Dell PowerEdge T100 Hardware Owner's Manual - Page 66
Installing a Hard Drive, out of the drive bay.
 |
View all Dell PowerEdge T100 manuals
Add to My Manuals
Save this manual to your list of manuals |
Page 66 highlights
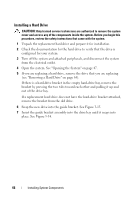
Installing a Hard Drive CAUTION: Only trained service technicians are authorized to remove the system cover and access any of the components inside the system. Before you begin this procedure, review the safety instructions that came with the system. 1 Unpack the replacement hard drive and prepare it for installation. 2 Check the documentation for the hard drive to verify that the drive is configured for your system. 3 Turn off the system and attached peripherals, and disconnect the system from the electrical outlet. 4 Open the system. See "Opening the System" on page 47. 5 If you are replacing a hard drive, remove the drive that you are replacing (see "Removing a Hard Drive" on page 64). If there is a hard-drive bracket in the empty hard-drive bay, remove the bracket by pressing the two tabs toward each other and pulling it up and out of the drive bay. If a replacement hard drive does not have the hard-drive bracket attached, remove the bracket from the old drive. 6 Snap the new drive into the guide bracket. See Figure 3-15. 7 Insert the guide bracket assembly into the drive bay until it snaps into place. See Figure 3-14. 66 Installing System Components
-
 1
1 -
2
-
3
-
4
-
5
-
6
-
7
-
8
-
9
-
10
-
11
-
12
-
13
-
14
-
15
-
16
-
17
-
18
-
19
-
20
-
21
-
22
-
23
-
24
-
25
-
26
-
27
-
28
-
29
-
30
-
31
-
32
-
33
-
34
-
35
-
36
-
37
-
38
-
39
-
40
-
41
-
42
-
43
-
44
-
45
-
46
-
47
-
48
-
49
-
50
-
51
-
52
-
53
-
54
-
55
-
56
-
57
-
58
-
59
-
60
-
 61
61 -
 62
62 -
 63
63 -
 64
64 -
 65
65 -
 66
66 -
 67
67 -
 68
68 -
 69
69 -
 70
70 -
 71
71 -
72
-
73
-
74
-
75
-
76
-
77
-
78
-
79
-
80
-
81
-
82
-
83
-
84
-
85
-
86
-
87
-
88
-
89
-
90
-
91
-
92
-
93
-
94
-
95
-
96
-
97
-
98
-
99
-
100
-
101
-
102
-
103
-
104
-
105
-
106
-
107
-
108
-
109
-
110
-
111
-
112
-
113
-
114
-
115
-
116
-
117
-
118
-
119
-
120
-
121
-
122
-
123
-
124
-
125
-
126
-
127
-
128
-
129
-
130
-
131
-
132
-
133
-
134
-
135
-
136
-
137
-
138
-
139
-
140
-
141
-
142
-
143
-
144
-
145
-
146
-
147
-
148
-
149
-
150
-
151
-
152
-
153
-
154
-
155
-
156
-
157
-
158
 |
 |
