Dell PowerEdge T100 Hardware Owner's Manual - Page 64
Hard Drives, Hard Drive Installation Guidelines, Removing a Hard Drive
 |
View all Dell PowerEdge T100 manuals
Add to My Manuals
Save this manual to your list of manuals |
Page 64 highlights
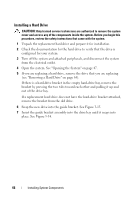
15 (Optional) Test the drive by running the system diagnostics. See "Running the System Diagnostics" on page 129. Hard Drives NOTE: The system's drive configuration must consist of all SATA hard drives or all SAS hard drives. Hard Drive Installation Guidelines Your system contains up to two SATA or SAS hard drives in internal drive bays. Both drives must be either SAS or SATA; mixed configurations are not supported. Up to two SATA drives may be connected to the system's integrated SATA controller or to an optional SAS controller expansion card. Up to two SAS drives may be connected to an optional SAS controller expansion card. Table 3-1 describes the possible drive configurations. Table 3-1. Hard-Drive Configurations Drive Number Drive Type Location 1 SATA HDD0 1 SAS HDD0 2 SATA HDD1 2 SAS HDD1 Controller integrated SATA controller SAS expansion card SAS expansion card integrated SATA SAS expansion card SAS expansion card Connector SATA_A HDD0 HDD0 SATA_B HDD1 HDD1 Removing a Hard Drive CAUTION: Only trained service technicians are authorized to remove the system cover and access any of the components inside the system. Before you begin this procedure, review the safety instructions that came with the system. 1 Turn off the system and attached peripherals, and disconnect the system from the electrical outlet. 2 Open the system. See "Opening the System" on page 47. 3 Disconnect the hard drive power cable from the hard drive that you are removing. 64 Installing System Components
-
 1
1 -
2
-
3
-
4
-
5
-
6
-
7
-
8
-
9
-
10
-
11
-
12
-
13
-
14
-
15
-
16
-
17
-
18
-
19
-
20
-
21
-
22
-
23
-
24
-
25
-
26
-
27
-
28
-
29
-
30
-
31
-
32
-
33
-
34
-
35
-
36
-
37
-
38
-
39
-
40
-
41
-
42
-
43
-
44
-
45
-
46
-
47
-
48
-
49
-
50
-
51
-
52
-
53
-
54
-
55
-
56
-
57
-
58
-
 59
59 -
 60
60 -
 61
61 -
 62
62 -
 63
63 -
 64
64 -
 65
65 -
 66
66 -
 67
67 -
 68
68 -
 69
69 -
70
-
71
-
72
-
73
-
74
-
75
-
76
-
77
-
78
-
79
-
80
-
81
-
82
-
83
-
84
-
85
-
86
-
87
-
88
-
89
-
90
-
91
-
92
-
93
-
94
-
95
-
96
-
97
-
98
-
99
-
100
-
101
-
102
-
103
-
104
-
105
-
106
-
107
-
108
-
109
-
110
-
111
-
112
-
113
-
114
-
115
-
116
-
117
-
118
-
119
-
120
-
121
-
122
-
123
-
124
-
125
-
126
-
127
-
128
-
129
-
130
-
131
-
132
-
133
-
134
-
135
-
136
-
137
-
138
-
139
-
140
-
141
-
142
-
143
-
144
-
145
-
146
-
147
-
148
-
149
-
150
-
151
-
152
-
153
-
154
-
155
-
156
-
157
-
158
 |
 |
