Dell PowerEdge T100 Hardware Owner's Manual - Page 116
Using Dell PowerEdge Diagnostics on Module Installation Guidelines - memory specifications
 |
View all Dell PowerEdge T100 manuals
Add to My Manuals
Save this manual to your list of manuals |
Page 116 highlights
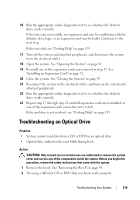
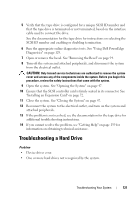
Action CAUTION: Only trained service technicians are authorized to remove the system cover and access any of the components inside the system. Before you begin this procedure, review the safety instructions that came with the system. 1 If the system is operational, run the appropriate online diagnostic test. See "Using Dell PowerEdge Diagnostics" on page 129. If diagnostics indicates a fault, follow the corrective actions provided by the diagnostic program. If the problem is not resolved or if the system is not operational, continue to the next step. 2 Turn off the system and attached peripherals, unplug the system from the power source and press the power button, and then reconnect the system to power. 3 Turn on the system and attached peripherals and, as the system boots, note the messages on the screen. If an error messages appears indicating a fault with a specific memory module, go to step 12. If any other system message appears that indicates a nonspecific memory problem, continue to the next step. 4 Enter the System Setup program and check the system memory setting. See "Using the System Setup Program" on page 29. If the installed memory does not match the amount of memory shown in the System Setup program, proceed to the next step. If the memory settings and installed memory indicate no problems, go to step 12. 5 Turn off the system and attached peripherals, and disconnect the system from the electrical outlet. 6 Open the system. See "Opening the System" on page 47. 7 Ensure that the memory banks are populated correctly. See "Memory Module Installation Guidelines" on page 75. If the memory modules are populated correctly, continue to the next step. 8 Reseat the memory modules in their sockets. See "Installing a Memory Module" on page 77. 116 Troubleshooting Your System
-
 1
1 -
2
-
3
-
4
-
5
-
6
-
7
-
8
-
9
-
10
-
11
-
12
-
13
-
14
-
15
-
16
-
17
-
18
-
19
-
20
-
21
-
22
-
23
-
24
-
25
-
26
-
27
-
28
-
29
-
30
-
31
-
32
-
33
-
34
-
35
-
36
-
37
-
38
-
39
-
40
-
41
-
42
-
43
-
44
-
45
-
46
-
47
-
48
-
49
-
50
-
51
-
52
-
53
-
54
-
55
-
56
-
57
-
58
-
59
-
60
-
61
-
62
-
63
-
64
-
65
-
66
-
67
-
68
-
69
-
70
-
71
-
72
-
73
-
74
-
75
-
76
-
77
-
78
-
79
-
80
-
81
-
82
-
83
-
84
-
85
-
86
-
87
-
88
-
89
-
90
-
91
-
92
-
93
-
94
-
95
-
96
-
97
-
98
-
99
-
100
-
101
-
102
-
103
-
104
-
105
-
106
-
107
-
108
-
109
-
110
-
 111
111 -
 112
112 -
 113
113 -
 114
114 -
 115
115 -
 116
116 -
 117
117 -
 118
118 -
 119
119 -
 120
120 -
 121
121 -
122
-
123
-
124
-
125
-
126
-
127
-
128
-
129
-
130
-
131
-
132
-
133
-
134
-
135
-
136
-
137
-
138
-
139
-
140
-
141
-
142
-
143
-
144
-
145
-
146
-
147
-
148
-
149
-
150
-
151
-
152
-
153
-
154
-
155
-
156
-
157
-
158
 |
 |