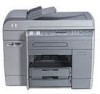
HP 9120 HP Officejet 9100 - User Guide - Page 115
Managing security, Setting up alerts and notifications, To manage security
 |
UPC - 829160117782
View all HP 9120 manuals
Add to My Manuals
Save this manual to your list of manuals |
Page 115 highlights
Note ENWW Managing security Security can be achieved by using the following methods: z Use of an administrator PIN to control administrator functions. See Changing the administrator PIN for more information. z Ability to configure authorized users to block unauthorized use of the all-in-one from the control panel. See Configuring authorized users for more information. z Ability to set passwords for network operations (such as for LDAP and SMTP). z Ability to set up blind carbon copies for e-mail transmissions. This feature can help prevent impersonation and misuse of the all-in-one (for example, for non-company purposes). See Configuring automatic blind copy (BCC) for more information. z Ability to prevent changes to the text in the FROM field of e-mail messages, to help prevent impersonation. See Configuring the defaults for e-mail message format (network connection) for more information. The following points about password security when you are configuring a network password by means of the embedded Web server: Secure Sockets Layer (SSL) (https) encryption is not supported. Passwords are encoded in Base64 format, and are not encrypted. To manage security z Embedded Web server (network connection) Open the embedded Web server, click the Settings tab, and then click Security in the left pane. Use the Web Server and Control Panel tab to set a password for the network and to synchronize this password with the administrator PIN. z HP Web Jetadmin software Open the HP Web Jetadmin software. See the software documentation for information about security. Setting up alerts and notifications You can set the following types of alerts and notifications: z E-mail notifications about supplies and about problems that occur in the media path z Audio alerts for error conditions z Error messages on the control-panel display for error conditions z Automatic sending of usage information from the all-in-one to HP to accurately track usage by means of myPrintMileage (a feature called AutoSend). See myPrintMileage for more information. To set up alerts and notifications z Embedded Web server (network connection) Open the embedded Web server, click the Settings tab, and then click Alerts in the left pane. Use the Notification tab to configure e-mail alerts about supplies and media path problems. Use the AutoSend tab to turn on the AutoSend feature. z Toolbox (direct connection) Open the Toolbox. On the Printer Status tab, click Preferences. Use the dialog box to set preferences for when alerts and notifications occur and what error conditions are reported. Administering the all-in-one 113
-
 1
1 -
2
-
3
-
4
-
5
-
6
-
7
-
8
-
9
-
10
-
11
-
12
-
13
-
14
-
15
-
16
-
17
-
18
-
19
-
20
-
21
-
22
-
23
-
24
-
25
-
26
-
27
-
28
-
29
-
30
-
31
-
32
-
33
-
34
-
35
-
36
-
37
-
38
-
39
-
40
-
41
-
42
-
43
-
44
-
45
-
46
-
47
-
48
-
49
-
50
-
51
-
52
-
53
-
54
-
55
-
56
-
57
-
58
-
59
-
60
-
61
-
62
-
63
-
64
-
65
-
66
-
67
-
68
-
69
-
70
-
71
-
72
-
73
-
74
-
75
-
76
-
77
-
78
-
79
-
80
-
81
-
82
-
83
-
84
-
85
-
86
-
87
-
88
-
89
-
90
-
91
-
92
-
93
-
94
-
95
-
96
-
97
-
98
-
99
-
100
-
101
-
102
-
103
-
104
-
105
-
106
-
107
-
108
-
109
-
 110
110 -
 111
111 -
 112
112 -
 113
113 -
 114
114 -
 115
115 -
 116
116 -
 117
117 -
 118
118 -
 119
119 -
 120
120 -
121
-
122
-
123
-
124
-
125
-
126
-
127
-
128
-
129
-
130
-
131
-
132
-
133
-
134
-
135
-
136
-
137
-
138
-
139
-
140
-
141
-
142
-
143
-
144
-
145
-
146
-
147
-
148
-
149
-
150
-
151
-
152
-
153
-
154
-
155
-
156
-
157
-
158
-
159
-
160
-
161
-
162
-
163
-
164
-
165
-
166
-
167
-
168
-
169
-
170
-
171
-
172
-
173
-
174
-
175
-
176
-
177
-
178
-
179
-
180
-
181
-
182
-
183
-
184
-
185
-
186
-
187
-
188
-
189
-
190
-
191
-
192
-
193
-
194
-
195
-
196
-
197
-
198
-
199
-
200
-
201
-
202
-
203
-
204
-
205
-
206
-
207
-
208
-
209
-
210
-
211
-
212
-
213
-
214
-
215
-
216
-
217
-
218
-
219
-
220
-
221
-
222
-
223
-
224
-
225
-
226
-
227
-
228
-
229
-
230
-
231
-
232
-
233
-
234
-
235
-
236
-
237
-
238
-
239
-
240
-
241
-
242
-
243
-
244
-
245
-
246
-
247
-
248
-
249
-
250
-
251
-
252
-
253
-
254
-
255
-
256
-
257
-
258
-
259
-
260
-
261
-
262
-
263
-
264
-
265
-
266
-
267
-
268
-
269
-
270
-
271
-
272
-
273
-
274
-
275
-
276
-
277
-
278
-
279
-
280
 |
 |
