HP 9120 HP Officejet 9100 - User Guide - Page 235
Scan mode menu, format is Joint Photographic Experts Group JPEG.
 |
UPC - 829160117782
View all HP 9120 manuals
Add to My Manuals
Save this manual to your list of manuals |
Page 235 highlights
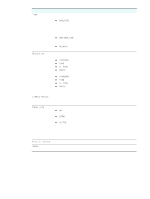
ENWW Scan mode menu Menu item Description Use this area to specify the path of a network folder, parallel, or USB destination. Glass or ADF Indicates whether the ADF or the scanner glass is the source for the scan. Options for scanning include the following choices: z 1-SIDED z 2-SIDED You can also reach the double-sided options by pressing 2-SIDED OPTIONS on the control panel. Type Selects the document type and format: z MIXED/PDF Use this option when the original contains both text and photographs. The output format is PDF. z PHOTO/JPEG Use this option when the original contains only photographs. The output format is Joint Photographic Experts Group (JPEG). z MIXED/JPEG Use this option when the original contains both text and photographs. The output format is JPEG. z BLACK/TIF Use this option when the original contains only text and you want to be able to edit the text in the resulting document. The output format is Tagged Information File Format (TIFF). z TEXT/PDF Use this option when the original contains only text. The output format is Adobe Portable Document Format (PDF). You can also reach the document type option by pressing TRAY/TYPE on the control panel. Paper Size Selects the paper size: z LETTER U.S. letter size (8.5 by 11 inches) z A4 A4 size (210 by 297 mm) z LEGAL Legal size (8.5 by 14 inches) When Type is PHOTO/JPEG, the list changes to a different set of sizes that are appropriate for photos (for example, 3 x 5 cm, 10 x 15 cm, and 4 x 6 inch). The option sets the size for both the original and the output, because it is assumed that these are to be identical. You can also reach the paper size option by pressing TRAY/TYPE on the control panel. Resolution Lighter/darker Prefix Setup Selects the setting for resolution: z 300 DPI z 150 DPI z 75 DPI You can also reach the resolution option by pressing QUALITY on the control panel. Adjusts the lightness and darkness of scans (from -4 to +4). You can also reach the contrast option by pressing LIGHTER/DARKER on the control panel. Selects the prefix for scanned files (up to 10 characters). Opens the SCAN SETUP menu. See SCAN SETUP menu for an explanation of the menu. Mode menus 233
-
 1
1 -
2
-
3
-
4
-
5
-
6
-
7
-
8
-
9
-
10
-
11
-
12
-
13
-
14
-
15
-
16
-
17
-
18
-
19
-
20
-
21
-
22
-
23
-
24
-
25
-
26
-
27
-
28
-
29
-
30
-
31
-
32
-
33
-
34
-
35
-
36
-
37
-
38
-
39
-
40
-
41
-
42
-
43
-
44
-
45
-
46
-
47
-
48
-
49
-
50
-
51
-
52
-
53
-
54
-
55
-
56
-
57
-
58
-
59
-
60
-
61
-
62
-
63
-
64
-
65
-
66
-
67
-
68
-
69
-
70
-
71
-
72
-
73
-
74
-
75
-
76
-
77
-
78
-
79
-
80
-
81
-
82
-
83
-
84
-
85
-
86
-
87
-
88
-
89
-
90
-
91
-
92
-
93
-
94
-
95
-
96
-
97
-
98
-
99
-
100
-
101
-
102
-
103
-
104
-
105
-
106
-
107
-
108
-
109
-
110
-
111
-
112
-
113
-
114
-
115
-
116
-
117
-
118
-
119
-
120
-
121
-
122
-
123
-
124
-
125
-
126
-
127
-
128
-
129
-
130
-
131
-
132
-
133
-
134
-
135
-
136
-
137
-
138
-
139
-
140
-
141
-
142
-
143
-
144
-
145
-
146
-
147
-
148
-
149
-
150
-
151
-
152
-
153
-
154
-
155
-
156
-
157
-
158
-
159
-
160
-
161
-
162
-
163
-
164
-
165
-
166
-
167
-
168
-
169
-
170
-
171
-
172
-
173
-
174
-
175
-
176
-
177
-
178
-
179
-
180
-
181
-
182
-
183
-
184
-
185
-
186
-
187
-
188
-
189
-
190
-
191
-
192
-
193
-
194
-
195
-
196
-
197
-
198
-
199
-
200
-
201
-
202
-
203
-
204
-
205
-
206
-
207
-
208
-
209
-
210
-
211
-
212
-
213
-
214
-
215
-
216
-
217
-
218
-
219
-
220
-
221
-
222
-
223
-
224
-
225
-
226
-
227
-
228
-
229
-
 230
230 -
 231
231 -
 232
232 -
 233
233 -
 234
234 -
 235
235 -
 236
236 -
 237
237 -
 238
238 -
 239
239 -
 240
240 -
241
-
242
-
243
-
244
-
245
-
246
-
247
-
248
-
249
-
250
-
251
-
252
-
253
-
254
-
255
-
256
-
257
-
258
-
259
-
260
-
261
-
262
-
263
-
264
-
265
-
266
-
267
-
268
-
269
-
270
-
271
-
272
-
273
-
274
-
275
-
276
-
277
-
278
-
279
-
280
 |
 |
