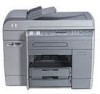
HP 9120 HP Officejet 9100 - User Guide - Page 154
Cleaning the exterior, Troubleshooting tips and resources
 |
UPC - 829160117782
View all HP 9120 manuals
Add to My Manuals
Save this manual to your list of manuals |
Page 154 highlights
CAUTION 4 Clean the white ADF lid backing with a soft cloth or sponge that has been moistened with a mild soap and warm water. Wash the backing gently to loosen debris; do not scrub the backing. 5 Dry the backing with a chamois or soft cloth. Do not use paper-based wipes, because these might scratch the backing. 6 If this does not clean the backing thoroughly, repeat the previous steps by using isopropyl (rubbing) alcohol, wipe the backing with a damp cloth to remove any residual alcohol, and then dry the backing as in step 5. 7 Close the ADF, plug in the power cord, and turn on the all-in-one. Note Cleaning the exterior Before cleaning the all-in-one, turn off the power and unplug the power cord from the electrical socket. Use a soft, damp, lint-free cloth to wipe dust, smudges, and stains off of the case. The exterior of the all-in-one does not require cleaning. Keep fluids away from the interior of the all-in-one, as well as from the control panel. Troubleshooting tips and resources If you have problems with the all-in-one or the software that runs with it, use the following tips and resources to resolve the problems. z Use any onscreen Help that is available for troubleshooting software. z Check for problems by using the embedded Web server (for network connection) or the Toolbox (for direct connection). See Embedded Web server (EWS) (network connection) or Toolbox (direct connection) for more information. z Turn off the all-in-one and then turn it on to see if this resolves the problem. Often this gives you the ability to continue with other functions. Sometimes a more specific message about the problem appears on the control-panel display. Resource Readme file and release notes Setup menu map Embedded Web server (network connection) Toolbox (Windows computers only, direct connection) Description Location Provide late-breaking information and troubleshooting tips. Included on Starter CD 1. Shows the structure and contents of all of the setup menus on the control panel, and the location and setting of all setup options. See Printing a setup menu map. Provides troubleshooting, diagnostic, and Available through any standard Web configuration information for the all-in-one (if the browser. all-in-one is connected to a network). See Embedded Web server (EWS) (network connection). Provides status, maintenance, and job accounting information about about the all-in-one. It also provides a link to steps for performing many of the tasks described in this guide, to HP Customer Support, HP Instant Support, and myPrintMileage. Available at the computer while you are using the Toolbox. See Toolbox (direct connection). 152 10 - Maintaining and troubleshooting ENWW
-
 1
1 -
2
-
3
-
4
-
5
-
6
-
7
-
8
-
9
-
10
-
11
-
12
-
13
-
14
-
15
-
16
-
17
-
18
-
19
-
20
-
21
-
22
-
23
-
24
-
25
-
26
-
27
-
28
-
29
-
30
-
31
-
32
-
33
-
34
-
35
-
36
-
37
-
38
-
39
-
40
-
41
-
42
-
43
-
44
-
45
-
46
-
47
-
48
-
49
-
50
-
51
-
52
-
53
-
54
-
55
-
56
-
57
-
58
-
59
-
60
-
61
-
62
-
63
-
64
-
65
-
66
-
67
-
68
-
69
-
70
-
71
-
72
-
73
-
74
-
75
-
76
-
77
-
78
-
79
-
80
-
81
-
82
-
83
-
84
-
85
-
86
-
87
-
88
-
89
-
90
-
91
-
92
-
93
-
94
-
95
-
96
-
97
-
98
-
99
-
100
-
101
-
102
-
103
-
104
-
105
-
106
-
107
-
108
-
109
-
110
-
111
-
112
-
113
-
114
-
115
-
116
-
117
-
118
-
119
-
120
-
121
-
122
-
123
-
124
-
125
-
126
-
127
-
128
-
129
-
130
-
131
-
132
-
133
-
134
-
135
-
136
-
137
-
138
-
139
-
140
-
141
-
142
-
143
-
144
-
145
-
146
-
147
-
148
-
 149
149 -
 150
150 -
 151
151 -
 152
152 -
 153
153 -
 154
154 -
 155
155 -
 156
156 -
 157
157 -
 158
158 -
 159
159 -
160
-
161
-
162
-
163
-
164
-
165
-
166
-
167
-
168
-
169
-
170
-
171
-
172
-
173
-
174
-
175
-
176
-
177
-
178
-
179
-
180
-
181
-
182
-
183
-
184
-
185
-
186
-
187
-
188
-
189
-
190
-
191
-
192
-
193
-
194
-
195
-
196
-
197
-
198
-
199
-
200
-
201
-
202
-
203
-
204
-
205
-
206
-
207
-
208
-
209
-
210
-
211
-
212
-
213
-
214
-
215
-
216
-
217
-
218
-
219
-
220
-
221
-
222
-
223
-
224
-
225
-
226
-
227
-
228
-
229
-
230
-
231
-
232
-
233
-
234
-
235
-
236
-
237
-
238
-
239
-
240
-
241
-
242
-
243
-
244
-
245
-
246
-
247
-
248
-
249
-
250
-
251
-
252
-
253
-
254
-
255
-
256
-
257
-
258
-
259
-
260
-
261
-
262
-
263
-
264
-
265
-
266
-
267
-
268
-
269
-
270
-
271
-
272
-
273
-
274
-
275
-
276
-
277
-
278
-
279
-
280
 |
 |
