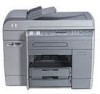
HP 9120 HP Officejet 9100 - User Guide - Page 73
Sending scans, Sending scans to a network folder (network connection)
 |
UPC - 829160117782
View all HP 9120 manuals
Add to My Manuals
Save this manual to your list of manuals |
Page 73 highlights
6 Sending scans Note Using the all-in-one, you can scan black-and-white and color originals and send them to a variety of destinations, such as one or more e-mail addresses, a folder on the network, or a program on a computer. You can use the control panel, the HP photo and imaging software, and TWAIN-compliant or WIA-compliant programs on a computer. Before you can use the HP photo and imaging software for scanning, you must customize the scan feature in the software. See Customizing the scan feature in the HP photo and imaging software (direct connection) for more information. If your all-in-one is connected directly to a computer running Windows, it is recommended that you use a USB connection to ensure optimal scanning performance. When sending scans to a network folder or as e-mail attachments from an all-in-one that is connected to a network, you must type any required information (such as user information or e-mail addresses) using the all-in-one keyboard. This section contains information about the following topics. z Sending scans z Changing common settings for a job z Setting defaults for all scan jobs z Using optical character recognition (OCR) software Sending scans This section contains information about the following topics. z Sending scans to a network folder (network connection) z Sending scans to a program on a computer (direct connection) z Sending scans as e-mail attachments z Sending a scan from a TWAIN-compliant or a WIA-compliant program to a computer on the network Sending scans to a network folder (network connection) You can scan originals directly from the all-in-one into a network folder without any computer-based software. The shared folder can reside on a file server or on any computer on your network. The all-in-one assigns a file name to the file that you create, composed of the following parts: z 10-character prefix that is based on the name of the all-in-one device can be set by the user z 4-digit sequential number that increments with each file that is created z an ".ext" file extension ENWW Sending scans 71
-
 1
1 -
2
-
3
-
4
-
5
-
6
-
7
-
8
-
9
-
10
-
11
-
12
-
13
-
14
-
15
-
16
-
17
-
18
-
19
-
20
-
21
-
22
-
23
-
24
-
25
-
26
-
27
-
28
-
29
-
30
-
31
-
32
-
33
-
34
-
35
-
36
-
37
-
38
-
39
-
40
-
41
-
42
-
43
-
44
-
45
-
46
-
47
-
48
-
49
-
50
-
51
-
52
-
53
-
54
-
55
-
56
-
57
-
58
-
59
-
60
-
61
-
62
-
63
-
64
-
65
-
66
-
67
-
 68
68 -
 69
69 -
 70
70 -
 71
71 -
 72
72 -
 73
73 -
 74
74 -
 75
75 -
 76
76 -
 77
77 -
 78
78 -
79
-
80
-
81
-
82
-
83
-
84
-
85
-
86
-
87
-
88
-
89
-
90
-
91
-
92
-
93
-
94
-
95
-
96
-
97
-
98
-
99
-
100
-
101
-
102
-
103
-
104
-
105
-
106
-
107
-
108
-
109
-
110
-
111
-
112
-
113
-
114
-
115
-
116
-
117
-
118
-
119
-
120
-
121
-
122
-
123
-
124
-
125
-
126
-
127
-
128
-
129
-
130
-
131
-
132
-
133
-
134
-
135
-
136
-
137
-
138
-
139
-
140
-
141
-
142
-
143
-
144
-
145
-
146
-
147
-
148
-
149
-
150
-
151
-
152
-
153
-
154
-
155
-
156
-
157
-
158
-
159
-
160
-
161
-
162
-
163
-
164
-
165
-
166
-
167
-
168
-
169
-
170
-
171
-
172
-
173
-
174
-
175
-
176
-
177
-
178
-
179
-
180
-
181
-
182
-
183
-
184
-
185
-
186
-
187
-
188
-
189
-
190
-
191
-
192
-
193
-
194
-
195
-
196
-
197
-
198
-
199
-
200
-
201
-
202
-
203
-
204
-
205
-
206
-
207
-
208
-
209
-
210
-
211
-
212
-
213
-
214
-
215
-
216
-
217
-
218
-
219
-
220
-
221
-
222
-
223
-
224
-
225
-
226
-
227
-
228
-
229
-
230
-
231
-
232
-
233
-
234
-
235
-
236
-
237
-
238
-
239
-
240
-
241
-
242
-
243
-
244
-
245
-
246
-
247
-
248
-
249
-
250
-
251
-
252
-
253
-
254
-
255
-
256
-
257
-
258
-
259
-
260
-
261
-
262
-
263
-
264
-
265
-
266
-
267
-
268
-
269
-
270
-
271
-
272
-
273
-
274
-
275
-
276
-
277
-
278
-
279
-
280
 |
 |
