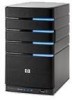
HP EX475 HP EX470, EX475 MediaSmart Server - User's Guide - Page 56
Windows Home Server Settings
 |
UPC - 883585222643
View all HP EX475 manuals
Add to My Manuals
Save this manual to your list of manuals |
Page 56 highlights
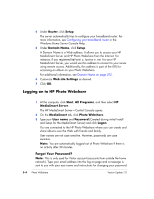
• Select visitor storage limits • Setup remote access Enable at least one user account with remote access 1 At the computer, double-click the Windows Home Server icon system tray. in the 2 Log on to the Windows Home Server Console. 3 Click the User Accounts tab. If the User Accounts Setup dialog displays, click OK. 4 Click Add on the User Accounts page. The Add User Accounts dialog box opens. If you 5 Type First name, Last name, and Logon name. The Logon name must be unique. 6 Check Enable remote access for this user and click Next. 7 Type and confirm a strong Password and click Next. 8 Set access to shared folders and click Finish. Select at least one user account to be a Webshare Manager Webshare Managers must have a user account with remote access enabled. If remote access is not enabled, complete the above steps before doing these. 1 Click Settings in the upper right of the Windows Home Server Console. The Windows Home Server Settings dialog box opens. 2 Click Photo Webshare in the left menu. 3 Under Webshare Managers, select the user accounts to manage albums and visitors. All user accounts are listed. However, remote access must be enabled on user accounts that are also Webshare Managers. If remote access is not enabled, you cannot select the user account. For more information, see Enable at least one user account with remote access on page 5-2. 4 Click OK on the Windows Home Server Settings dialog or keep it open to set up Webshare notifications, which are described in the next procedure. 5-2 Photo Webshare Version Update 1.1.1
-
 1
1 -
2
-
3
-
4
-
5
-
6
-
7
-
8
-
9
-
10
-
11
-
12
-
13
-
14
-
15
-
16
-
17
-
18
-
19
-
20
-
21
-
22
-
23
-
24
-
25
-
26
-
27
-
28
-
29
-
30
-
31
-
32
-
33
-
34
-
35
-
36
-
37
-
38
-
39
-
40
-
41
-
42
-
43
-
44
-
45
-
46
-
47
-
48
-
49
-
50
-
 51
51 -
 52
52 -
 53
53 -
 54
54 -
 55
55 -
 56
56 -
 57
57 -
 58
58 -
 59
59 -
 60
60 -
 61
61 -
62
-
63
-
64
-
65
-
66
-
67
-
68
-
69
-
70
-
71
-
72
-
73
-
74
-
75
-
76
-
77
-
78
-
79
-
80
-
81
-
82
-
83
-
84
-
85
-
86
-
87
-
88
-
89
-
90
-
91
-
92
-
93
-
94
-
95
-
96
-
97
-
98
-
99
-
100
-
101
-
102
-
103
-
104
-
105
-
106
-
107
-
108
-
109
-
110
-
111
-
112
-
113
-
114
-
115
-
116
-
117
-
118
-
119
-
120
-
121
-
122
-
123
-
124
-
125
-
126
-
127
-
128
-
129
-
130
-
131
-
132
-
133
-
134
-
135
-
136
-
137
-
138
-
139
-
140
-
141
-
142
-
143
-
144
-
145
-
146
-
147
-
148
-
149
-
150
-
151
-
152
-
153
-
154
-
155
-
156
-
157
-
158
-
159
-
160
-
161
-
162
-
163
-
164
-
165
-
166
-
167
-
168
-
169
-
170
-
171
-
172
-
173
-
174
-
175
-
176
-
177
-
178
-
179
-
180
-
181
-
182
-
183
-
184
-
185
-
186
-
187
-
188
-
189
-
190
-
191
-
192
 |
 |