HP EX475 HP EX470, EX475 MediaSmart Server - User's Guide - Page 68
Naming your album, Adding photos to your album
 |
UPC - 883585222643
View all HP EX475 manuals
Add to My Manuals
Save this manual to your list of manuals |
Page 68 highlights
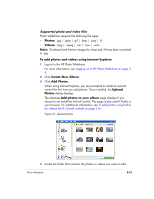
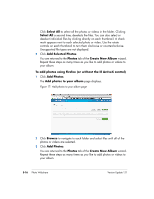
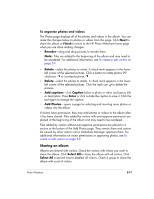
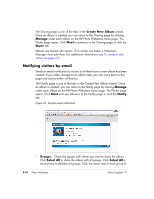
To create an album to share over the Web 1 Log on to the HP Photo Webshare. For more information, see Logging on to HP Photo Webshare on page 54. 2 Click Create New Album. The wizard walks you through the process of: ƒ Naming your album ƒ Adding photos to your album ƒ Sharing an album Webshare Managers or visitors with permission to add photos can create new albums and add photos to existing albums. Naming your album Give your album a name and description that are recognized by family and friends. To name your album 1 Log on to the HP Photo Webshare. For more information, see Logging on to HP Photo Webshare on page 54. 2 Click Create New Album. Type the following information. ƒ Name-the title of the album ƒ Description-type a caption for your album. Optional. 3 Click Next to go to the next step in creating albums, adding photos and videos. Adding photos to your album Add and arrange photos and videos on this page. The Photos page is one of the tabs in the Create New Album wizard. Once an album is created, you can return to the Photos page by clicking Manage under each album on the HP Photo Webshare home page. 5-14 Photo Webshare Version Update 1.1.1
-
 1
1 -
2
-
3
-
4
-
5
-
6
-
7
-
8
-
9
-
10
-
11
-
12
-
13
-
14
-
15
-
16
-
17
-
18
-
19
-
20
-
21
-
22
-
23
-
24
-
25
-
26
-
27
-
28
-
29
-
30
-
31
-
32
-
33
-
34
-
35
-
36
-
37
-
38
-
39
-
40
-
41
-
42
-
43
-
44
-
45
-
46
-
47
-
48
-
49
-
50
-
51
-
52
-
53
-
54
-
55
-
56
-
57
-
58
-
59
-
60
-
61
-
62
-
 63
63 -
 64
64 -
 65
65 -
 66
66 -
 67
67 -
 68
68 -
 69
69 -
 70
70 -
 71
71 -
 72
72 -
 73
73 -
74
-
75
-
76
-
77
-
78
-
79
-
80
-
81
-
82
-
83
-
84
-
85
-
86
-
87
-
88
-
89
-
90
-
91
-
92
-
93
-
94
-
95
-
96
-
97
-
98
-
99
-
100
-
101
-
102
-
103
-
104
-
105
-
106
-
107
-
108
-
109
-
110
-
111
-
112
-
113
-
114
-
115
-
116
-
117
-
118
-
119
-
120
-
121
-
122
-
123
-
124
-
125
-
126
-
127
-
128
-
129
-
130
-
131
-
132
-
133
-
134
-
135
-
136
-
137
-
138
-
139
-
140
-
141
-
142
-
143
-
144
-
145
-
146
-
147
-
148
-
149
-
150
-
151
-
152
-
153
-
154
-
155
-
156
-
157
-
158
-
159
-
160
-
161
-
162
-
163
-
164
-
165
-
166
-
167
-
168
-
169
-
170
-
171
-
172
-
173
-
174
-
175
-
176
-
177
-
178
-
179
-
180
-
181
-
182
-
183
-
184
-
185
-
186
-
187
-
188
-
189
-
190
-
191
-
192
 |
 |
