HP Integrity Superdome 2 HP Integrity Superdome 2 Onboard Administrator User G - Page 43
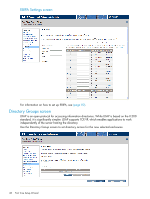
Rack and Enclosure Settings screen
 |
View all HP Integrity Superdome 2 manuals
Add to My Manuals
Save this manual to your list of manuals |
Page 43 highlights
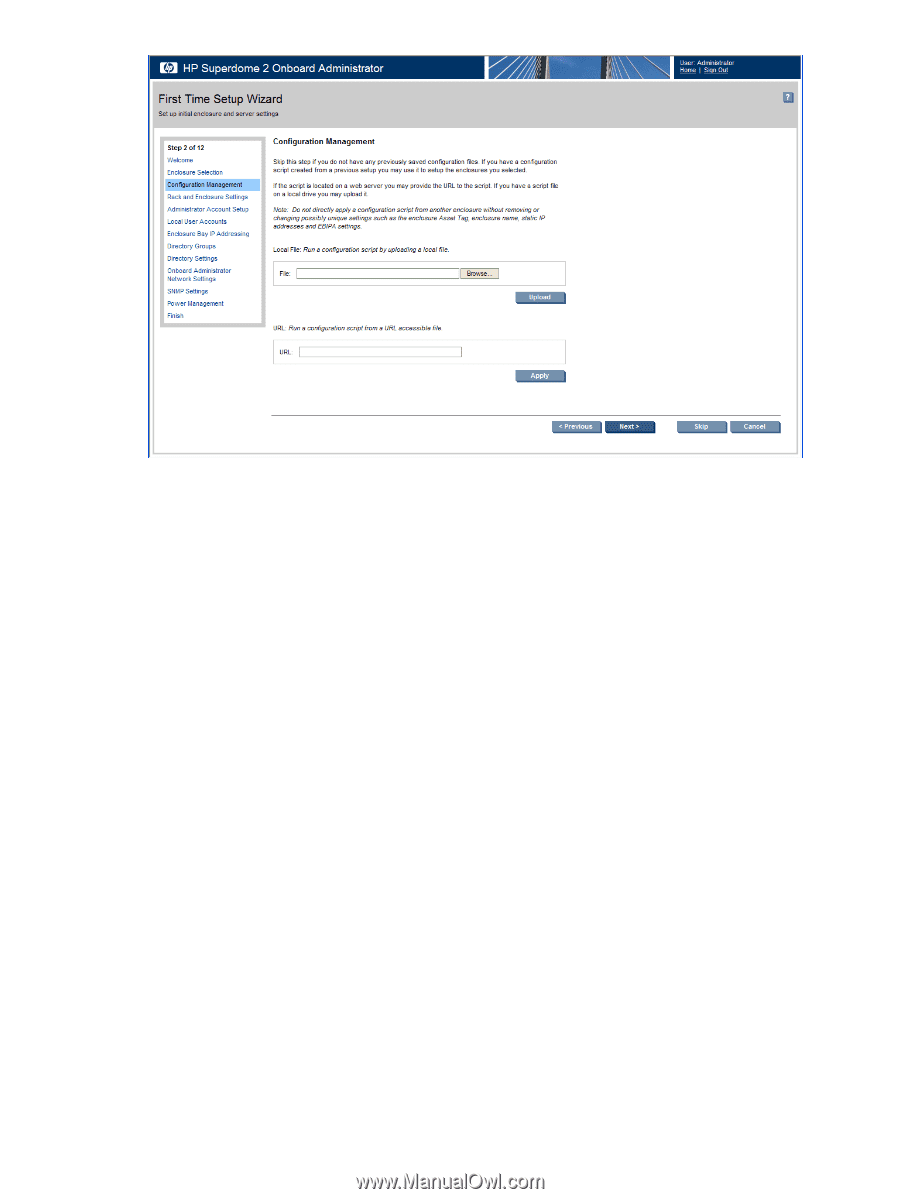
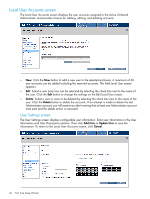
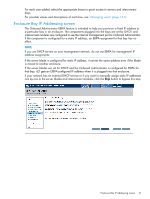
To set up selected enclosures using a configuration file: On the Configuration Management screen, select one of the following options: • Local file: Browse for the configuration file, or enter the path of the script file into the textbox. The maximum number of characters in the file path is 256. Click Upload after entering the script file path. • URL: Enter an http:// path to the configuration file if it is located on a web server. The maximum number of characters in the file path is 256. Click Upload after entering the URL. A window appears displaying the results. If more than one enclosure is selected during the enclosure selection, select the enclosure to upload or apply the configuration file to use from the drop-down that appears. If multiple enclosures were selected, repeat this process for each additional enclosure. You cannot select more than one enclosure at a time for configuration management. Rack and Enclosure Settings screen This screen enables youto assign time settings and a common name to your rack and to assign unique names and asset tags to your enclosures. Rack and Enclosure Settings screen 43
-
 1
1 -
2
-
3
-
4
-
5
-
6
-
7
-
8
-
9
-
10
-
11
-
12
-
13
-
14
-
15
-
16
-
17
-
18
-
19
-
20
-
21
-
22
-
23
-
24
-
25
-
26
-
27
-
28
-
29
-
30
-
31
-
32
-
33
-
34
-
35
-
36
-
37
-
 38
38 -
 39
39 -
 40
40 -
 41
41 -
 42
42 -
 43
43 -
 44
44 -
 45
45 -
 46
46 -
 47
47 -
 48
48 -
49
-
50
-
51
-
52
-
53
-
54
-
55
-
56
-
57
-
58
-
59
-
60
-
61
-
62
-
63
-
64
-
65
-
66
-
67
-
68
-
69
-
70
-
71
-
72
-
73
-
74
-
75
-
76
-
77
-
78
-
79
-
80
-
81
-
82
-
83
-
84
-
85
-
86
-
87
-
88
-
89
-
90
-
91
-
92
-
93
-
94
-
95
-
96
-
97
-
98
-
99
-
100
-
101
-
102
-
103
-
104
-
105
-
106
-
107
-
108
-
109
-
110
-
111
-
112
-
113
-
114
-
115
-
116
-
117
-
118
-
119
-
120
-
121
-
122
-
123
-
124
-
125
-
126
-
127
-
128
-
129
-
130
-
131
-
132
-
133
-
134
-
135
-
136
-
137
-
138
-
139
-
140
-
141
-
142
-
143
-
144
-
145
-
146
-
147
-
148
-
149
-
150
-
151
-
152
-
153
-
154
-
155
-
156
-
157
-
158
-
159
-
160
-
161
-
162
-
163
-
164
-
165
-
166
-
167
-
168
-
169
-
170
-
171
-
172
-
173
-
174
-
175
-
176
-
177
-
178
-
179
-
180
-
181
-
182
-
183
-
184
-
185
-
186
-
187
-
188
-
189
-
190
-
191
 |
 |