HP LH4r HP NetRAID-4M Installation Guide - Page 88
Caution, Attach the Daughter Card to the new HP NetRAID-4M
 |
View all HP LH4r manuals
Add to My Manuals
Save this manual to your list of manuals |
Page 88 highlights
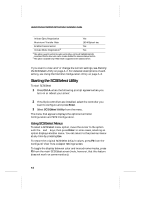
Hewlett-Packard NetRAID-4M Controller Installation Guide ! Caution: Do not remove your Daughter Card from the controller until your Hewlett-Packard technical support representative is ready to replace your HP NetRAID-4M controller. 1 Determine if there is data in the cache, as described in Determining if Data is in the Cache on page 8-5. 2 Power OFF the system, uncable and remove the defective controller and Daughter Card assembly. 3 Disconnect the Daughter Card from the faulty controller. 4 Attach the Daughter Card to the new HP NetRAID-4M controller. 5 Install the new HP NetRAID-4M controller. 6 Reattach the SCSI cables. 7 Power ON and reboot the system. The new controller on start-up will recognize that its cache contains valid disk data and proceed to flush the cache to the disks. Note: After the cache has been flushed, the system should be powered off and the new controller removed. The old daughter card from the damaged controller should then be removed from the new controller. The DIMM from the old daughter card should be installed in the new daughter card, and the new daughter card attached to the new controller. ❒ 8-6
-
 1
1 -
2
-
3
-
4
-
5
-
6
-
7
-
8
-
9
-
10
-
11
-
12
-
13
-
14
-
15
-
16
-
17
-
18
-
19
-
20
-
21
-
22
-
23
-
24
-
25
-
26
-
27
-
28
-
29
-
30
-
31
-
32
-
33
-
34
-
35
-
36
-
37
-
38
-
39
-
40
-
41
-
42
-
43
-
44
-
45
-
46
-
47
-
48
-
49
-
50
-
51
-
52
-
53
-
54
-
55
-
56
-
57
-
58
-
59
-
60
-
61
-
62
-
63
-
64
-
65
-
66
-
67
-
68
-
69
-
70
-
71
-
72
-
73
-
74
-
75
-
76
-
77
-
78
-
79
-
80
-
81
-
82
-
 83
83 -
 84
84 -
 85
85 -
 86
86 -
 87
87 -
 88
88 -
 89
89 -
 90
90 -
 91
91 -
 92
92 -
 93
93 -
94
-
95
-
96
-
97
-
98
-
99
-
100
-
101
-
102
-
103
-
104
-
105
-
106
-
107
-
108
-
109
-
110
-
111
-
112
-
113
-
114
-
115
-
116
-
117
-
118
-
119
-
120
-
121
-
122
-
123
-
124
 |
 |