HP LH4r HP NetRAID-4M Installation Guide - Page 90
Starting the SCSISelect Utility, Using SCSISelect Menus, Using SCSI, Menus
 |
View all HP LH4r manuals
Add to My Manuals
Save this manual to your list of manuals |
Page 90 highlights
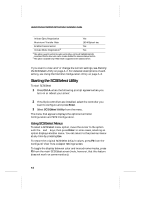
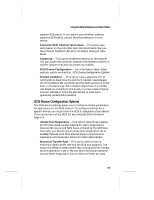
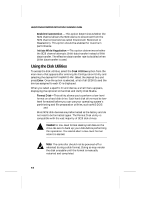
Hewlett-Packard NetRAID-4M Controller Installation Guide Initiate Sync Negotiation Yes Maximum Transfer Rate 160 MBytes/sec Enable Disconnection Yes Initiate Wide Negotiation2 Yes 1 This option is used to control the cache on the drive, not the HP NetRAID-4M. We recommend that the drive write cache remain disabled for maximum data protection. 2 This option is available only if Wide SCSI is supported on the attached drives. If you want to view and/or change the current settings, see Starting the SCSISelect Utility on page A-2. For detailed descriptions of each setting, see Using the Controller Configuration Utility on page A-3. Starting the SCSISelect Utility To start SCSISelect 1 Press Ctrl-A when the following prompt appears when you turn on or reboot your server: Press for Configuration Utility! 2 If multiple controllers are installed, select the controller you want to configure and press Enter. 3 Select SCSISelect Utility from the menu. The menu that appears displays the options Controller Configuration and SCSI Configuration. Using SCSISelect Menus To select a SCSISelect menu option, move the cursor to the option with the ↑ and ↓ keys, then press Enter. In some cases, selecting an option displays another menu. You can return to the previous menu at any time by pressing Esc. To restore the original SCSISelect default values, press F6 from the Configure/View Host Adapter Settings screen. To toggle the display between color and monochrome modes, press F5 from the main SCSISelect screen (note, however, that this feature does not work on some monitors). A-2
-
 1
1 -
2
-
3
-
4
-
5
-
6
-
7
-
8
-
9
-
10
-
11
-
12
-
13
-
14
-
15
-
16
-
17
-
18
-
19
-
20
-
21
-
22
-
23
-
24
-
25
-
26
-
27
-
28
-
29
-
30
-
31
-
32
-
33
-
34
-
35
-
36
-
37
-
38
-
39
-
40
-
41
-
42
-
43
-
44
-
45
-
46
-
47
-
48
-
49
-
50
-
51
-
52
-
53
-
54
-
55
-
56
-
57
-
58
-
59
-
60
-
61
-
62
-
63
-
64
-
65
-
66
-
67
-
68
-
69
-
70
-
71
-
72
-
73
-
74
-
75
-
76
-
77
-
78
-
79
-
80
-
81
-
82
-
83
-
84
-
 85
85 -
 86
86 -
 87
87 -
 88
88 -
 89
89 -
 90
90 -
 91
91 -
 92
92 -
 93
93 -
 94
94 -
 95
95 -
96
-
97
-
98
-
99
-
100
-
101
-
102
-
103
-
104
-
105
-
106
-
107
-
108
-
109
-
110
-
111
-
112
-
113
-
114
-
115
-
116
-
117
-
118
-
119
-
120
-
121
-
122
-
123
-
124
 |
 |
