HP LH4r HP NetRAID-4M Installation Guide - Page 98
Creating a Container, Ctrl A, Container Configuration Utility, Left/Right, Insert, Delete, Enter
 |
View all HP LH4r manuals
Add to My Manuals
Save this manual to your list of manuals |
Page 98 highlights
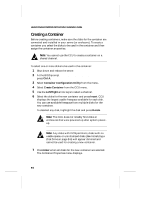
Hewlett-Packard NetRAID-4M Controller Installation Guide Creating a Container Before creating containers, make sure the disks for the container are connected and installed in your server (or enclosure). To create a container you select the disks to be used in the container and then assign the container properties. Note: You cannot use the CCU to create a container on a shared channel. To select one or more disks to be used in the container: 1 Shut down and reboot the server. 2 At the BIOS prompt Press for Configuration Utility! press Ctrl A. 3 Select Container Configuration Utility from the menu. 4 Select Create Container from the CCU menu. 5 Use the Left/Right arrow keys to select a channel. 6 Select the disks for the new container and press Insert. CCU displays the largest usable freespace available for each disk. You can use available freespace from multiple disks for the new container. To deselect any disk, highlight the disk and press Delete. Note: The CCU does not reliably find disks or enclosures that were powered up after system powerup. Note: Any disks with DOS partitions, disks with no usable space, or uninitialized disks (See Initializing a Disk Drive on page B-6) will appear dimmed and cannot be used for creating a new container. 7 Press Enter when all disks for the new container are selected. The Container Properties menu displays. B-2
-
 1
1 -
2
-
3
-
4
-
5
-
6
-
7
-
8
-
9
-
10
-
11
-
12
-
13
-
14
-
15
-
16
-
17
-
18
-
19
-
20
-
21
-
22
-
23
-
24
-
25
-
26
-
27
-
28
-
29
-
30
-
31
-
32
-
33
-
34
-
35
-
36
-
37
-
38
-
39
-
40
-
41
-
42
-
43
-
44
-
45
-
46
-
47
-
48
-
49
-
50
-
51
-
52
-
53
-
54
-
55
-
56
-
57
-
58
-
59
-
60
-
61
-
62
-
63
-
64
-
65
-
66
-
67
-
68
-
69
-
70
-
71
-
72
-
73
-
74
-
75
-
76
-
77
-
78
-
79
-
80
-
81
-
82
-
83
-
84
-
85
-
86
-
87
-
88
-
89
-
90
-
91
-
92
-
 93
93 -
 94
94 -
 95
95 -
 96
96 -
 97
97 -
 98
98 -
 99
99 -
 100
100 -
 101
101 -
 102
102 -
 103
103 -
104
-
105
-
106
-
107
-
108
-
109
-
110
-
111
-
112
-
113
-
114
-
115
-
116
-
117
-
118
-
119
-
120
-
121
-
122
-
123
-
124
 |
 |
