HP Neoware e90 NeoLinux Thin Clients User Manual - Page 24
Network Settings dialog, Network Devices tab, Selected, DHCP/BOOTP
 |
View all HP Neoware e90 manuals
Add to My Manuals
Save this manual to your list of manuals |
Page 24 highlights
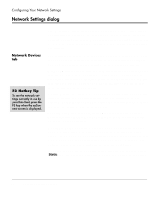
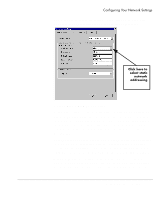
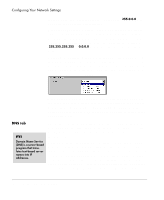
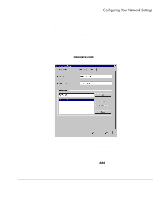
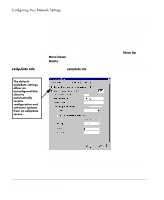
Configuring Your Network Settings Network Settings dialog Network Devices tab F3 Hotkey Tip To see the network settings currently in use by your thin client, press the F3 key when the ezConnect screen is displayed. The Network Settings dialog includes four tabbed pages allowing an administrator to configure the thin client network settings, including defining an ezUpdate server. When a thin client security password has been set, the password must be supplied before changes in this dialog are effected. The following values may be set on the Network Devices tab. If more than one network interface is installed in your thin client appliance, you may choose between the settings for each device on this tab. Network Device: If more than one network interface is detected by the thin client, each may be controlled separately by selecting from the drop-down list (click on the down arrow to see the list). All Neoware thin clients will have at least one network interface showing in this field: "Built-in Ethernet (default)." Enable Device: [Default: Selected] This checkbox allows an administrator to disable one or more installed network interfaces. When selected, Enable Device checkbox allows the network interface showing in the Network Device field to operate. For example: When using a Wireless Ethernet device (Wi-Fi), the built-in Ethernet adapter must be disabled to avoid conflicts during software update operations. Configure Using: [Default: DHCP/BOOTP] Choose from the dropdown selection list whether to use a dynamic network addressing scheme (DHCP or BOOTP) or a static IP address. If your network uses DHCP or BOOTP for configuration, you may not need to make any adjustments to network settings on the thin client appliance. However, if you wish to manually assign the network address, select Static from the drop-down list (click on the down arrow in the field). 24 Network Settings dialog
-
 1
1 -
2
-
3
-
4
-
5
-
6
-
7
-
8
-
9
-
10
-
11
-
12
-
13
-
14
-
15
-
16
-
17
-
18
-
 19
19 -
 20
20 -
 21
21 -
 22
22 -
 23
23 -
 24
24 -
 25
25 -
 26
26 -
 27
27 -
 28
28 -
 29
29 -
30
-
31
-
32
-
33
-
34
-
35
-
36
-
37
-
38
-
39
-
40
-
41
-
42
-
43
-
44
-
45
-
46
-
47
-
48
-
49
-
50
-
51
-
52
-
53
-
54
-
55
-
56
-
57
-
58
-
59
-
60
-
61
-
62
-
63
-
64
-
65
-
66
-
67
-
68
-
69
-
70
-
71
-
72
-
73
-
74
-
75
-
76
-
77
-
78
-
79
-
80
-
81
-
82
-
83
-
84
-
85
-
86
-
87
-
88
-
89
-
90
-
91
-
92
-
93
-
94
-
95
-
96
-
97
-
98
-
99
-
100
-
101
-
102
-
103
-
104
-
105
-
106
-
107
-
108
-
109
-
110
-
111
-
112
-
113
-
114
-
115
-
116
-
117
-
118
-
119
-
120
-
121
-
122
-
123
-
124
-
125
-
126
-
127
-
128
-
129
-
130
-
131
-
132
-
133
-
134
-
135
-
136
-
137
-
138
 |
 |