HP PageWide XL 5000 User Guide - Page 116
Copying, Multi- PDF
 |
View all HP PageWide XL 5000 manuals
Add to My Manuals
Save this manual to your list of manuals |
Page 116 highlights
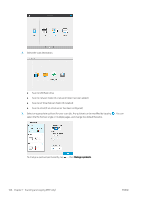
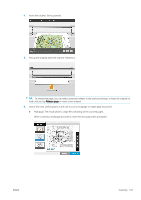
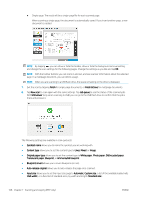
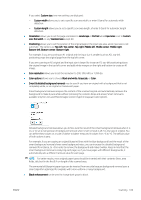
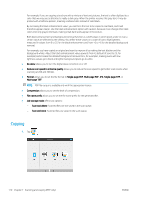
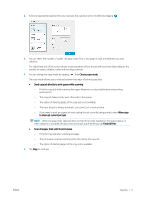
For example, if you are copying a brochure with a mixture of text and pictures, the text is often digitized to a color that we may see as black but is really a dark gray. When the printer receives this gray text, it may be printed with a halftone pattern, meaning scattered dots instead of solid black. By increasing the black enhancement value, you can force the text to be copied in real black, and it will therefore appear clearer. Use the black enhancement option with caution, because it can change other dark colors (not only grays) into black, making small dark spots appear in the picture. Both black enhancement and background removal function as cutoff values in which pixels under or over a certain value are affected by the setting. You define these values on a scale of low to high lightness measured in values from 0 to 25 for the black enhancement and from −6 to +6 for the detailed background removal. For example, you have copied an original and want to improve it by making the text blacker and the background whiter. Adjust the black enhancement value upwards from its default of zero (to 25, for example) and increase the detailed background removal (to 6, for example), making pixels with low lightness values go to black and lighter background pixels go to white. ● De-skew allows you to turn the digital skew correction on or off. ● Reduce scan speed to enhance quality allows you to reduce the scan speed to get better scan results when scanning at 200 and 300 dpi. ● Format allows you to set the file format to Single-page PDF, Multi-page PDF, JPG, Single-page TIFF, or Multi-page TIFF. NOTE: PDF file output is available only with the appropriate license. ● Compression allows you to set the level of compression. ● File name prefix allows you to set the file name prefix for the generated file. ● Job storage mode offers two options: - Scan and delete: Scanned files are not saved in the scan queue. - Scan and store: Scanned files are saved in the scan queue. Copying 1. Tap . 110 Chapter 7 Scanning and copying (MFP only) ENWW
-
 1
1 -
2
-
3
-
4
-
5
-
6
-
7
-
8
-
9
-
10
-
11
-
12
-
13
-
14
-
15
-
16
-
17
-
18
-
19
-
20
-
21
-
22
-
23
-
24
-
25
-
26
-
27
-
28
-
29
-
30
-
31
-
32
-
33
-
34
-
35
-
36
-
37
-
38
-
39
-
40
-
41
-
42
-
43
-
44
-
45
-
46
-
47
-
48
-
49
-
50
-
51
-
52
-
53
-
54
-
55
-
56
-
57
-
58
-
59
-
60
-
61
-
62
-
63
-
64
-
65
-
66
-
67
-
68
-
69
-
70
-
71
-
72
-
73
-
74
-
75
-
76
-
77
-
78
-
79
-
80
-
81
-
82
-
83
-
84
-
85
-
86
-
87
-
88
-
89
-
90
-
91
-
92
-
93
-
94
-
95
-
96
-
97
-
98
-
99
-
100
-
101
-
102
-
103
-
104
-
105
-
106
-
107
-
108
-
109
-
110
-
 111
111 -
 112
112 -
 113
113 -
 114
114 -
 115
115 -
 116
116 -
 117
117 -
 118
118 -
 119
119 -
 120
120 -
 121
121 -
122
-
123
-
124
-
125
-
126
-
127
-
128
-
129
-
130
-
131
-
132
-
133
-
134
-
135
-
136
-
137
-
138
-
139
-
140
-
141
-
142
-
143
-
144
-
145
-
146
-
147
-
148
-
149
-
150
-
151
-
152
-
153
-
154
-
155
-
156
-
157
-
158
-
159
-
160
-
161
-
162
-
163
-
164
-
165
-
166
-
167
-
168
-
169
-
170
-
171
-
172
-
173
-
174
-
175
-
176
-
177
-
178
-
179
-
180
-
181
-
182
-
183
-
184
-
185
-
186
-
187
-
188
-
189
 |
 |