HP PageWide XL 5000 User Guide - Page 160
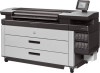
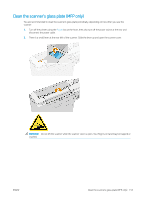
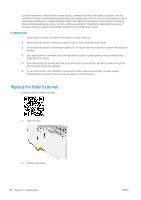
Remove the glass plate and clean it on both sides. See, Optionally, for more thorough cleaning
 |
View all HP PageWide XL 5000 manuals
Add to My Manuals
Save this manual to your list of manuals |
Page 160 highlights
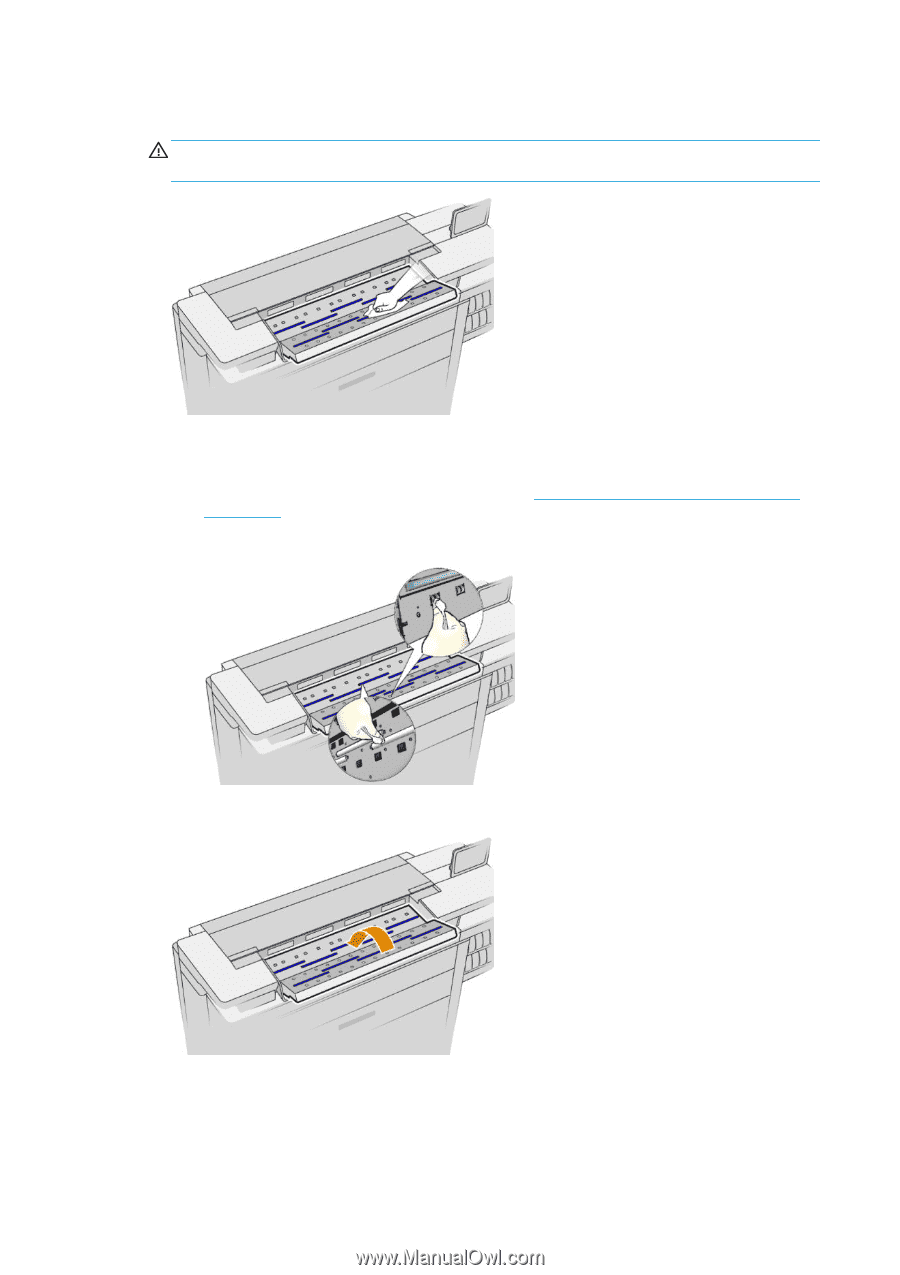
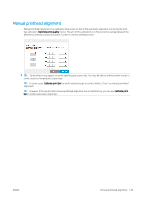
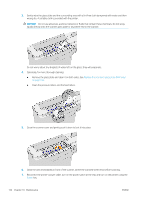
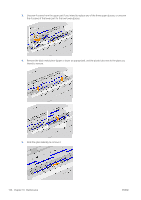
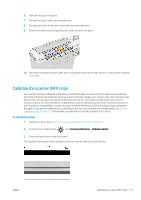
3. Gently wipe the glass plate and the surrounding area with a lint-free cloth dampened with water and then wrung dry. A suitable cloth is provided with the printer. CAUTION: Do not use abrasives, acetone, benzene or fluids that contain these chemicals. Do not spray liquids directly onto the scanner glass plate or anywhere else in the scanner. Do not worry about tiny droplets of water left on the glass: they will evaporate. 4. Optionally, for more thorough cleaning: ● Remove the glass plate and clean it on both sides. See Replace the scanner's glass plate (MFP only) on page 155. ● Clean the pressure rollers and the feed rollers. 5. Close the scanner cover and gently push it down to lock it into place. 6. Clean the area immediately in front of the scanner, where the scanned sheet rests before scanning. 7. Reconnect the printer's power cable, turn on the power switch at the rear, and turn on the printer using the Power key. 154 Chapter 10 Maintenance ENWW
-
 1
1 -
2
-
3
-
4
-
5
-
6
-
7
-
8
-
9
-
10
-
11
-
12
-
13
-
14
-
15
-
16
-
17
-
18
-
19
-
20
-
21
-
22
-
23
-
24
-
25
-
26
-
27
-
28
-
29
-
30
-
31
-
32
-
33
-
34
-
35
-
36
-
37
-
38
-
39
-
40
-
41
-
42
-
43
-
44
-
45
-
46
-
47
-
48
-
49
-
50
-
51
-
52
-
53
-
54
-
55
-
56
-
57
-
58
-
59
-
60
-
61
-
62
-
63
-
64
-
65
-
66
-
67
-
68
-
69
-
70
-
71
-
72
-
73
-
74
-
75
-
76
-
77
-
78
-
79
-
80
-
81
-
82
-
83
-
84
-
85
-
86
-
87
-
88
-
89
-
90
-
91
-
92
-
93
-
94
-
95
-
96
-
97
-
98
-
99
-
100
-
101
-
102
-
103
-
104
-
105
-
106
-
107
-
108
-
109
-
110
-
111
-
112
-
113
-
114
-
115
-
116
-
117
-
118
-
119
-
120
-
121
-
122
-
123
-
124
-
125
-
126
-
127
-
128
-
129
-
130
-
131
-
132
-
133
-
134
-
135
-
136
-
137
-
138
-
139
-
140
-
141
-
142
-
143
-
144
-
145
-
146
-
147
-
148
-
149
-
150
-
151
-
152
-
153
-
154
-
 155
155 -
 156
156 -
 157
157 -
 158
158 -
 159
159 -
 160
160 -
 161
161 -
 162
162 -
 163
163 -
 164
164 -
 165
165 -
166
-
167
-
168
-
169
-
170
-
171
-
172
-
173
-
174
-
175
-
176
-
177
-
178
-
179
-
180
-
181
-
182
-
183
-
184
-
185
-
186
-
187
-
188
-
189
 |
 |