HP PageWide XL 5000 User Guide - Page 84
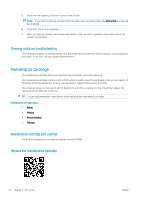
Maintenance cartridge troubleshooting
 |
View all HP PageWide XL 5000 manuals
Add to My Manuals
Save this manual to your list of manuals |
Page 84 highlights
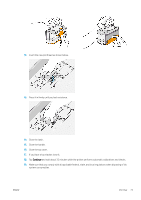
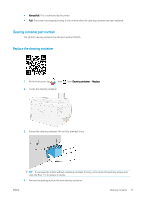
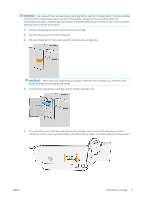
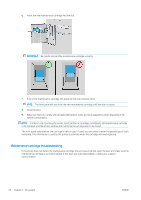
6. Insert the new maintenance cartridge into the slot. IMPORTANT: Be careful to insert the maintenance cartridge correctly. 7. Push in the maintenance cartridge into place; do not use excessive force. NOTE: The front panel will not show the new maintenance cartridge until the door is closed. 8. Close the door. 9. Make sure that you comply with all applicable federal, state, and local regulations when disposing of ink system consumables. NOTE: In order to start printing, the printer needs all the ink cartridges, printheads, and maintenance cartridge to be installed, and the printer window and maintenance cartridge door to be closed. The front panel asks whether the cartridge is new or used. If used, you are asked to enter the percentage of cloth remaining. This information is used by the printer to estimate when the cartridge will need replacing. Maintenance cartridge troubleshooting If the printer does not detect the maintenance cartridge that you have inserted, open the door and make sure the maintenance cartridge is correctly inserted. If this does not solve the problem, contact your support representative. 78 Chapter 3 Ink system ENWW
-
 1
1 -
2
-
3
-
4
-
5
-
6
-
7
-
8
-
9
-
10
-
11
-
12
-
13
-
14
-
15
-
16
-
17
-
18
-
19
-
20
-
21
-
22
-
23
-
24
-
25
-
26
-
27
-
28
-
29
-
30
-
31
-
32
-
33
-
34
-
35
-
36
-
37
-
38
-
39
-
40
-
41
-
42
-
43
-
44
-
45
-
46
-
47
-
48
-
49
-
50
-
51
-
52
-
53
-
54
-
55
-
56
-
57
-
58
-
59
-
60
-
61
-
62
-
63
-
64
-
65
-
66
-
67
-
68
-
69
-
70
-
71
-
72
-
73
-
74
-
75
-
76
-
77
-
78
-
 79
79 -
 80
80 -
 81
81 -
 82
82 -
 83
83 -
 84
84 -
 85
85 -
 86
86 -
 87
87 -
 88
88 -
 89
89 -
90
-
91
-
92
-
93
-
94
-
95
-
96
-
97
-
98
-
99
-
100
-
101
-
102
-
103
-
104
-
105
-
106
-
107
-
108
-
109
-
110
-
111
-
112
-
113
-
114
-
115
-
116
-
117
-
118
-
119
-
120
-
121
-
122
-
123
-
124
-
125
-
126
-
127
-
128
-
129
-
130
-
131
-
132
-
133
-
134
-
135
-
136
-
137
-
138
-
139
-
140
-
141
-
142
-
143
-
144
-
145
-
146
-
147
-
148
-
149
-
150
-
151
-
152
-
153
-
154
-
155
-
156
-
157
-
158
-
159
-
160
-
161
-
162
-
163
-
164
-
165
-
166
-
167
-
168
-
169
-
170
-
171
-
172
-
173
-
174
-
175
-
176
-
177
-
178
-
179
-
180
-
181
-
182
-
183
-
184
-
185
-
186
-
187
-
188
-
189
 |
 |
