Panasonic HPX500 Operating Instructions - Page 107
Clip Operations, Playing Back Clips, Shot Mark
 |
UPC - 791871302965
View all Panasonic HPX500 manuals
Add to My Manuals
Save this manual to your list of manuals |
Page 107 highlights
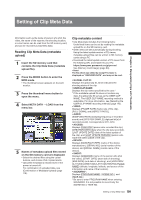
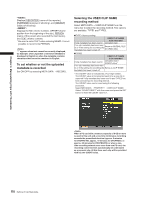
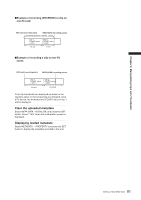
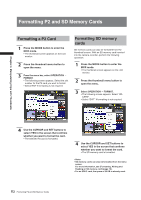
Chapter 6 Manipulating Clips with Thumbnails Clip Operations Playing Back Clips 1 Press the MODE button to enter the MCR mode. • The thumbnail screen appears on the LCD monitor. 2 Use the cursor buttons to move the pointer over the desired clip. 3 Press the PLAY button, and the clip under the pointer will be played back on the LCD monitor. • After playback of the clip under the pointer, subsequent clips are played back in order, according to when they were shot. The thumbnail screen returns after the last clip has been played back. • When playing back clips, it is not necessary to "select" the clips (blue frames around the thumbnails). • Clips with clip numbers displayed in red cannot be played. 4 During playback, pressing the REW button starts 4× speed reverse playback, and the FF button starts 4× speed fast playback. • Press the PLAY button to return to normal playback. 6 Pressing the STOP button during clip playback stops the playback and returns the display to the thumbnail screen. When playback is stopped, the position of the pointer remains on the clip that was being played back, regardless of where the playback started. Shot Mark A shot mark can be added to a clip thumbnail to distinguish this clip from the others. 1 Press the MODE button to enter the MCR mode. • The thumbnail screen appears on the LCD monitor. 2 Use the cursor buttons to move the pointer over the clip to which you want to attach a shot mark. 3 Press the USER button to which the shot mark function has been assigned. • Use the setting menu SW MODE screen to assign the SHOT MARK function to a USER button. 5 During clip playback, pressing the STILL button will temporarily stop (pause) the process. • During a pause, pressing the REW button moves the pause position to the beginning of the clip. • Pressing the REW button again moves the pause position to the beginning of the previous clip. • During a pause, pressing the FF button moves the pause position to the beginning of the next clip. (Holding down the FF button displays the last image in the last clip. "EOS" appears at this time.) USER MAIN, USER1 and USER2 buttons 4 A shot mark will be attached to the clip thumbnail under the pointer. • To delete a shot mark, reposition the pointer over the clip and press the Shot Mark button. 107 Clip Operations
-
 1
1 -
2
-
3
-
4
-
5
-
6
-
7
-
8
-
9
-
10
-
11
-
12
-
13
-
14
-
15
-
16
-
17
-
18
-
19
-
20
-
21
-
22
-
23
-
24
-
25
-
26
-
27
-
28
-
29
-
30
-
31
-
32
-
33
-
34
-
35
-
36
-
37
-
38
-
39
-
40
-
41
-
42
-
43
-
44
-
45
-
46
-
47
-
48
-
49
-
50
-
51
-
52
-
53
-
54
-
55
-
56
-
57
-
58
-
59
-
60
-
61
-
62
-
63
-
64
-
65
-
66
-
67
-
68
-
69
-
70
-
71
-
72
-
73
-
74
-
75
-
76
-
77
-
78
-
79
-
80
-
81
-
82
-
83
-
84
-
85
-
86
-
87
-
88
-
89
-
90
-
91
-
92
-
93
-
94
-
95
-
96
-
97
-
98
-
99
-
100
-
101
-
 102
102 -
 103
103 -
 104
104 -
 105
105 -
 106
106 -
 107
107 -
 108
108 -
 109
109 -
 110
110 -
 111
111 -
 112
112 -
113
-
114
-
115
-
116
-
117
-
118
-
119
-
120
-
121
-
122
-
123
-
124
-
125
-
126
-
127
-
128
-
129
-
130
-
131
-
132
-
133
-
134
-
135
-
136
-
137
-
138
-
139
-
140
-
141
-
142
-
143
-
144
-
145
-
146
-
147
-
148
-
149
-
150
-
151
-
152
 |
 |
