Panasonic HPX500 Operating Instructions - Page 138
Inspecting the Camera Unit, Inspecting the Memory Recording Functions
 |
UPC - 791871302965
View all Panasonic HPX500 manuals
Add to My Manuals
Save this manual to your list of manuals |
Page 138 highlights
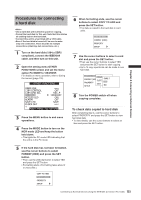
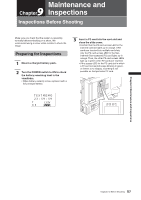
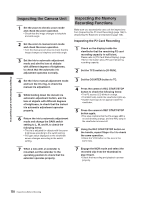
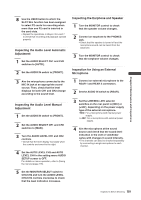
Chapter 9 Maintenance and Inspections Inspecting the Camera Unit 1 Set the zoom to electric zoom mode and check the zoom operation. • Check that the image changes to telephoto and wide angle. 2 Set the zoom to manual zoom mode and check the zoom operation. • Turn the manual zoom lever to check that the image changes to telephoto and wide angle. 3 Set the iris to automatic adjustment mode and aim the lens at objects with different degrees of brightness, to check that the automatic iris adjustment operates normally. 4 Set the iris to manual adjustment mode and turn the iris ring, to check the manual iris adjustment. 5 While holding down the instant iris automatic adjustment button, aim the lens at objects with different degrees of brightness, to check that the instant iris automatic adjustment operates properly. 6 Return the iris to automatic adjustment mode and change the GAIN switch setting to L, M, and H, to check the following items: • The iris is adjusted for objects with the same brightness according to the switch setting. • The gain value displayed on the viewfinder screen changes according to the switch setting. Inspecting the Memory Recording Functions Make sure you successively carry out the inspections from [Inspecting the P2 Card Recording] (page 138) to [Inspecting the Earphone and Speaker] (page 139). Inspecting the P2 Card Recording 1 Check on the display inside the viewfinder that the remaining P2 card recording capacity is sufficient. Please refer to [P2 Card Status Display] (page 113) for information about P2 card remaining recording capacity. 2 Set the TCG switch to [R-RUN]. 3 Set the COUNTER button to TC. 4 Press the camera's REC START/STOP button to check the following items: • The P2 access LED blinks in orange. • The REC lamp inside the viewfinder lights up. • System warnings do not appear inside the viewfinder. 5 Press the camera's REC START/STOP button again. • This step confirms that the P2 access LED is on and showing orange, and the REC lamp in the viewfinder is turned off. 6 Using the REC START/STOP button on the handle, repeat Steps 4 to 5 to check the same operation. • Check the VTR button on the lens in the same way. 7 When a lens with an extender is mounted, set the extender to the operating position to check that the extender operates properly. 7 Engage the MCR mode and select the recorded clip from the thumbnail to play it back. • Check that recording and playback operate properly. 138 Inspections Before Shooting
-
 1
1 -
2
-
3
-
4
-
5
-
6
-
7
-
8
-
9
-
10
-
11
-
12
-
13
-
14
-
15
-
16
-
17
-
18
-
19
-
20
-
21
-
22
-
23
-
24
-
25
-
26
-
27
-
28
-
29
-
30
-
31
-
32
-
33
-
34
-
35
-
36
-
37
-
38
-
39
-
40
-
41
-
42
-
43
-
44
-
45
-
46
-
47
-
48
-
49
-
50
-
51
-
52
-
53
-
54
-
55
-
56
-
57
-
58
-
59
-
60
-
61
-
62
-
63
-
64
-
65
-
66
-
67
-
68
-
69
-
70
-
71
-
72
-
73
-
74
-
75
-
76
-
77
-
78
-
79
-
80
-
81
-
82
-
83
-
84
-
85
-
86
-
87
-
88
-
89
-
90
-
91
-
92
-
93
-
94
-
95
-
96
-
97
-
98
-
99
-
100
-
101
-
102
-
103
-
104
-
105
-
106
-
107
-
108
-
109
-
110
-
111
-
112
-
113
-
114
-
115
-
116
-
117
-
118
-
119
-
120
-
121
-
122
-
123
-
124
-
125
-
126
-
127
-
128
-
129
-
130
-
131
-
132
-
 133
133 -
 134
134 -
 135
135 -
 136
136 -
 137
137 -
 138
138 -
 139
139 -
 140
140 -
 141
141 -
 142
142 -
 143
143 -
144
-
145
-
146
-
147
-
148
-
149
-
150
-
151
-
152
 |
 |
