Panasonic HPX500 Operating Instructions - Page 6

Preparation, Manipulating Clips, with Thumbnails - scene files

Page 6 highlights

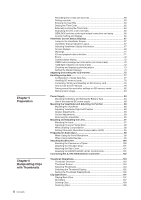
Chapter 5 Preparation Chapter 6 Manipulating Clips with Thumbnails 6 Contents Recording time codes and user bits 59 Setting user bits 60 Entering the User Bits 60 Setting the Time Code 62 Externally Locking the Time Code 64 Outputting the time code externally 65 GENLOCK and time code input/output connection and setup 66 Counter Setting and Display 66 Viewfinder Screen Status Displays 67 Lamps in the Viewfinder Screen 67 Viewfinder Status Indication Layout 67 Selecting Viewfinder Display Information 67 Screen displays 68 Warnings ...71 P2 card playback data indication 71 Errors ...72 Camera status display 72 USER buttons assignment information (at mode check 72 ! LED light indication (at mode check 72 Checking and displaying shooting status 73 Setting the Marker Displays 74 Adjusting and setting the LCD monitor 75 Handling setup data 77 Configuration of setup data files 77 Handling SD memory cards 78 Formatting, Writing and Reading an SD memory card 78 How to Use Scene File Data 79 Saving scene files and other settings on SD memory cards 82 Memory Card Usage 83 Power Supply 84 Mounting the Battery and Setting the Battery Type 84 Use of the external DC power supply 86 Mounting the Viewfinder and Adjusting its Position 88 Mounting the Viewfinder 88 Adjusting Viewfinder Right-Left Position 88 Diopter Adjustments 89 Screen Adjustments 89 Removing the Viewfinder 90 Mounting and Adjusting the Lens 91 Mounting the Lens 91 Adjusting the Lens Flange Back 92 White Shading Compensation 92 Setting Chromatic Aberration Compensation (CAC 95 Preparing for Audio Input 98 When Using the Front Microphone 98 When Using Audio Devices 99 Attaching Accessories 100 Mounting the Camera on a Tripod 100 Attaching the Shoulder Strap 101 Attaching the Rain Cover 101 Attaching the FRONT AUDIO LEVEL Control Knob 101 Connecting the AJ-RC10G Extension Controller 102 Thumbnail Operations 103 Thumbnail Overview 103 Thumbnail Screen 104 Selecting Thumbnails 104 Switching the Thumbnail Display 105 Setting the Thumbnail Display Mode 106 Clip Operations 107 Playing Back Clips 107 Shot Mark 107 Deleting Clips 108 Restoring Clips 108

  • 1
  • 2
  • 3
  • 4
  • 5
  • 6
  • 7
  • 8
  • 9
  • 10
  • 11
  • 12
  • 13
  • 14
  • 15
  • 16
  • 17
  • 18
  • 19
  • 20
  • 21
  • 22
  • 23
  • 24
  • 25
  • 26
  • 27
  • 28
  • 29
  • 30
  • 31
  • 32
  • 33
  • 34
  • 35
  • 36
  • 37
  • 38
  • 39
  • 40
  • 41
  • 42
  • 43
  • 44
  • 45
  • 46
  • 47
  • 48
  • 49
  • 50
  • 51
  • 52
  • 53
  • 54
  • 55
  • 56
  • 57
  • 58
  • 59
  • 60
  • 61
  • 62
  • 63
  • 64
  • 65
  • 66
  • 67
  • 68
  • 69
  • 70
  • 71
  • 72
  • 73
  • 74
  • 75
  • 76
  • 77
  • 78
  • 79
  • 80
  • 81
  • 82
  • 83
  • 84
  • 85
  • 86
  • 87
  • 88
  • 89
  • 90
  • 91
  • 92
  • 93
  • 94
  • 95
  • 96
  • 97
  • 98
  • 99
  • 100
  • 101
  • 102
  • 103
  • 104
  • 105
  • 106
  • 107
  • 108
  • 109
  • 110
  • 111
  • 112
  • 113
  • 114
  • 115
  • 116
  • 117
  • 118
  • 119
  • 120
  • 121
  • 122
  • 123
  • 124
  • 125
  • 126
  • 127
  • 128
  • 129
  • 130
  • 131
  • 132
  • 133
  • 134
  • 135
  • 136
  • 137
  • 138
  • 139
  • 140
  • 141
  • 142
  • 143
  • 144
  • 145
  • 146
  • 147
  • 148
  • 149
  • 150
  • 151
  • 152

6
Contents
Recording time codes and user bits
..........................................................
59
Setting user bits
........................................................................................
60
Entering the User Bits
...............................................................................
60
Setting the Time Code
..............................................................................
62
Externally Locking the Time Code
............................................................
64
Outputting the time code externally
..........................................................
65
GENLOCK and time code input/output connection and setup
.................
66
Counter Setting and Display
.....................................................................
66
Viewfinder Screen Status Displays
..............................................................
67
Lamps in the Viewfinder Screen
................................................................
67
Viewfinder Status Indication Layout
...........................................................
67
Selecting Viewfinder Display Information
..................................................
67
Screen displays
.........................................................................................
68
Warnings
....................................................................................................
71
P2 card playback data indication
...............................................................
71
Errors
..........................................................................................................
72
Camera status display
................................................................................
72
USER buttons assignment information (at mode check)
...........................
72
! LED light indication (at mode check)
.......................................................
72
Checking and displaying shooting status
.................................................
73
Setting the Marker Displays
.......................................................................
74
Adjusting and setting the LCD monitor
.........................................................
75
Handling setup data
........................................................................................
77
Configuration of setup data files
...............................................................
77
Handling SD memory cards
.......................................................................
78
Formatting, Writing and Reading an SD memory card
..............................
78
How to Use Scene File Data
......................................................................
79
Saving scene files and other settings on SD memory cards
....................
82
Memory Card Usage
.................................................................................
83
Power Supply
..................................................................................................
84
Mounting the Battery and Setting the Battery Type
..................................
84
Use of the external DC power supply
.......................................................
86
Mounting the Viewfinder and Adjusting its Position
..................................
88
Mounting the Viewfinder
...........................................................................
88
Adjusting Viewfinder Right-Left Position
...................................................
88
Diopter Adjustments
..................................................................................
89
Screen Adjustments
..................................................................................
89
Removing the Viewfinder
..........................................................................
90
Mounting and Adjusting the Lens
..................................................................
91
Mounting the Lens
......................................................................................
91
Adjusting the Lens Flange Back
...............................................................
92
White Shading Compensation
..................................................................
92
Setting Chromatic Aberration Compensation (CAC)
...............................
95
Preparing for Audio Input
..............................................................................
98
When Using the Front Microphone
...........................................................
98
When Using Audio Devices
.......................................................................
99
Attaching Accessories
.................................................................................
100
Mounting the Camera on a Tripod
...........................................................
100
Attaching the Shoulder Strap
...................................................................
101
Attaching the Rain Cover
.........................................................................
101
Attaching the FRONT AUDIO LEVEL Control Knob
................................
101
Connecting the AJ-RC10G Extension Controller
.......................................
102
Thumbnail Operations
...................................................................................
103
Thumbnail Overview
................................................................................
103
Thumbnail Screen
....................................................................................
104
Selecting Thumbnails
...............................................................................
104
Switching the Thumbnail Display
.............................................................
105
Setting the Thumbnail Display Mode
.......................................................
106
Clip Operations
..............................................................................................
107
Playing Back Clips
...................................................................................
107
Shot Mark
.................................................................................................
107
Deleting Clips
...........................................................................................
108
Restoring Clips
.........................................................................................
108
Chapter 5
Preparation
Chapter 6
Manipulating Clips
with Thumbnails