Panasonic HPX500 Operating Instructions - Page 141
Maintenance, Cleaning Inside the Viewfinder, Eyepiece Care, Phenomenon Inherent to CCD Cameras
 |
UPC - 791871302965
View all Panasonic HPX500 manuals
Add to My Manuals
Save this manual to your list of manuals |
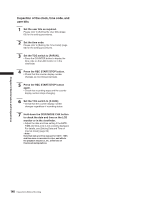
Page 141 highlights
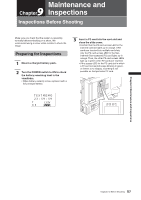
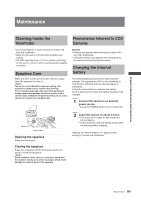
Chapter 9 Maintenance and Inspections Maintenance Cleaning Inside the Viewfinder Phenomenon Inherent to CCD Cameras • Do not use thinner or other solvents to remove dirt from the viewfinder. • Wipe the lens with a commercially available lens cleaner. • DO NOT wipe the mirror. If dirt or rubbish is sticking on the mirror, remove it with a commercially available air blower. Eyepiece Care When the CRT screen and the mirror become dusty, open the eyepiece to clean it. The mirror is provided with a special coating. Use a blower or similar tool to remove dust from the mirror. Using tissue paper will cause dust particles to scrape against and damage the mirror surface. Use a commercially available hair-planted cloth (such as a lens cleaner) to remove more stubborn dirt. Smears • Smears may appear when shooting an object with very high brightness. • This phenomenon may appear more frequently as the electronic shutter speed increases. Charging the internal battery The internal battery preserves the date and time settings. The appearance of in the viewfinder or LCD monitor indicates that the internal battery is exhausted. Follow the steps below to recharge the battery. Set the date and time when the battery has been fully charged. 1 Connect the camera to an external power source. • Leave the POWER switch on the camera off. Eyepiece Lock button Opening the eyepiece Press the lock button. Closing the eyepiece Press the eyepiece until the lock button clicks into place to close the eyepiece. When outdoors, never carry or set up the camera with the eyepiece facing up to prevent sunlight, which could damage the internal parts of the eyepiece. 2 Leave the camera for about 4 hours. • This is the time it takes to fully charge the internal battery. • Check the time code and setting menus after completing battery charging. Replace the internal battery if appears after charging. Consult your distributor. 141 Maintenance
-
 1
1 -
2
-
3
-
4
-
5
-
6
-
7
-
8
-
9
-
10
-
11
-
12
-
13
-
14
-
15
-
16
-
17
-
18
-
19
-
20
-
21
-
22
-
23
-
24
-
25
-
26
-
27
-
28
-
29
-
30
-
31
-
32
-
33
-
34
-
35
-
36
-
37
-
38
-
39
-
40
-
41
-
42
-
43
-
44
-
45
-
46
-
47
-
48
-
49
-
50
-
51
-
52
-
53
-
54
-
55
-
56
-
57
-
58
-
59
-
60
-
61
-
62
-
63
-
64
-
65
-
66
-
67
-
68
-
69
-
70
-
71
-
72
-
73
-
74
-
75
-
76
-
77
-
78
-
79
-
80
-
81
-
82
-
83
-
84
-
85
-
86
-
87
-
88
-
89
-
90
-
91
-
92
-
93
-
94
-
95
-
96
-
97
-
98
-
99
-
100
-
101
-
102
-
103
-
104
-
105
-
106
-
107
-
108
-
109
-
110
-
111
-
112
-
113
-
114
-
115
-
116
-
117
-
118
-
119
-
120
-
121
-
122
-
123
-
124
-
125
-
126
-
127
-
128
-
129
-
130
-
131
-
132
-
133
-
134
-
135
-
 136
136 -
 137
137 -
 138
138 -
 139
139 -
 140
140 -
 141
141 -
 142
142 -
 143
143 -
 144
144 -
 145
145 -
 146
146 -
147
-
148
-
149
-
150
-
151
-
152
 |
 |
