Samsung SGH-ZX20 User Manual (user Manual) (ver.f1) (English) - Page 112
Using Record Video
 |
View all Samsung SGH-ZX20 manuals
Add to My Manuals
Save this manual to your list of manuals |
Page 112 highlights
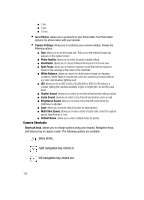
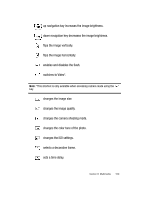
• Copy: allows you to copy the photo to another folder. Use the Left or Right Navigation key to make your folder selection. • Real Size: allows you view the photo in Real Size mode. • Slide Show: allows you to view your collection of photos taken. • Edit: allows you to edit the photo. Select Edit and press the Options soft key. The following options appear in the display: ⅷ Save As: allows you to rename and save the photo. ⅷ Resize: allows you to resize the photo. ⅷ Effects: allows you to change the color tone of the photo. ⅷ Adjust: allows you to adjust the color of the photo. ⅷ Frames: allows you to select a decorative frame overlay. ⅷ Cliparts: allows you to add clipart to your photo. ⅷ Insert Text: allows you to add text to your photo. ⅷ Rotate: allows you to move the photo 900 R (right) or 90O L (left). ⅷ Flip: allows you to flip the photo vertically or horizontally. ⅷ Crop: allows you to cut a specific section of the photo. Allowing you to make it the proper size or to remove it completely. • Delete: allows you to delete the highlighted photo. • Rename: allows you to change the name of the photo. • Details: shows the properties of the photo such as Size, Format, Date, Time, Resolution, and Forwarding. Using Record Video 1. In Idle mode, press the Menu ( ) soft key to access Menu mode. 2. Use the Navigation keys to highlight My Stuff and press the Select soft key or the key. 3. Use the Up or Down Navigation key to highlight Video and press the Select soft key or the key, press the Select soft key or the key. 4. Use the Left or Right Navigation key to select Record Video press the Select soft key or the key. Alternatively to record a video, press the Options soft key, highlight Record Video and press the Select soft key or the key. 5. Adjust the image by aiming the camera at the subject. Press the Options soft key to access video options. See "Using the Video Options" on page 113 for more information. 6. Press the key to start recording. 112
-
 1
1 -
2
-
3
-
4
-
5
-
6
-
7
-
8
-
9
-
10
-
11
-
12
-
13
-
14
-
15
-
16
-
17
-
18
-
19
-
20
-
21
-
22
-
23
-
24
-
25
-
26
-
27
-
28
-
29
-
30
-
31
-
32
-
33
-
34
-
35
-
36
-
37
-
38
-
39
-
40
-
41
-
42
-
43
-
44
-
45
-
46
-
47
-
48
-
49
-
50
-
51
-
52
-
53
-
54
-
55
-
56
-
57
-
58
-
59
-
60
-
61
-
62
-
63
-
64
-
65
-
66
-
67
-
68
-
69
-
70
-
71
-
72
-
73
-
74
-
75
-
76
-
77
-
78
-
79
-
80
-
81
-
82
-
83
-
84
-
85
-
86
-
87
-
88
-
89
-
90
-
91
-
92
-
93
-
94
-
95
-
96
-
97
-
98
-
99
-
100
-
101
-
102
-
103
-
104
-
105
-
106
-
 107
107 -
 108
108 -
 109
109 -
 110
110 -
 111
111 -
 112
112 -
 113
113 -
 114
114 -
 115
115 -
 116
116 -
 117
117 -
118
-
119
-
120
-
121
-
122
-
123
-
124
-
125
-
126
-
127
-
128
-
129
-
130
-
131
-
132
-
133
-
134
-
135
-
136
-
137
-
138
-
139
-
140
-
141
-
142
-
143
-
144
-
145
-
146
-
147
-
148
-
149
-
150
-
151
-
152
-
153
-
154
-
155
-
156
-
157
-
158
-
159
-
160
-
161
-
162
-
163
-
164
-
165
-
166
-
167
-
168
-
169
-
170
-
171
-
172
-
173
-
174
-
175
-
176
-
177
-
178
-
179
 |
 |