Samsung SGH-ZX20 User Manual (user Manual) (ver.f1) (English) - Page 49
First/Last Name
 |
View all Samsung SGH-ZX20 manuals
Add to My Manuals
Save this manual to your list of manuals |
Page 49 highlights
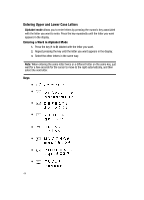
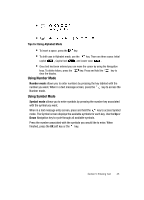
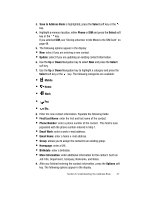
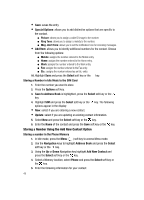
• First/Last Name: enter the first and last name of the contact. • Phone Number: enter the phone number of the contact. To change a number type press the Options soft key, highlight Change Type and press the Select soft key or the key. Choose from Mobile, Home, Work, Fax, and Etc. Select a type and press the Select soft key or the key. • Email Work: enter a work e-mail address. • Email Home: enter a home e-mail address. • Group: allows you to assign the contact to an existing group. • Homepage: enter a URL. • Birthdate: enter a birthdate • More Information: enter additional information for the contact. Such as Job Title, Department, Company, Nickname, and Notes. 6. Press the Options soft key. Choose from the following options: • Save: saves the entry. • Special Options: allows you to add distinctive options that are specific to the contact. ⅷ Picture: allows you to assign a caller ID image to the number. ⅷ Ring Tone: allows you to assign a melody to the number. ⅷ Msg. Alert Tone: allows you to set the notification tone for incoming messages. • Add Item: allows you to identify additional numbers for the contact. Choose from the following options: ⅷ Mobile: assigns the number entered to the Mobile entry. ⅷ Home: assigns the number entered to the Home entry. ⅷ Work: assigns the number entered to the Work entry. ⅷ Fax: assigns the number entered to the Fax entry. ⅷ Etc.: assigns the number entered as an Etc. entry. 7. Highlight Save and press the Select soft key or the key. Storing a number in the SIM Memory 1. In Idle mode, press the Menu ( ) soft key to access Menu mode. 2. Use the Navigation keys to highlight Address Book and press the Select soft key or the key. 3. Using the Up or Down Navigation key highlight Add New Contact and press the Select soft key or the key. Section 6: Understanding Your Address Book 49
-
 1
1 -
2
-
3
-
4
-
5
-
6
-
7
-
8
-
9
-
10
-
11
-
12
-
13
-
14
-
15
-
16
-
17
-
18
-
19
-
20
-
21
-
22
-
23
-
24
-
25
-
26
-
27
-
28
-
29
-
30
-
31
-
32
-
33
-
34
-
35
-
36
-
37
-
38
-
39
-
40
-
41
-
42
-
43
-
 44
44 -
 45
45 -
 46
46 -
 47
47 -
 48
48 -
 49
49 -
 50
50 -
 51
51 -
 52
52 -
 53
53 -
 54
54 -
55
-
56
-
57
-
58
-
59
-
60
-
61
-
62
-
63
-
64
-
65
-
66
-
67
-
68
-
69
-
70
-
71
-
72
-
73
-
74
-
75
-
76
-
77
-
78
-
79
-
80
-
81
-
82
-
83
-
84
-
85
-
86
-
87
-
88
-
89
-
90
-
91
-
92
-
93
-
94
-
95
-
96
-
97
-
98
-
99
-
100
-
101
-
102
-
103
-
104
-
105
-
106
-
107
-
108
-
109
-
110
-
111
-
112
-
113
-
114
-
115
-
116
-
117
-
118
-
119
-
120
-
121
-
122
-
123
-
124
-
125
-
126
-
127
-
128
-
129
-
130
-
131
-
132
-
133
-
134
-
135
-
136
-
137
-
138
-
139
-
140
-
141
-
142
-
143
-
144
-
145
-
146
-
147
-
148
-
149
-
150
-
151
-
152
-
153
-
154
-
155
-
156
-
157
-
158
-
159
-
160
-
161
-
162
-
163
-
164
-
165
-
166
-
167
-
168
-
169
-
170
-
171
-
172
-
173
-
174
-
175
-
176
-
177
-
178
-
179
 |
 |