Symantec 10744983 Administration Guide - Page 42
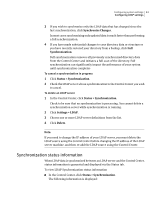
Status > LDAP Synchronization
 |
UPC - 037648279321
View all Symantec 10744983 manuals
Add to My Manuals
Save this manual to your list of manuals |
Page 42 highlights
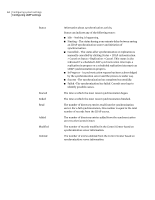
42 Configuring system settings Configuring LDAP settings Table 2-5 Edit LDAP Server page (continued) Item Description Authentication Query Details Autofill - Places default values in the fields for you to modify as needed. Specify the queries to use - You have the following options when selecting what authentication queries to use: ■ Query start (Auth base DN) - Designates the point in the directory from which to start searching for entries to authenticate. ■ Login attribute - The attribute on a person entry that defines a user name. ■ Primary email attribute - The attribute on a person or distribution-group entry that represents a mailbox. ■ Email alias attribute - The attribute on a person or distributing-group entry that contains one or more alternative email addresses for that entity's mailbox ■ Login query - Finds users based on their Login attributes. Test -Attempts to execute the query as defined. Note: For Exchange 5.5, the user directory Name (rdn) must be the same as the alias (uid) for that user. Synchronization Configuration Specify default synchronization options - This section only appears if Synchronization is checked for Usage. It allows for the following definitions governing synchronization behavior: ■ Synchronize every - Specifies how often scheduled synchronization occurs. You can specify a number of minutes, hours, or days. The default is 1 day. ■ Audit level - Verbosity setting for LDAP audit logs. Choices of Off, Low, and Verbose are available. The default is Off. ■ Page size - Number of discrete changes that are accepted together for synchronization. Use a number between 1 and 2,000. The default is 25. If you are using the iPlanet/SunOne directory server, change Page size to 0 for optimal performance. Caution: Editing an LDAP server definition can cause a full synchronization to be initiated. This can have serious performance impact on your system until the synchronization completes. Note: If you must disable an LDAP server while synchronization is in progress, you must first cancel the synchronization and then disable the LDAP server. To initiate an LDAP synchronization from an LDAP server to the Control Center 1 Click Status > LDAP Synchronization. 2 Check the LDAP server you wish to synchronize to the Control Center.
-
 1
1 -
2
-
3
-
4
-
5
-
6
-
7
-
8
-
9
-
10
-
11
-
12
-
13
-
14
-
15
-
16
-
17
-
18
-
19
-
20
-
21
-
22
-
23
-
24
-
25
-
26
-
27
-
28
-
29
-
30
-
31
-
32
-
33
-
34
-
35
-
36
-
 37
37 -
 38
38 -
 39
39 -
 40
40 -
 41
41 -
 42
42 -
 43
43 -
 44
44 -
 45
45 -
 46
46 -
 47
47 -
48
-
49
-
50
-
51
-
52
-
53
-
54
-
55
-
56
-
57
-
58
-
59
-
60
-
61
-
62
-
63
-
64
-
65
-
66
-
67
-
68
-
69
-
70
-
71
-
72
-
73
-
74
-
75
-
76
-
77
-
78
-
79
-
80
-
81
-
82
-
83
-
84
-
85
-
86
-
87
-
88
-
89
-
90
-
91
-
92
-
93
-
94
-
95
-
96
-
97
-
98
-
99
-
100
-
101
-
102
-
103
-
104
-
105
-
106
-
107
-
108
-
109
-
110
-
111
-
112
-
113
-
114
-
115
-
116
-
117
-
118
-
119
-
120
-
121
-
122
-
123
-
124
-
125
-
126
-
127
-
128
-
129
-
130
-
131
-
132
-
133
-
134
-
135
-
136
-
137
-
138
-
139
-
140
-
141
-
142
-
143
-
144
-
145
-
146
-
147
-
148
-
149
-
150
-
151
-
152
-
153
-
154
-
155
-
156
-
157
-
158
-
159
-
160
-
161
-
162
-
163
-
164
-
165
-
166
-
167
-
168
-
169
-
170
-
171
-
172
-
173
-
174
-
175
-
176
-
177
-
178
-
179
-
180
-
181
-
182
-
183
-
184
-
185
-
186
-
187
-
188
-
189
-
190
-
191
-
192
-
193
-
194
-
195
-
196
-
197
-
198
-
199
-
200
-
201
-
202
-
203
-
204
-
205
-
206
-
207
-
208
-
209
-
210
-
211
-
212
-
213
-
214
-
215
-
216
-
217
-
218
-
219
-
220
-
221
-
222
-
223
-
224
-
225
-
226
-
227
-
228
-
229
-
230
-
231
-
232
-
233
-
234
-
235
-
236
-
237
-
238
-
239
-
240
-
241
-
242
-
243
-
244
-
245
-
246
-
247
-
248
-
249
 |
 |
