Brother International BES-100E BE-100 Workbook - English - Page 61
Setting entry and exit points
 |
View all Brother International BES-100E manuals
Add to My Manuals
Save this manual to your list of manuals |
Page 61 highlights
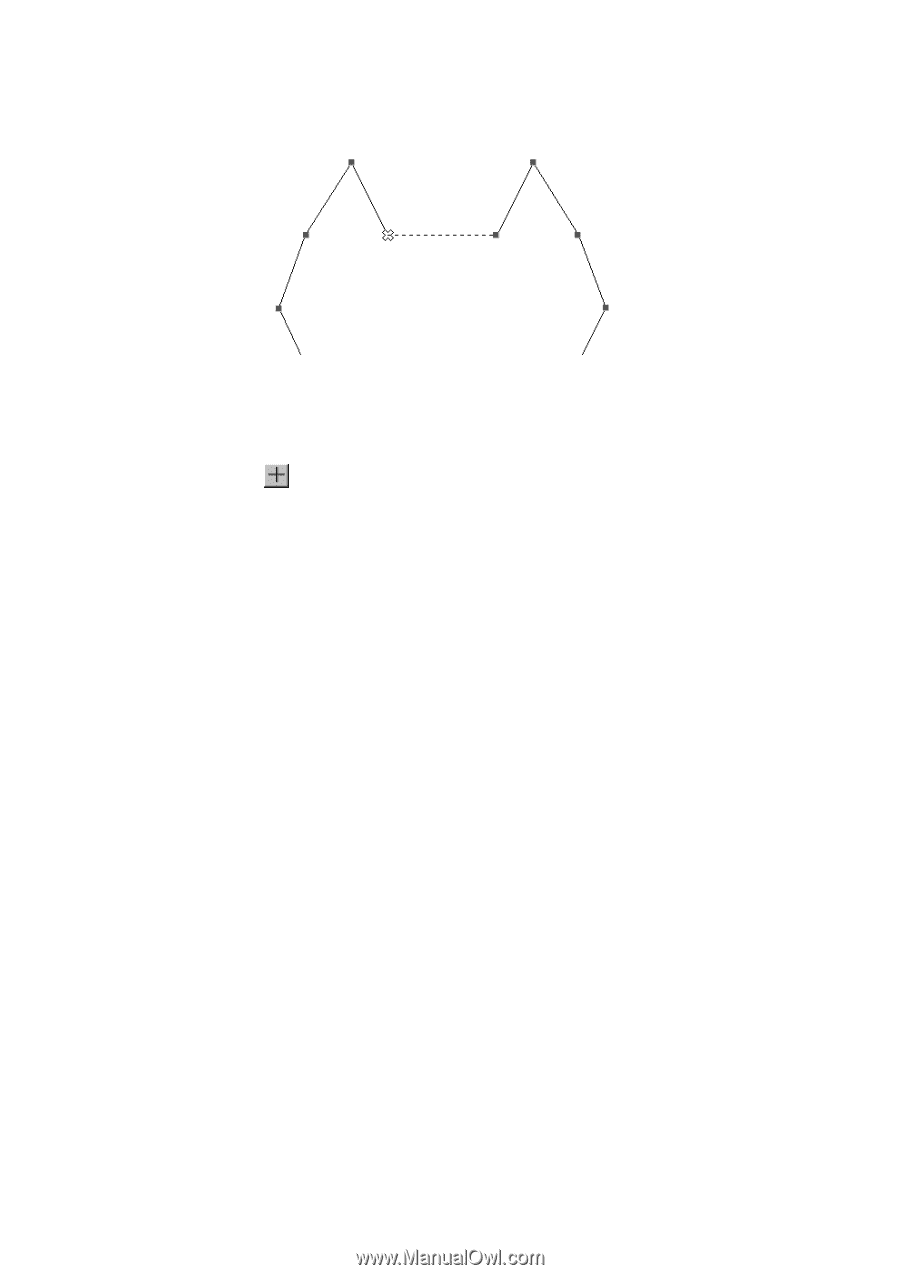
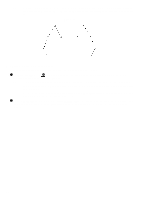
NOTE: After splitting a manual stitch, stitches should be inserted to form lock stitching in order to prevent the stitching from unraveling. For more information about inserting manual stitches, see chapter 20. Figure 97 s Setting entry and exit points To specify the punchpoint where sewing of the design shape begins or ends: 1 Using the Reshape tool ( ), select the punchpoint of the manual stitch that you wish to split. The selected punchpoint changes to light blue. NOTE: For regions and polygons, any punchpoint throughout the shape can be set as an entry or exit point. However, for columns and paths, only end points (which appear in red) can be set as entry and exit points. For more information about using the buttons in the Navigation palette to select punchpoints, see Navigating through the design in chapter 23. 2 On the Punchpoints drop-down menu, click Set Entry Point (to specify the punchpoint as the beginning stitch for the design shape) or click Set Exit Point (to specify the punchpoint as the final stitch for the design shape). 58
-
 1
1 -
2
-
3
-
4
-
5
-
6
-
7
-
8
-
9
-
10
-
11
-
12
-
13
-
14
-
15
-
16
-
17
-
18
-
19
-
20
-
21
-
22
-
23
-
24
-
25
-
26
-
27
-
28
-
29
-
30
-
31
-
32
-
33
-
34
-
35
-
36
-
37
-
38
-
39
-
40
-
41
-
42
-
43
-
44
-
45
-
46
-
47
-
48
-
49
-
50
-
51
-
52
-
53
-
54
-
55
-
 56
56 -
 57
57 -
 58
58 -
 59
59 -
 60
60 -
 61
61 -
 62
62 -
 63
63 -
 64
64 -
 65
65 -
 66
66 -
67
-
68
-
69
-
70
-
71
-
72
-
73
-
74
-
75
-
76
-
77
-
78
-
79
-
80
-
81
-
82
-
83
-
84
-
85
-
86
-
87
-
88
-
89
-
90
-
91
-
92
-
93
-
94
-
95
-
96
-
97
-
98
-
99
-
100
-
101
-
102
-
103
-
104
-
105
-
106
-
107
-
108
-
109
-
110
-
111
-
112
-
113
-
114
-
115
-
116
-
117
-
118
-
119
 |
 |