Brother International BES-100E BE-100 Workbook - English - Page 85
Performing maintenance on the programmable stitches
 |
View all Brother International BES-100E manuals
Add to My Manuals
Save this manual to your list of manuals |
Page 85 highlights
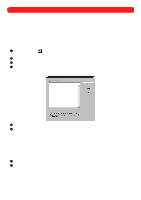
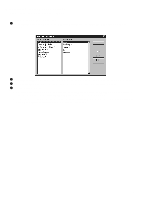
NOTE: To view the pattern on the screen, click Markers on the View drop-down menu. The Markers dialog box appears. Select the Needle penetrations check box (A check mark will appear.), and then click the OK button. Clicking the Zoom In button ( pattern can be viewed. ) enlarges the design so that the details of the When creating programmable stitches, the size does not matter since it will be constrained by the stitch length. s Performing maintenance on the programmable stitches New programmable stitches can be edited, renamed or even deleted. To edit or delete programmable stitches: 1 On the Options drop-down menu, click "Memorize" Maintenance. The "Memorize" Maintenance dialog box appears. 2 In the Select a category box, select Programmable fill stitch, Programmable jagged edge, or Programmable run stitch, depending on the type of stitch you wish to change. 3 In the Select a name box, select the stitch that you wish to change. 4 Do any of the following: x To edit the selected programmable stitch, click the Edit button. This opens the file. Edit the stitch as desired, and then save it. NOTE: For more information about selecting and moving punchpoints, see chapter 4. x To rename the selected programmable stitch, click the Rename button. The Rename dialog box appears. Type the new name in the Enter the new name box, and then click the OK button. x To delete the selected programmable stitch, click the Delete button. When the message Are you sure you want to delete this memorized item? appears, click the Yes button. 82
-
 1
1 -
2
-
3
-
4
-
5
-
6
-
7
-
8
-
9
-
10
-
11
-
12
-
13
-
14
-
15
-
16
-
17
-
18
-
19
-
20
-
21
-
22
-
23
-
24
-
25
-
26
-
27
-
28
-
29
-
30
-
31
-
32
-
33
-
34
-
35
-
36
-
37
-
38
-
39
-
40
-
41
-
42
-
43
-
44
-
45
-
46
-
47
-
48
-
49
-
50
-
51
-
52
-
53
-
54
-
55
-
56
-
57
-
58
-
59
-
60
-
61
-
62
-
63
-
64
-
65
-
66
-
67
-
68
-
69
-
70
-
71
-
72
-
73
-
74
-
75
-
76
-
77
-
78
-
79
-
 80
80 -
 81
81 -
 82
82 -
 83
83 -
 84
84 -
 85
85 -
 86
86 -
 87
87 -
 88
88 -
 89
89 -
 90
90 -
91
-
92
-
93
-
94
-
95
-
96
-
97
-
98
-
99
-
100
-
101
-
102
-
103
-
104
-
105
-
106
-
107
-
108
-
109
-
110
-
111
-
112
-
113
-
114
-
115
-
116
-
117
-
118
-
119
 |
 |
