Canon PowerShot S10 User Guide for ImageBrowser version 3.6 - Page 66
Saving the My Camera Settings to the Camera 7/10
 |
View all Canon PowerShot S10 manuals
Add to My Manuals
Save this manual to your list of manuals |
Page 66 highlights
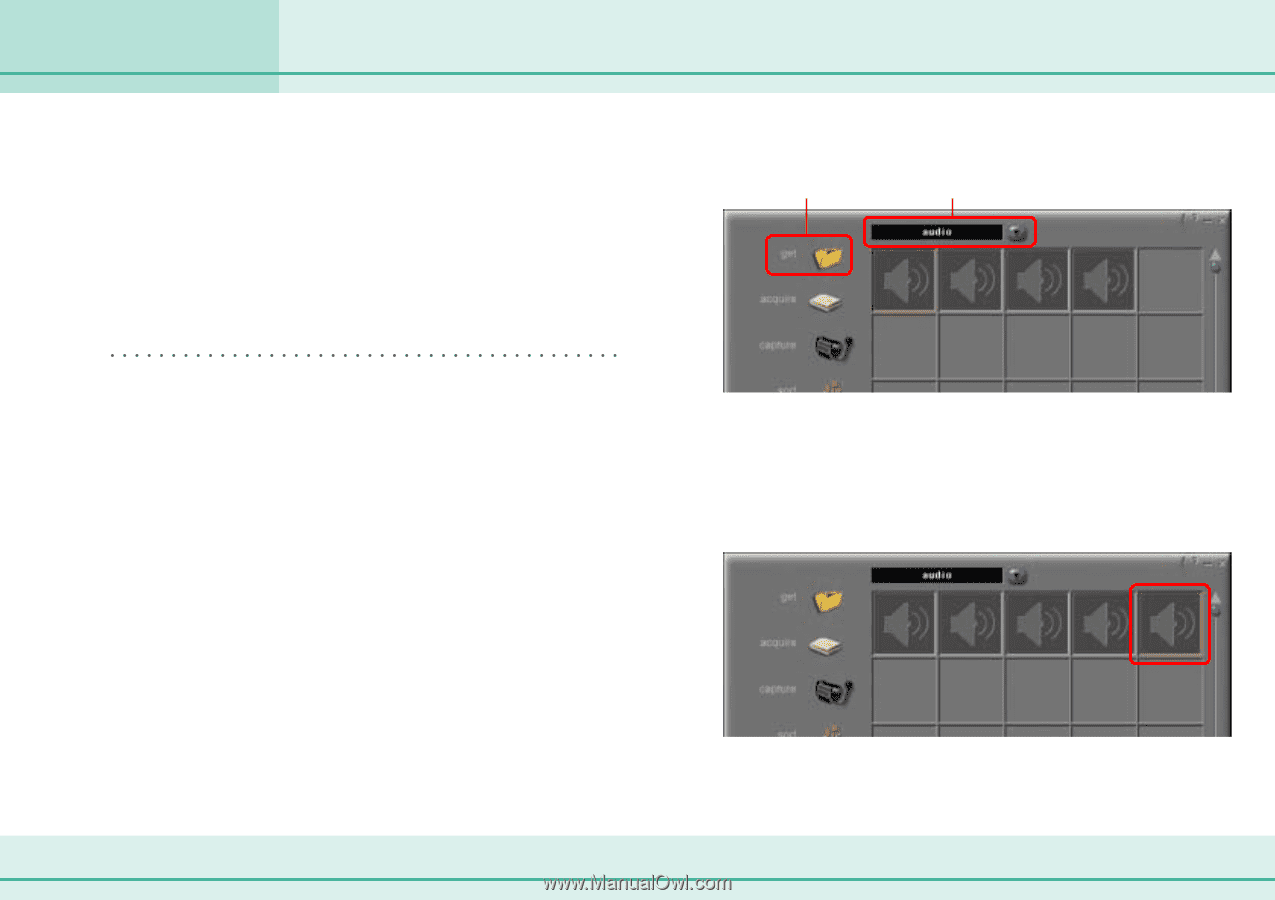
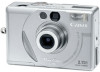
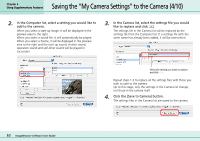
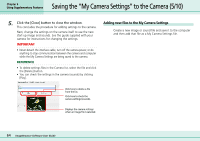
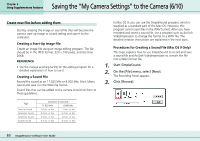
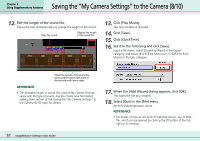
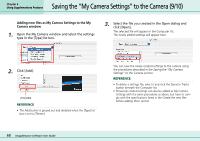
Chapter 6 Using Supplementary Features Saving the "My Camera Settings" to the Camera (7/10) 4. Click [Stop] to halt the recording. 5. Click [Save]. The Save dialog appears. 6. Save the file. Input a file name and click the [Save] button. This saves the recorded sound. REFERENCE • Save the sound file to the disk containing the System folder. You cannot save it to any other disk. 7. On the [File] menu, select [Quit]. SimpleSound closes. 8. On the disk to which ArcSoft VideoImpression was installed, double-click the [VideoImpression] folder, followed by the [VideoImpression] icon. ArcSoft VideoImpression starts. 9. Click [New]. 10. Select [audio] from the list box and click [get]. Click [get]. Select [audio]. When the "Open" dialog appears, select the sound file you created in SimpleSound and click [Open]. A new sound icon is added. 11. Double-click the newly added sound icon. The window will change to the sound editing window. 66 ImageBrowser Software User Guide
-
 1
1 -
2
-
3
-
4
-
5
-
6
-
7
-
8
-
9
-
10
-
11
-
12
-
13
-
14
-
15
-
16
-
17
-
18
-
19
-
20
-
21
-
22
-
23
-
24
-
25
-
26
-
27
-
28
-
29
-
30
-
31
-
32
-
33
-
34
-
35
-
36
-
37
-
38
-
39
-
40
-
41
-
42
-
43
-
44
-
45
-
46
-
47
-
48
-
49
-
50
-
51
-
52
-
53
-
54
-
55
-
56
-
57
-
58
-
59
-
60
-
 61
61 -
 62
62 -
 63
63 -
 64
64 -
 65
65 -
 66
66 -
 67
67 -
 68
68 -
 69
69 -
 70
70 -
 71
71 -
72
-
73
-
74
-
75
-
76
-
77
-
78
-
79
-
80
-
81
-
82
-
83
-
84
-
85
-
86
-
87
-
88
-
89
-
90
-
91
-
92
-
93
-
94
-
95
-
96
-
97
-
98
-
99
-
100
-
101
-
102
-
103
-
104
-
105
-
106
-
107
-
108
-
109
-
110
 |
 |