Canon PowerShot S10 User Guide for ImageBrowser version 3.6 - Page 86
Converting RAW Images 2/4
 |
View all Canon PowerShot S10 manuals
Add to My Manuals
Save this manual to your list of manuals |
Page 86 highlights
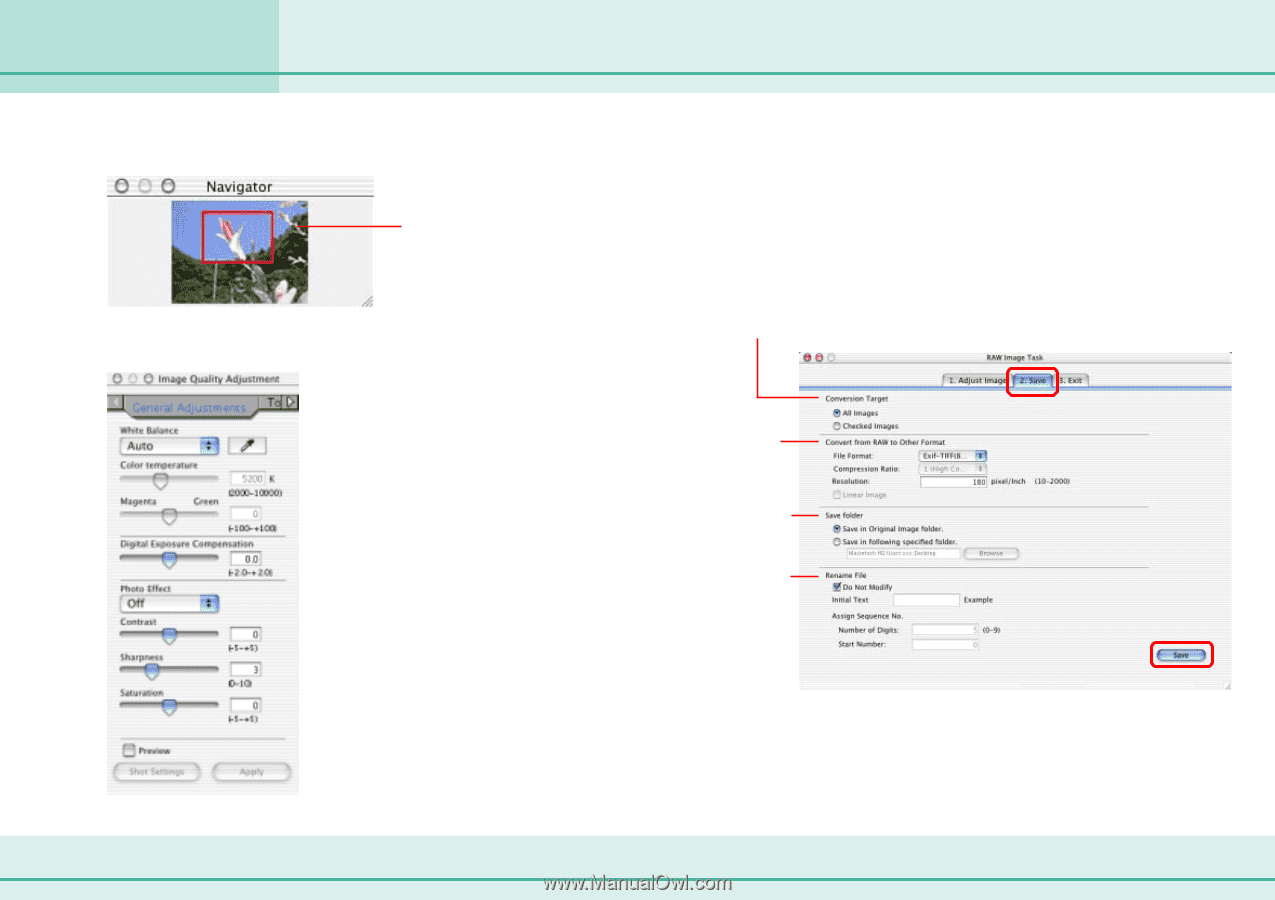
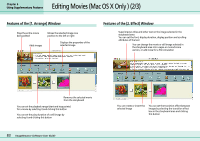
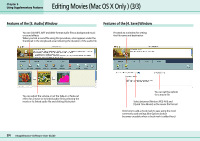
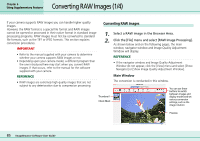
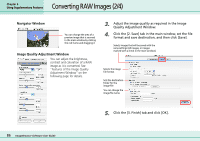
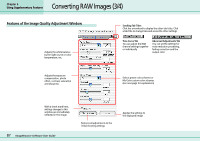
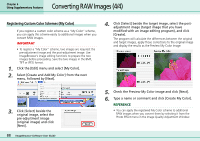
Converting RAW Images (2/4) Chapter 6 Using Supplementary Features ■ Navigator Window You can change the area of a preview image that is zoomed in the main window by clicking this red frame and dragging it ■ Image Quality Adjustment Window You can adjust the brightness, contrast and coloration of a RAW image as it is converted. See "Features of the Image Quality Adjustment Window" on the following page for details. 3. Adjust the image quality as required in the Image Quality Adjustment Window. 4. Click the [2. Save] tab in the main window, set the file format and save destination, and then click [Save]. Selects images that will be saved with the same settings (All images, or images marked with a check in the main window) Selects the image file format Sets the destination folder for the image file You can change the image file name 5. Click the [3. Finish] tab and click [OK]. 86 ImageBrowser Software User Guide
-
 1
1 -
2
-
3
-
4
-
5
-
6
-
7
-
8
-
9
-
10
-
11
-
12
-
13
-
14
-
15
-
16
-
17
-
18
-
19
-
20
-
21
-
22
-
23
-
24
-
25
-
26
-
27
-
28
-
29
-
30
-
31
-
32
-
33
-
34
-
35
-
36
-
37
-
38
-
39
-
40
-
41
-
42
-
43
-
44
-
45
-
46
-
47
-
48
-
49
-
50
-
51
-
52
-
53
-
54
-
55
-
56
-
57
-
58
-
59
-
60
-
61
-
62
-
63
-
64
-
65
-
66
-
67
-
68
-
69
-
70
-
71
-
72
-
73
-
74
-
75
-
76
-
77
-
78
-
79
-
80
-
 81
81 -
 82
82 -
 83
83 -
 84
84 -
 85
85 -
 86
86 -
 87
87 -
 88
88 -
 89
89 -
 90
90 -
 91
91 -
92
-
93
-
94
-
95
-
96
-
97
-
98
-
99
-
100
-
101
-
102
-
103
-
104
-
105
-
106
-
107
-
108
-
109
-
110
 |
 |