Epson 7850p User Manual - Page 80
Adding WEP Encryption, or go to Setting Up Your Macintosh for Access Point
 |
UPC - 010343845992
View all Epson 7850p manuals
Add to My Manuals
Save this manual to your list of manuals |
Page 80 highlights
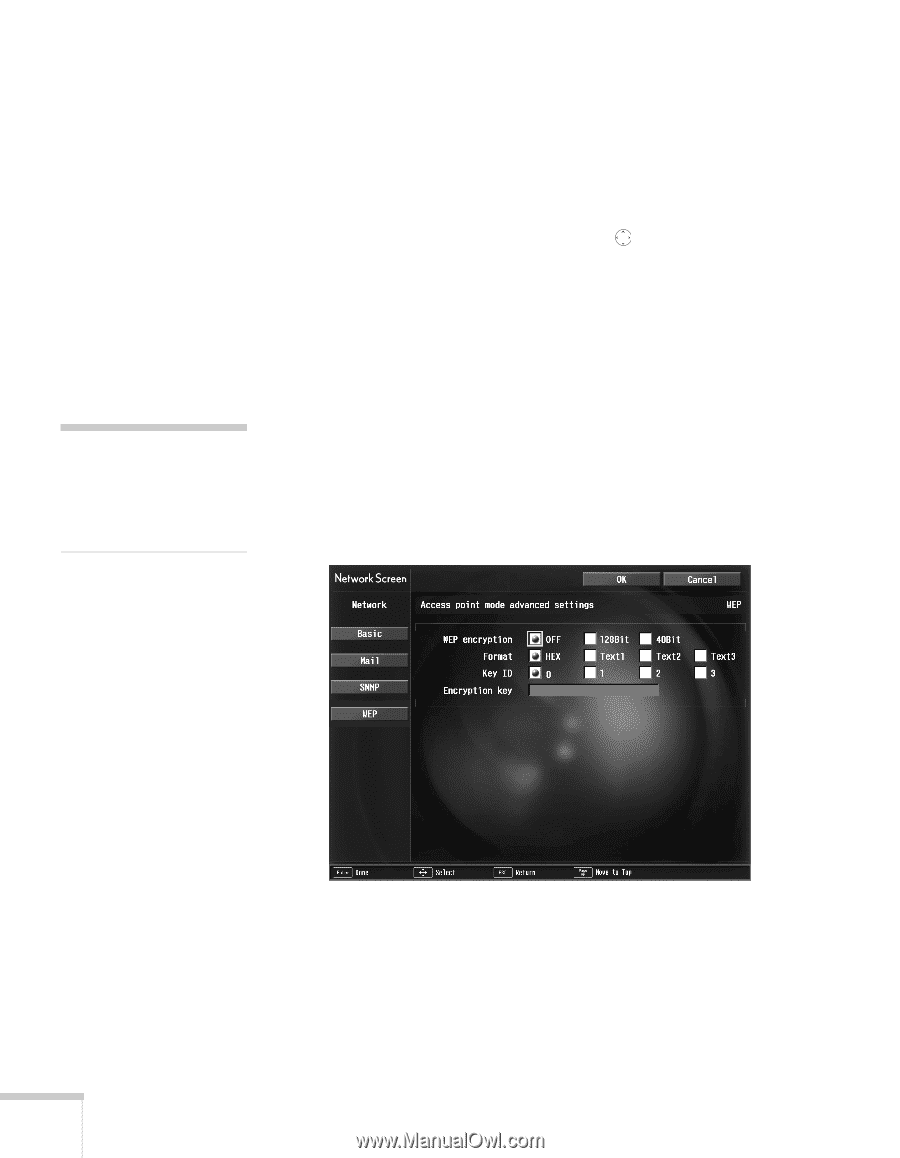
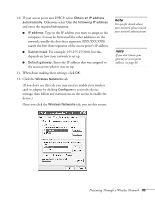
note For instructions on how to access the Access point mode advanced settings screen, see page 77. 10. If you want to set up WEP encryption on the projector for additional security of wireless transmissions, click the WEP button on the left side of the screen and continue with "Adding WEP Encryption" on page 80. Otherwise, continue with step 11. 11. When done making your settings, highlight the OK button at the top of the screen (you can either use the button on the remote control or press ESC to highlight it), then press Enter. Highlight the OK button again and press Enter to return to the main EasyMP Network Screen. Now you're ready to set up your computer for wireless projecting. Continue with "Configuring the Network Settings for Windows" on page 81, or go to "Setting Up Your Macintosh for Access Point Mode" on page 87. Adding WEP Encryption When you click the WEP button on the Access point mode advanced settings screen, you see this screen: 1. If you want to enable WEP encryption, highlight either 128Bit for 128 bit WEP encryption, or 40Bit for 40 bit WEP encryption. Then press Enter. 2. For Format, highlight HEX to enable hexadecimal input, then press Enter. 80 Presenting Through a Wireless Network
-
 1
1 -
2
-
3
-
4
-
5
-
6
-
7
-
8
-
9
-
10
-
11
-
12
-
13
-
14
-
15
-
16
-
17
-
18
-
19
-
20
-
21
-
22
-
23
-
24
-
25
-
26
-
27
-
28
-
29
-
30
-
31
-
32
-
33
-
34
-
35
-
36
-
37
-
38
-
39
-
40
-
41
-
42
-
43
-
44
-
45
-
46
-
47
-
48
-
49
-
50
-
51
-
52
-
53
-
54
-
55
-
56
-
57
-
58
-
59
-
60
-
61
-
62
-
63
-
64
-
65
-
66
-
67
-
68
-
69
-
70
-
71
-
72
-
73
-
74
-
 75
75 -
 76
76 -
 77
77 -
 78
78 -
 79
79 -
 80
80 -
 81
81 -
 82
82 -
 83
83 -
 84
84 -
 85
85 -
86
-
87
-
88
-
89
-
90
-
91
-
92
-
93
-
94
-
95
-
96
-
97
-
98
-
99
-
100
-
101
-
102
-
103
-
104
-
105
-
106
-
107
-
108
-
109
-
110
-
111
-
112
-
113
-
114
-
115
-
116
-
117
-
118
-
119
-
120
-
121
-
122
-
123
-
124
-
125
-
126
-
127
-
128
-
129
-
130
-
131
-
132
-
133
-
134
-
135
-
136
-
137
-
138
-
139
-
140
-
141
-
142
-
143
-
144
-
145
-
146
-
147
-
148
-
149
-
150
-
151
-
152
-
153
-
154
-
155
-
156
-
157
-
158
-
159
-
160
-
161
-
162
-
163
-
164
-
165
-
166
-
167
-
168
-
169
-
170
-
171
-
172
-
173
-
174
-
175
-
176
-
177
-
178
-
179
-
180
-
181
-
182
-
183
-
184
-
185
-
186
-
187
-
188
-
189
-
190
-
191
-
192
-
193
-
194
-
195
-
196
-
197
-
198
-
199
-
200
-
201
-
202
-
203
-
204
-
205
-
206
-
207
-
208
-
209
-
210
-
211
-
212
-
213
-
214
-
215
-
216
-
217
-
218
-
219
-
220
-
221
-
222
-
223
-
224
 |
 |