HP Photosmart 2570 User Guide - Page 30
Use printer sharing (Windows), Use Webscan, System Preferences, Sharing, Services, Printer Sharing - how to scan
 |
View all HP Photosmart 2570 manuals
Add to My Manuals
Save this manual to your list of manuals |
Page 30 highlights
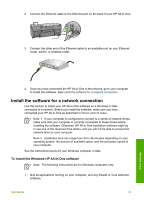
The computer searches for the HP All-in-One. 7. In the printer list, select the HP All-in-One, then click Add. The HP All-in-One is added to the printer list. 8. Print as you would to any printer. Use printer sharing (Windows) If your computer is on a network, and another computer on the network is connected to the HP All-in-One by using a USB cable, you can use that device as your printer using Windows printer sharing. The computer connected directly to the HP All-in-One acts as the host for the printer and has full feature functionality. Other computers on the network, which are referred to as clients, have access only to the print features. All other functions must be performed on the host computer. For more information on enabling Windows printer sharing, refer to the user guide that came with your computer or the Windows onscreen Help. Use printer sharing (Mac) If your computer is on a network, and another computer on the network is connected to the HP All-in-One with a USB cable, you share that device using printer sharing. Other computers on the network, which are referred to as clients, have access only to the print features. All other functions must be performed on the host computer. To enable printer sharing 1. On the client and host computers, do the following: a. Select System Preferences in the Dock. The System Preferences window appears. b. Select Sharing. c. From the Services tab, click Printer Sharing. 2. On the host computer, do the following: a. Select System Preferences in the Dock. The System Preferences window appears. b. Select Print & Fax. c. Click the check box next to Share my printers with other computers. Use Webscan Webscan is a feature of the Embedded Web Server that lets you scan photos and documents from your HP All-in-One to your computer using a Web browser. This feature is available even if you chose not to install the device software on your computer. For more information on Webscan, see the online help in the Embedded Web Server. For more information on the Embedded Web Server, see Connect to a network. Finish setup User Guide 27
-
 1
1 -
2
-
3
-
4
-
5
-
6
-
7
-
8
-
9
-
10
-
11
-
12
-
13
-
14
-
15
-
16
-
17
-
18
-
19
-
20
-
21
-
22
-
23
-
24
-
 25
25 -
 26
26 -
 27
27 -
 28
28 -
 29
29 -
 30
30 -
 31
31 -
 32
32 -
 33
33 -
 34
34 -
 35
35 -
36
-
37
-
38
-
39
-
40
-
41
-
42
-
43
-
44
-
45
-
46
-
47
-
48
-
49
-
50
-
51
-
52
-
53
-
54
-
55
-
56
-
57
-
58
-
59
-
60
-
61
-
62
-
63
-
64
-
65
-
66
-
67
-
68
-
69
-
70
-
71
-
72
-
73
-
74
-
75
-
76
-
77
-
78
-
79
-
80
-
81
-
82
-
83
-
84
-
85
-
86
-
87
-
88
-
89
-
90
-
91
-
92
-
93
-
94
-
95
-
96
-
97
-
98
-
99
-
100
-
101
-
102
-
103
-
104
-
105
-
106
-
107
-
108
-
109
-
110
-
111
-
112
-
113
-
114
-
115
-
116
-
117
-
118
-
119
-
120
-
121
-
122
-
123
-
124
-
125
-
126
-
127
-
128
-
129
-
130
-
131
-
132
-
133
-
134
-
135
-
136
-
137
-
138
-
139
-
140
-
141
-
142
 |
 |