HP Photosmart 2570 User Guide - Page 99
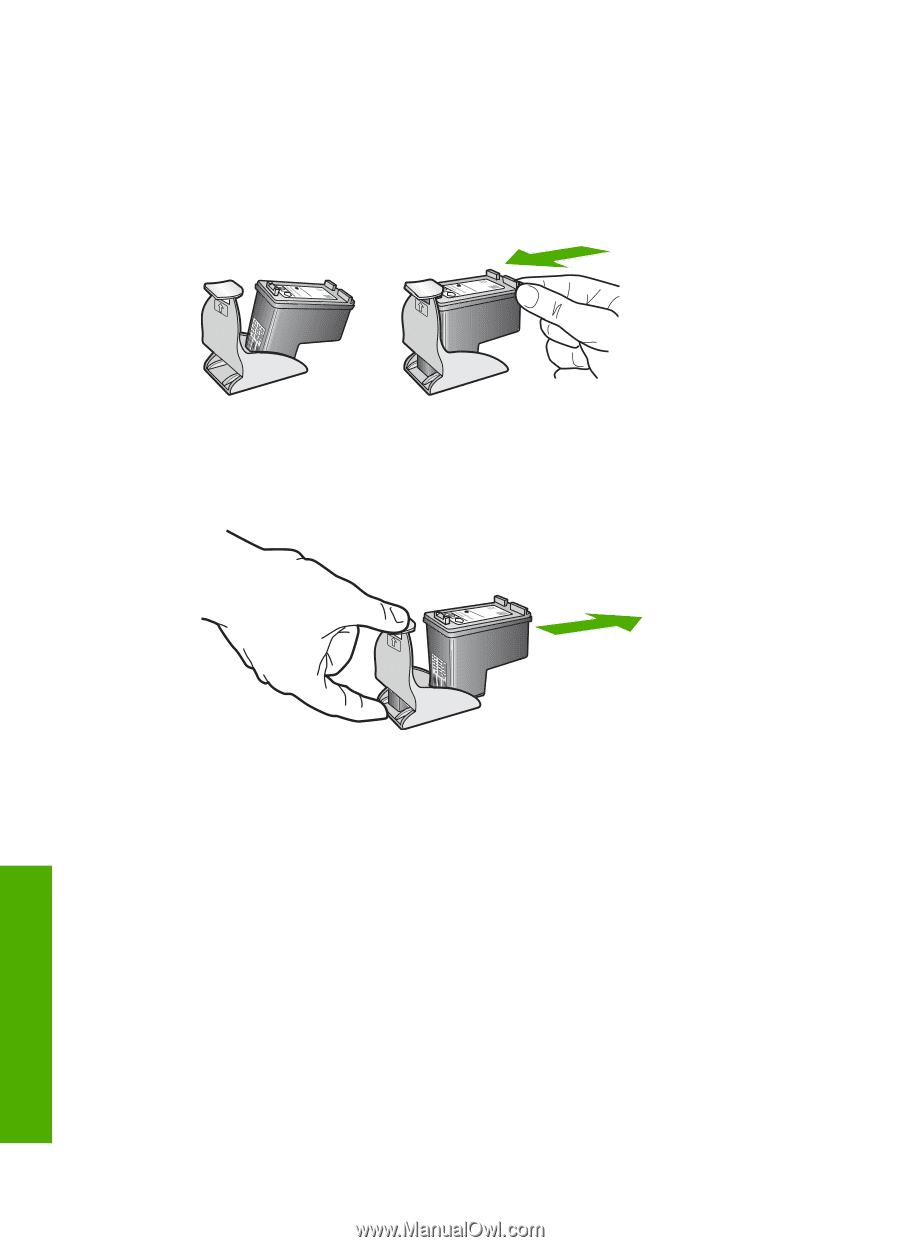
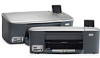
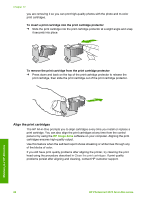
Align the print cartridges, To insert a print cartridge into the print cartridge protector
 |
View all HP Photosmart 2570 manuals
Add to My Manuals
Save this manual to your list of manuals |
Page 99 highlights
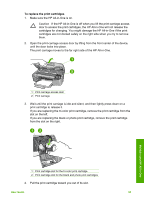
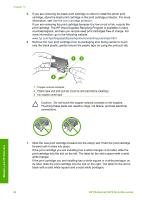
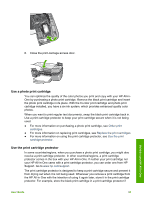
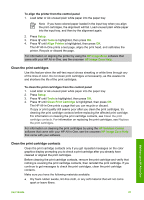
Chapter 12 you are removing it so you can print high-quality photos with the photo and tri-color print cartridges. To insert a print cartridge into the print cartridge protector ➔ Slide the print cartridge into the print cartridge protector at a slight angle and snap it securely into place. To remove the print cartridge from the print cartridge protector ➔ Press down and back on the top of the print cartridge protector to release the print cartridge, then slide the print cartridge out of the print cartridge protector. Maintain your HP All-in-One Align the print cartridges The HP All-in-One prompts you to align cartridges every time you install or replace a print cartridge. You can also align the print cartridges at any time from the control panel or by using the HP Image Zone software on your computer. Aligning the print cartridges ensures high-quality output. Use this feature when the self-test report shows streaking or white lines through any of the blocks of color. If you still have print quality problems after aligning the printer, try cleaning the print head using the procedure described in Clean the print cartridges. If print quality problems persist after aligning and cleaning, contact HP customer support. 96 HP Photosmart 2570 All-in-One series
-
 1
1 -
2
-
3
-
4
-
5
-
6
-
7
-
8
-
9
-
10
-
11
-
12
-
13
-
14
-
15
-
16
-
17
-
18
-
19
-
20
-
21
-
22
-
23
-
24
-
25
-
26
-
27
-
28
-
29
-
30
-
31
-
32
-
33
-
34
-
35
-
36
-
37
-
38
-
39
-
40
-
41
-
42
-
43
-
44
-
45
-
46
-
47
-
48
-
49
-
50
-
51
-
52
-
53
-
54
-
55
-
56
-
57
-
58
-
59
-
60
-
61
-
62
-
63
-
64
-
65
-
66
-
67
-
68
-
69
-
70
-
71
-
72
-
73
-
74
-
75
-
76
-
77
-
78
-
79
-
80
-
81
-
82
-
83
-
84
-
85
-
86
-
87
-
88
-
89
-
90
-
91
-
92
-
93
-
 94
94 -
 95
95 -
 96
96 -
 97
97 -
 98
98 -
 99
99 -
 100
100 -
 101
101 -
 102
102 -
 103
103 -
 104
104 -
105
-
106
-
107
-
108
-
109
-
110
-
111
-
112
-
113
-
114
-
115
-
116
-
117
-
118
-
119
-
120
-
121
-
122
-
123
-
124
-
125
-
126
-
127
-
128
-
129
-
130
-
131
-
132
-
133
-
134
-
135
-
136
-
137
-
138
-
139
-
140
-
141
-
142
 |
 |