HP Photosmart 2570 User Guide - Page 68
Save photos to your computer, Set New Defaults
 |
View all HP Photosmart 2570 manuals
Add to My Manuals
Save this manual to your list of manuals |
Page 68 highlights
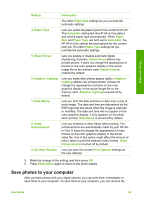
Photos and videos Setting Description The other Paper Size settings let you override the automatic settings. 4. Paper Type Lets you select the paper type for the current print job. The Automatic setting lets the HP All-in-One detect and set the paper type automatically. When Paper Size and Paper Type are both set to Automatic, the HP All-in-One selects the best options for the current print job. The other Paper Type settings let you override the automatic settings. 5. Smart Focus Lets you enable or disable automatic digital sharpening of photos. Smart Focus affects only printed photos. It does not change the appearance of photos on the color graphics display or the actual image file on the memory card. Smart Focus is enabled by default. 6. Adaptive Lighting Lets you make dark photos appear lighter. Adaptive Lighting affects only printed photos. It does not change the appearance of photos on the color graphics display or the actual image file on the memory card. Adaptive Lighting is turned off by default. 7. Date Stamp Lets you print the date and time or date only on top of each image. The date and time are determined by the EXIF tags that are stored when the image is captured or modified. The date and time will not appear on the color graphics display. It only appears on the photo when printed. Date Stamp is turned off by default. 8. Video Enhancement Lets you enhance a video frame when printing. The enhancements are automatically made by your HP Allin-One. It does not change the appearance of video frames on the color graphics display or the actual video file. Use of this option might affect the amount of time it takes to print the selected video frames. Video Enhancement is turned off by default. 9. Set New Defaults Lets you save the current Print Options settings as the new defaults. 5. Make the change to the setting, and then press OK. 6. Press Photo Menu again to return to the photo display. Save photos to your computer After you take photos with your digital camera, you can print them immediately or save them to your computer. To save them to your computer, you can remove the User Guide 65
-
 1
1 -
2
-
3
-
4
-
5
-
6
-
7
-
8
-
9
-
10
-
11
-
12
-
13
-
14
-
15
-
16
-
17
-
18
-
19
-
20
-
21
-
22
-
23
-
24
-
25
-
26
-
27
-
28
-
29
-
30
-
31
-
32
-
33
-
34
-
35
-
36
-
37
-
38
-
39
-
40
-
41
-
42
-
43
-
44
-
45
-
46
-
47
-
48
-
49
-
50
-
51
-
52
-
53
-
54
-
55
-
56
-
57
-
58
-
59
-
60
-
61
-
62
-
 63
63 -
 64
64 -
 65
65 -
 66
66 -
 67
67 -
 68
68 -
 69
69 -
 70
70 -
 71
71 -
 72
72 -
 73
73 -
74
-
75
-
76
-
77
-
78
-
79
-
80
-
81
-
82
-
83
-
84
-
85
-
86
-
87
-
88
-
89
-
90
-
91
-
92
-
93
-
94
-
95
-
96
-
97
-
98
-
99
-
100
-
101
-
102
-
103
-
104
-
105
-
106
-
107
-
108
-
109
-
110
-
111
-
112
-
113
-
114
-
115
-
116
-
117
-
118
-
119
-
120
-
121
-
122
-
123
-
124
-
125
-
126
-
127
-
128
-
129
-
130
-
131
-
132
-
133
-
134
-
135
-
136
-
137
-
138
-
139
-
140
-
141
-
142
 |
 |