HP Photosmart 2570 User Guide - Page 57
View photos, View photos using the HP All-in-One, View a slideshow, View photos using your computer
 |
View all HP Photosmart 2570 manuals
Add to My Manuals
Save this manual to your list of manuals |
Page 57 highlights
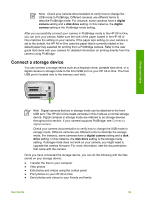
Photos and videos Chapter 6 Caution Never attempt to disconnect a storage device while it is being accessed. Doing so can damage files on the storage device. You can safely remove a storage device only when the status light next to the memory card slots is not blinking. View photos You can view photos on the color graphics display of your HP All-in-One. You can also view photos using the HP Image Zone software that came with your HP All-inOne. View photos using the HP All-in-One You can view and select photos on the color graphics display of your HP All-in-One, either individually or as a slideshow. View a photo You can view a photo on the control panel of your HP All-in-One. To view a photo 1. Insert the memory card into the appropriate slot on your HP All-in-One, or connect a storage device to the front USB port. 2. Press or until the photo you want to view appears on the color graphics display. Tip You can press and hold down or to quickly navigate through all photos. View a slideshow You can use the Slideshow option on the Photo Menu to view all the photos on a memory card or storage device as a slideshow. To view a slideshow 1. Insert a memory card into the appropriate slot on your HP All-in-One, or connect a storage device to the front USB port. 2. Press Photo to display the Photo Menu. 3. Press until Slideshow is highlighted, then press OK to start the slideshow. 4. Press Cancel to end the slideshow. 5. Press Photo again to return to the photo display. View photos using your computer You can view and edit photos using the HP Image Zone software that came with your HP All-in-One. For more information, see the onscreen HP Image Zone Help. 54 HP Photosmart 2570 All-in-One series
-
 1
1 -
2
-
3
-
4
-
5
-
6
-
7
-
8
-
9
-
10
-
11
-
12
-
13
-
14
-
15
-
16
-
17
-
18
-
19
-
20
-
21
-
22
-
23
-
24
-
25
-
26
-
27
-
28
-
29
-
30
-
31
-
32
-
33
-
34
-
35
-
36
-
37
-
38
-
39
-
40
-
41
-
42
-
43
-
44
-
45
-
46
-
47
-
48
-
49
-
50
-
51
-
 52
52 -
 53
53 -
 54
54 -
 55
55 -
 56
56 -
 57
57 -
 58
58 -
 59
59 -
 60
60 -
 61
61 -
 62
62 -
63
-
64
-
65
-
66
-
67
-
68
-
69
-
70
-
71
-
72
-
73
-
74
-
75
-
76
-
77
-
78
-
79
-
80
-
81
-
82
-
83
-
84
-
85
-
86
-
87
-
88
-
89
-
90
-
91
-
92
-
93
-
94
-
95
-
96
-
97
-
98
-
99
-
100
-
101
-
102
-
103
-
104
-
105
-
106
-
107
-
108
-
109
-
110
-
111
-
112
-
113
-
114
-
115
-
116
-
117
-
118
-
119
-
120
-
121
-
122
-
123
-
124
-
125
-
126
-
127
-
128
-
129
-
130
-
131
-
132
-
133
-
134
-
135
-
136
-
137
-
138
-
139
-
140
-
141
-
142
 |
 |