HP Photosmart 2570 User Guide - Page 78
Make a borderless copy of a photo, Crop an original, Stop copying, Copy Menu, Reduce/Enlarge
 |
View all HP Photosmart 2570 manuals
Add to My Manuals
Save this manual to your list of manuals |
Page 78 highlights
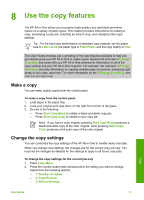
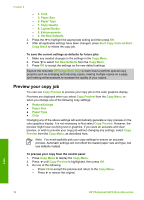
Make a borderless copy of a photo You can make borderless copies on both large and small photo papers. For the best quality when copying a photo, load photo paper in the paper tray and change your copy settings for the correct paper type and photo enhancement. 1. Load photo paper in the paper tray. You can load up to 10 x 15 cm (4 x 6 inch) photo paper (without tabs) into the photo tray. Larger size photo paper, however, must be loaded in the main tray. 2. Load your original photo print side down on the right front corner of the glass. Position the photo on the glass so the long edge of the photo is along the front edge of the glass. 3. Press Copy Menu to display the Copy Menu. 4. Press to highlight Reduce/Enlarge, then press OK. 5. Press to highlight Fill Entire Page, then press OK. 6. Press Start Copy Black or Start Copy Color. The HP All-in-One makes a borderless copy of your original photo, as shown below. Tip If the output is not borderless, then set the paper size to the appropriate borderless paper size, set the paper type to Photo Paper, and then try again. For more information on changing copy settings, see Change the copy settings. Crop an original Before copying an original, you might want select an area to copy using the Crop setting from the Copy Menu. Selecting the Crop setting initiates a scan and displays a preview of the original on the color graphics display. Cropping changes the dimensions of the image, thus decreasing its physical size. Tip You can resize the cropped image by changing the Reduce/Enlarge setting. Use Fill Entire Page to make a borderless copy of the cropped image. Use Fit to Page to make a copy with borders. Enlarging a cropped image might affect print quality depending on the resolution of the image. To crop an image from the control panel 1. Press Copy to display the Copy Menu. 2. Press until Crop is highlighted, then press OK. 3. Use the arrow keys to set the position of the upper-left corner of the crop area. 4. Press OK. 5. Use the arrow keys to set the position of the lower-right corner of the crop area. 6. Press OK. The cropped image is displayed on the color graphics display. Stop copying ➔ To stop copying, press Cancel on the control panel. Copy User Guide 75
-
 1
1 -
2
-
3
-
4
-
5
-
6
-
7
-
8
-
9
-
10
-
11
-
12
-
13
-
14
-
15
-
16
-
17
-
18
-
19
-
20
-
21
-
22
-
23
-
24
-
25
-
26
-
27
-
28
-
29
-
30
-
31
-
32
-
33
-
34
-
35
-
36
-
37
-
38
-
39
-
40
-
41
-
42
-
43
-
44
-
45
-
46
-
47
-
48
-
49
-
50
-
51
-
52
-
53
-
54
-
55
-
56
-
57
-
58
-
59
-
60
-
61
-
62
-
63
-
64
-
65
-
66
-
67
-
68
-
69
-
70
-
71
-
72
-
 73
73 -
 74
74 -
 75
75 -
 76
76 -
 77
77 -
 78
78 -
 79
79 -
 80
80 -
 81
81 -
 82
82 -
 83
83 -
84
-
85
-
86
-
87
-
88
-
89
-
90
-
91
-
92
-
93
-
94
-
95
-
96
-
97
-
98
-
99
-
100
-
101
-
102
-
103
-
104
-
105
-
106
-
107
-
108
-
109
-
110
-
111
-
112
-
113
-
114
-
115
-
116
-
117
-
118
-
119
-
120
-
121
-
122
-
123
-
124
-
125
-
126
-
127
-
128
-
129
-
130
-
131
-
132
-
133
-
134
-
135
-
136
-
137
-
138
-
139
-
140
-
141
-
142
 |
 |