Lexmark 5470 User's Guide - Page 43
Understanding the printer software, Productivity Studio Welcome Screen - driver
 |
UPC - 734646010801
View all Lexmark 5470 manuals
Add to My Manuals
Save this manual to your list of manuals |
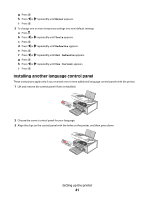
Page 43 highlights
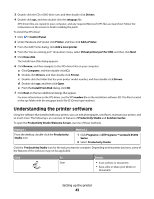
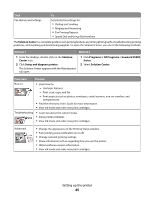
3 Double-click the CD or DVD drive icon, and then double-click Drivers. 4 Double-click xps, and then double-click the setupxps file. XPS driver files are copied to your computer, and any required Microsoft XPS files are launched. Follow the instructions on the screen to finish installing the patch. To install the XPS driver: 1 Click Œ Control Panel. 2 Under Hardware and Sound, click Printer, and then click Add a Printer. 3 From the Add Printer dialog, click Add a local printer. 4 From the "Use an existing port" drop-down menu, select Virtual printer port for USB, and then click Next. 5 Click Have disk. The Install From Disk dialog appears. 6 Click Browse, and then navigate to the XPS driver files on your computer: a Click Computer, and then double-click (C:). b Double-click Drivers, and then double-click Printer. c Double-click the folder that has your printer model number, and then double-click Drivers. d Double-click xps, and then click Open. e From the Install From Disk dialog, click OK. 7 Click Next on the two additional dialogs that appear. For more information on the XPS driver, see the XPS readme file on the installation software CD. The file is located in the xps folder with the setupxps batch file (D:\Drivers\xps\readme). Understanding the printer software Using the software that installed with your printer, you can edit photographs, send faxes, maintain your printer, and so much more. The following is an overview of features of Productivity Studio and Solution Center. To open the Productivity Studio Welcome Screen, use one of these methods: Method 1 From the desktop, double-click the Productivity Studio icon. Method 2 1 Click Programs or All Programs ŒLexmark X5400 Series. 2 Select Productivity Studio. Click the Productivity Studio icon for the task you want to complete. Depending on the printer you have, some of the features of this software may not be applicable. Click To Scan Details • Scan a photo or document. • Save, edit, or share your photo or document. Setting up the printer 43
-
 1
1 -
2
-
3
-
4
-
5
-
6
-
7
-
8
-
9
-
10
-
11
-
12
-
13
-
14
-
15
-
16
-
17
-
18
-
19
-
20
-
21
-
22
-
23
-
24
-
25
-
26
-
27
-
28
-
29
-
30
-
31
-
32
-
33
-
34
-
35
-
36
-
37
-
 38
38 -
 39
39 -
 40
40 -
 41
41 -
 42
42 -
 43
43 -
 44
44 -
 45
45 -
 46
46 -
 47
47 -
 48
48 -
49
-
50
-
51
-
52
-
53
-
54
-
55
-
56
-
57
-
58
-
59
-
60
-
61
-
62
-
63
-
64
-
65
-
66
-
67
-
68
-
69
-
70
-
71
-
72
-
73
-
74
-
75
-
76
-
77
-
78
-
79
-
80
-
81
-
82
-
83
-
84
-
85
-
86
-
87
-
88
-
89
-
90
-
91
-
92
-
93
-
94
-
95
-
96
-
97
-
98
-
99
-
100
-
101
-
102
-
103
-
104
-
105
-
106
-
107
-
108
-
109
-
110
-
111
-
112
-
113
-
114
-
115
-
116
-
117
-
118
-
119
-
120
-
121
-
122
-
123
-
124
-
125
-
126
-
127
-
128
-
129
-
130
-
131
-
132
-
133
-
134
-
135
-
136
-
137
-
138
-
139
-
140
-
141
-
142
-
143
-
144
-
145
-
146
-
147
-
148
-
149
-
150
-
151
-
152
-
153
-
154
-
155
-
156
-
157
-
158
-
159
-
160
-
161
-
162
-
163
-
164
-
165
-
166
-
167
-
168
-
169
-
170
-
171
-
172
-
173
-
174
-
175
-
176
-
177
-
178
-
179
-
180
-
181
-
182
-
183
-
184
-
185
-
186
-
187
-
188
-
189
-
190
-
191
-
192
-
193
-
194
-
195
-
196
-
197
-
198
-
199
-
200
-
201
-
202
 |
 |