Canon imageCLASS MF6595cx imageCLASS MF6500 Series Reference Guide - Page 114
Basic Network Settings, IP Address Setting
 |
View all Canon imageCLASS MF6595cx manuals
Add to My Manuals
Save this manual to your list of manuals |
Page 114 highlights
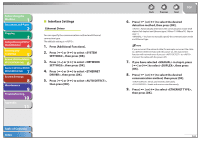
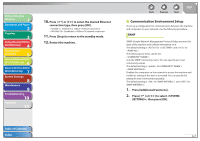
Before Using the Machine 1 Document and Paper 2 Copying 3 Sending and Receiving (MF6595cx/ MF6595/MF6590 Only) 4 Printing and Scanning 5 Network (MF6595cx/MF6595/ 6 MF6590/MF6540 Only) Remote UI (MF6595cx/MF6595/ 7 MF6590/MF6540 Only) System Settings 8 Maintenance 9 Troubleshooting 10 Appendix 11 Basic Network Settings Basic Network Settings are required in order to use the following functions of the machine. ˔ Printing or sending a fax from a computer Before making basic network settings, confirm that the following procedures are performed. It is recommended that the network administrator perform the following procedures. 1. Network Cable Connection (See "Software Settings with Computer," in the Starter Guide.) Connect the machine to your network using the network cables. 2. Preparation for Protocol Settings (See "Software Settings with Computer," in the Starter Guide.) Specify the machine's IP address so that the machine and the network computer can communicate before making protocol settings. Any of the following can be used to specify the settings. - Machine's operation panel (Additional Functions menu) - NetSpot Device Installer (Canon utility software included in the User Software CD) Back Previous Next TOP ˙ IP Address Setting By default, the IP address is assigned to the machine automatically by the DHCP server. To confirm the assigned IP address, "Software Settings with Computer," in the Starter Guide. If the IP address is not assigned automatically, or you want to specify the IP address manually, follow the procedure below to specify the IP address. This machine also supports automatic IP addresses using BOOTP and RARP protocols. If you use these protocols, select in step 6 of the following procedures, then specify the or settings. 1. Press [Additional Functions]. 2. Press [ ] or [ ] to select , then press [OK]. 3. Press [ ] or [ ] to select , then press [OK]. Table of Contents Index 6-4
-
 1
1 -
2
-
3
-
4
-
5
-
6
-
7
-
8
-
9
-
10
-
11
-
12
-
13
-
14
-
15
-
16
-
17
-
18
-
19
-
20
-
21
-
22
-
23
-
24
-
25
-
26
-
27
-
28
-
29
-
30
-
31
-
32
-
33
-
34
-
35
-
36
-
37
-
38
-
39
-
40
-
41
-
42
-
43
-
44
-
45
-
46
-
47
-
48
-
49
-
50
-
51
-
52
-
53
-
54
-
55
-
56
-
57
-
58
-
59
-
60
-
61
-
62
-
63
-
64
-
65
-
66
-
67
-
68
-
69
-
70
-
71
-
72
-
73
-
74
-
75
-
76
-
77
-
78
-
79
-
80
-
81
-
82
-
83
-
84
-
85
-
86
-
87
-
88
-
89
-
90
-
91
-
92
-
93
-
94
-
95
-
96
-
97
-
98
-
99
-
100
-
101
-
102
-
103
-
104
-
105
-
106
-
107
-
108
-
 109
109 -
 110
110 -
 111
111 -
 112
112 -
 113
113 -
 114
114 -
 115
115 -
 116
116 -
 117
117 -
 118
118 -
 119
119 -
120
-
121
-
122
-
123
-
124
-
125
-
126
-
127
-
128
-
129
-
130
-
131
-
132
-
133
-
134
-
135
-
136
-
137
-
138
-
139
-
140
-
141
-
142
-
143
-
144
-
145
-
146
-
147
-
148
-
149
-
150
-
151
-
152
-
153
-
154
-
155
-
156
-
157
-
158
-
159
-
160
-
161
-
162
-
163
-
164
-
165
-
166
-
167
-
168
-
169
-
170
-
171
-
172
-
173
-
174
-
175
-
176
-
177
-
178
-
179
-
180
-
181
-
182
-
183
-
184
-
185
-
186
-
187
-
188
-
189
-
190
-
191
-
192
-
193
-
194
-
195
-
196
-
197
-
198
-
199
-
200
-
201
-
202
-
203
-
204
-
205
-
206
-
207
-
208
-
209
-
210
-
211
-
212
-
213
-
214
-
215
-
216
-
217
-
218
-
219
-
220
-
221
-
222
-
223
-
224
-
225
-
226
-
227
-
228
-
229
-
230
-
231
-
232
-
233
-
234
-
235
-
236
-
237
-
238
-
239
-
240
-
241
-
242
-
243
-
244
-
245
-
246
-
247
-
248
-
249
-
250
-
251
-
252
-
253
-
254
-
255
-
256
-
257
-
258
-
259
-
260
-
261
-
262
-
263
-
264
-
265
-
266
-
267
-
268
-
269
-
270
-
271
-
272
-
273
-
274
-
275
-
276
-
277
-
278
-
279
-
280
-
281
-
282
-
283
-
284
-
285
-
286
-
287
-
288
-
289
-
290
-
291
-
292
 |
 |