HP Z200 HP Z200 SFF Workstation Maintenance and Service Guide - Page 107
Using the Small Form Factor Computer in a Tower Orientation
 |
View all HP Z200 manuals
Add to My Manuals
Save this manual to your list of manuals |
Page 107 highlights
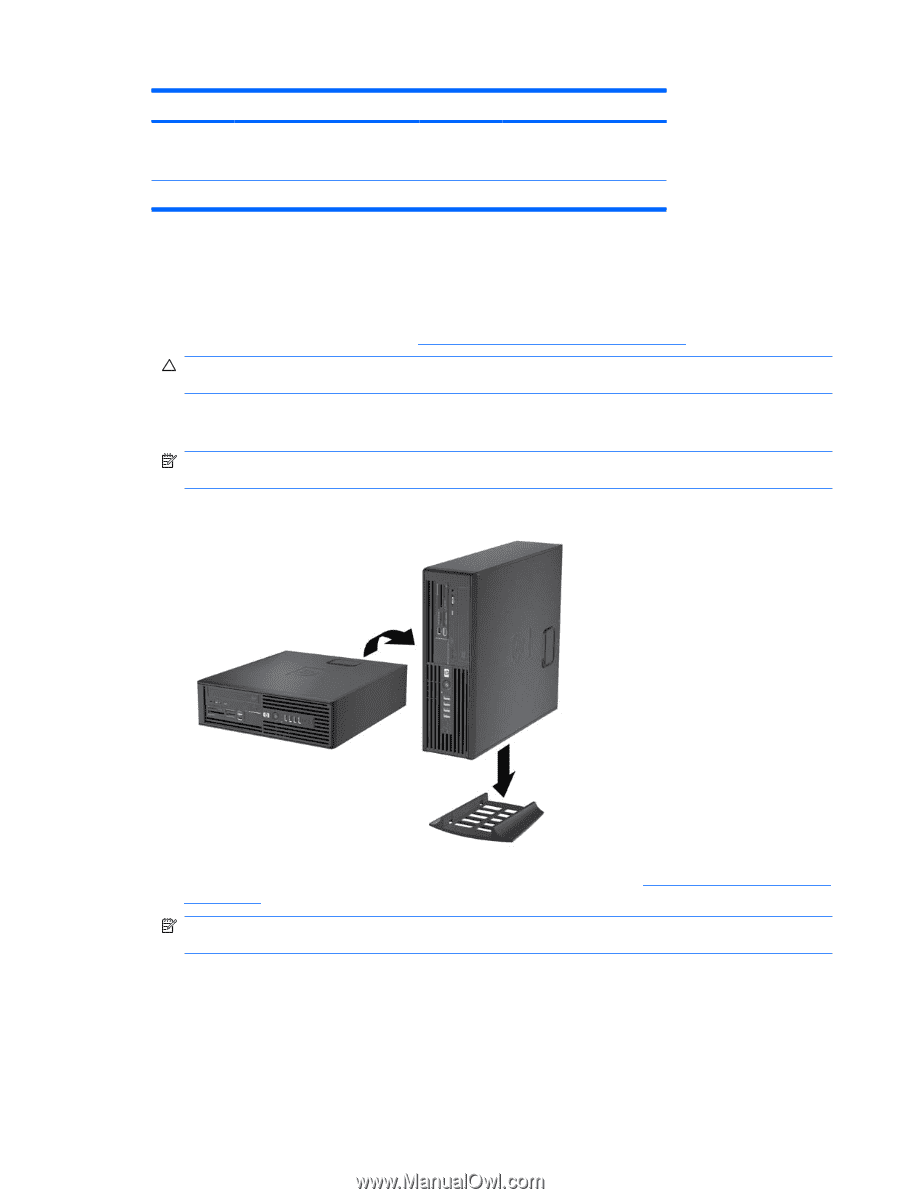
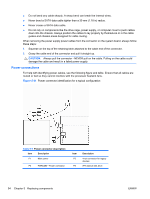
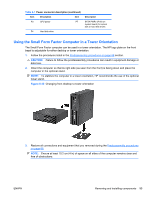
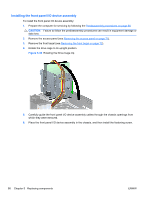
Table 5-7 Power connector description (continued) Item Description Item P3 CPU power P7 P4 Hard disk drive Description SATA PWR1 (P160 on system board) for optical disk or hard disk drives Using the Small Form Factor Computer in a Tower Orientation The Small Form Factor computer can be used in a tower orientation. The HP logo plate on the front bezel is adjustable for either desktop or tower orientation. 1. Follow the procedures listed in the Predisassembly procedures on page 68 section. CAUTION: Failure to follow the predisassembly procedures can result in equipment damage or data loss. 2. Orient the computer so that its right side (as seen from the front) is facing down and place the computer in the optional stand. NOTE: To stabilize the computer in a tower orientation, HP recommends the use of the optional tower stand. Figure 5-32 Changing from desktop to tower orientation 3. Restore all connections and equipment that you removed during the Predisassembly procedures on page 68. NOTE: Ensure at least 10.2 cm (4 in) of space on all sides of the computer remains clear and free of obstructions. ENWW Removing and installing components 95
-
 1
1 -
2
-
3
-
4
-
5
-
6
-
7
-
8
-
9
-
10
-
11
-
12
-
13
-
14
-
15
-
16
-
17
-
18
-
19
-
20
-
21
-
22
-
23
-
24
-
25
-
26
-
27
-
28
-
29
-
30
-
31
-
32
-
33
-
34
-
35
-
36
-
37
-
38
-
39
-
40
-
41
-
42
-
43
-
44
-
45
-
46
-
47
-
48
-
49
-
50
-
51
-
52
-
53
-
54
-
55
-
56
-
57
-
58
-
59
-
60
-
61
-
62
-
63
-
64
-
65
-
66
-
67
-
68
-
69
-
70
-
71
-
72
-
73
-
74
-
75
-
76
-
77
-
78
-
79
-
80
-
81
-
82
-
83
-
84
-
85
-
86
-
87
-
88
-
89
-
90
-
91
-
92
-
93
-
94
-
95
-
96
-
97
-
98
-
99
-
100
-
101
-
 102
102 -
 103
103 -
 104
104 -
 105
105 -
 106
106 -
 107
107 -
 108
108 -
 109
109 -
 110
110 -
 111
111 -
 112
112 -
113
-
114
-
115
-
116
-
117
-
118
-
119
-
120
-
121
-
122
-
123
-
124
-
125
-
126
-
127
-
128
-
129
-
130
-
131
-
132
-
133
-
134
-
135
-
136
-
137
-
138
-
139
-
140
-
141
-
142
-
143
-
144
-
145
-
146
-
147
-
148
-
149
-
150
-
151
-
152
-
153
-
154
-
155
-
156
-
157
-
158
-
159
-
160
-
161
-
162
-
163
-
164
-
165
-
166
-
167
-
168
-
169
-
170
-
171
-
172
-
173
-
174
-
175
-
176
-
177
-
178
-
179
-
180
-
181
-
182
-
183
-
184
-
185
-
186
-
187
-
188
-
189
-
190
-
191
-
192
-
193
-
194
-
195
-
196
-
197
-
198
-
199
 |
 |