HP Z200 HP Z200 SFF Workstation Maintenance and Service Guide - Page 99
Installing a hard drive or media card reader into the drive cage, CAUTION
 |
View all HP Z200 manuals
Add to My Manuals
Save this manual to your list of manuals |
Page 99 highlights
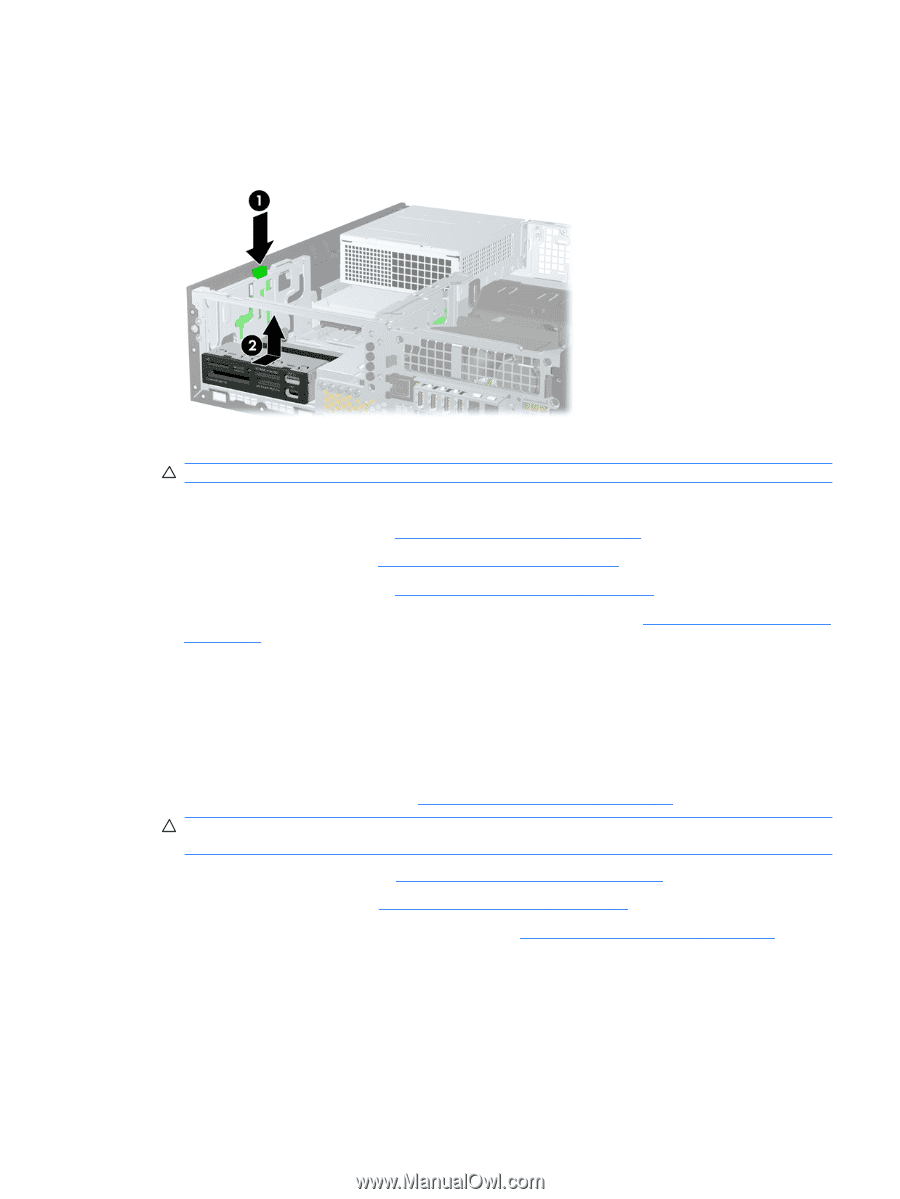
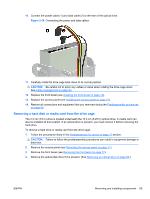
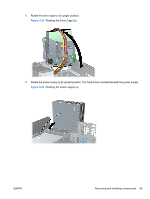
6. Press down on the green drive retainer button located on the left side of the drive to disengage the drive from the drive cage (1). While pressing the drive retainer button, slide the drive back until it stops, then lift it up and out of the drive cage (2). Figure 5-21 Removing a drive from the drive cage (media card reader shown) 7. Rotate the drive cage back down to its normal position. CAUTION: Be careful not to pinch any cables or wires when rotating the drive cage down. 8. If you are replacing the drive, transfer the four guide screws from the old drive to the new one. 9. Replace the optical drive. (See Installing an optical drive on page 82.) 10. Replace the front bezel (see Installing the front bezel on page 72). 11. Replace the access panel (see Installing the access panel on page 71). 12. Restore all connections and equipment that you removed during the Predisassembly procedures on page 68. Installing a hard drive or media card reader into the drive cage The 3.3 cm (3.5 in) drive is located underneath the 13.3 cm (5.25 in) optical drive. A media card reader can also be installed at this location. If an optical drive is present, you must remove it to install the hard drive. To install a hard drive or media card in the drive cage: 1. Follow the procedures listed in the Predisassembly for drives on page 77 section. CAUTION: Failure to follow the predisassembly procedures can result in equipment damage or data loss. 2. Remove the access panel (see Removing the access panel on page 71). 3. Remove the front bezel (see Removing the front bezel on page 72). 4. Remove the optical disk drive if it is present. (See Removing an optical drive on page 80.) ENWW Removing and installing components 87
-
 1
1 -
2
-
3
-
4
-
5
-
6
-
7
-
8
-
9
-
10
-
11
-
12
-
13
-
14
-
15
-
16
-
17
-
18
-
19
-
20
-
21
-
22
-
23
-
24
-
25
-
26
-
27
-
28
-
29
-
30
-
31
-
32
-
33
-
34
-
35
-
36
-
37
-
38
-
39
-
40
-
41
-
42
-
43
-
44
-
45
-
46
-
47
-
48
-
49
-
50
-
51
-
52
-
53
-
54
-
55
-
56
-
57
-
58
-
59
-
60
-
61
-
62
-
63
-
64
-
65
-
66
-
67
-
68
-
69
-
70
-
71
-
72
-
73
-
74
-
75
-
76
-
77
-
78
-
79
-
80
-
81
-
82
-
83
-
84
-
85
-
86
-
87
-
88
-
89
-
90
-
91
-
92
-
93
-
 94
94 -
 95
95 -
 96
96 -
 97
97 -
 98
98 -
 99
99 -
 100
100 -
 101
101 -
 102
102 -
 103
103 -
 104
104 -
105
-
106
-
107
-
108
-
109
-
110
-
111
-
112
-
113
-
114
-
115
-
116
-
117
-
118
-
119
-
120
-
121
-
122
-
123
-
124
-
125
-
126
-
127
-
128
-
129
-
130
-
131
-
132
-
133
-
134
-
135
-
136
-
137
-
138
-
139
-
140
-
141
-
142
-
143
-
144
-
145
-
146
-
147
-
148
-
149
-
150
-
151
-
152
-
153
-
154
-
155
-
156
-
157
-
158
-
159
-
160
-
161
-
162
-
163
-
164
-
165
-
166
-
167
-
168
-
169
-
170
-
171
-
172
-
173
-
174
-
175
-
176
-
177
-
178
-
179
-
180
-
181
-
182
-
183
-
184
-
185
-
186
-
187
-
188
-
189
-
190
-
191
-
192
-
193
-
194
-
195
-
196
-
197
-
198
-
199
 |
 |