HP Z200 HP Z200 SFF Workstation Maintenance and Service Guide - Page 131
Installing the CPU heatsink, CAUTION
 |
View all HP Z200 manuals
Add to My Manuals
Save this manual to your list of manuals |
Page 131 highlights
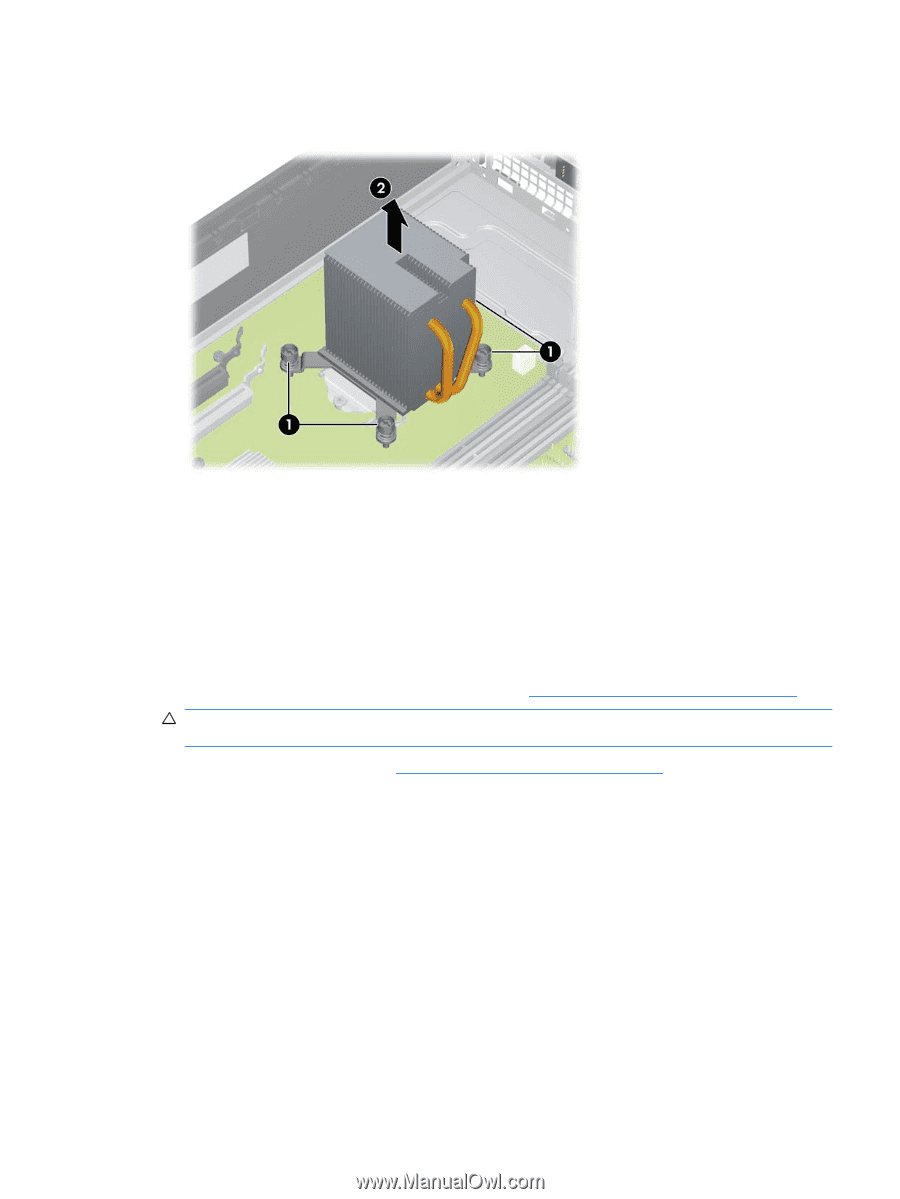
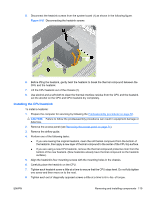
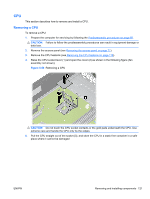
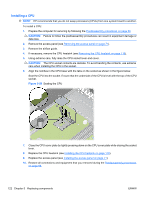
5. Disconnect the heatsink screws from the system board (1) as shown in the following figure. Figure 5-57 Disconnecting the heatsink screws 6. Before lifting the heatsink, gently twist the heatsink to break the thermal compound between the CPU and the heatsink. 7. Lift the CPU heatsink out of the chassis (2). 8. Use alcohol and a soft cloth to clean the thermal interface residue from the CPU and the heatsink. Let the alcohol on the CPU and CPU heatsink dry completely. Installing the CPU heatsink To install a heatsink: 1. Prepare the computer for servicing by following the Predisassembly procedures on page 68. CAUTION: Failure to follow the predisassembly procedures can result in equipment damage or data loss. 2. Remove the access panel (see Removing the access panel on page 71). 3. Remove the airflow guide. 4. Perform one of the following tasks: ● If you are reusing the original heatsink, clean the old themal compound from the bottom of the heatsink, then apply a new layer of thermal compound to the center of the CPU top surface. ● If you are using a new CPU heatsink, remove the thermal compound protective liner from the bottom of the new heatsink. (New heatsinks already have thermal compound on the heatsink surface.) 5. Align the heatsink's four mounting screws with the mounting holes in the chassis. 6. Carefully place the heatsink on the CPU. 7. Tighten each heatsink screw a little at a time to ensure that the CPU stays level. Do not fully tighten one screw and then move on to the next. 8. Tighten each set of diagonally opposed screws a little at a time to 6 in.-lbs. of torque. ENWW Removing and installing components 119
-
 1
1 -
2
-
3
-
4
-
5
-
6
-
7
-
8
-
9
-
10
-
11
-
12
-
13
-
14
-
15
-
16
-
17
-
18
-
19
-
20
-
21
-
22
-
23
-
24
-
25
-
26
-
27
-
28
-
29
-
30
-
31
-
32
-
33
-
34
-
35
-
36
-
37
-
38
-
39
-
40
-
41
-
42
-
43
-
44
-
45
-
46
-
47
-
48
-
49
-
50
-
51
-
52
-
53
-
54
-
55
-
56
-
57
-
58
-
59
-
60
-
61
-
62
-
63
-
64
-
65
-
66
-
67
-
68
-
69
-
70
-
71
-
72
-
73
-
74
-
75
-
76
-
77
-
78
-
79
-
80
-
81
-
82
-
83
-
84
-
85
-
86
-
87
-
88
-
89
-
90
-
91
-
92
-
93
-
94
-
95
-
96
-
97
-
98
-
99
-
100
-
101
-
102
-
103
-
104
-
105
-
106
-
107
-
108
-
109
-
110
-
111
-
112
-
113
-
114
-
115
-
116
-
117
-
118
-
119
-
120
-
121
-
122
-
123
-
124
-
125
-
 126
126 -
 127
127 -
 128
128 -
 129
129 -
 130
130 -
 131
131 -
 132
132 -
 133
133 -
 134
134 -
 135
135 -
 136
136 -
137
-
138
-
139
-
140
-
141
-
142
-
143
-
144
-
145
-
146
-
147
-
148
-
149
-
150
-
151
-
152
-
153
-
154
-
155
-
156
-
157
-
158
-
159
-
160
-
161
-
162
-
163
-
164
-
165
-
166
-
167
-
168
-
169
-
170
-
171
-
172
-
173
-
174
-
175
-
176
-
177
-
178
-
179
-
180
-
181
-
182
-
183
-
184
-
185
-
186
-
187
-
188
-
189
-
190
-
191
-
192
-
193
-
194
-
195
-
196
-
197
-
198
-
199
 |
 |