Yamaha MO6 Owner's Manual - Page 213
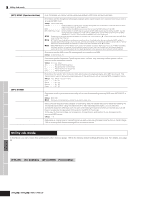
Press the [F1] CONFIG button, then [SF2] FORMAT
 |
UPC - 086792837703
View all Yamaha MO6 manuals
Add to My Manuals
Save this manual to your list of manuals |
Page 213 highlights
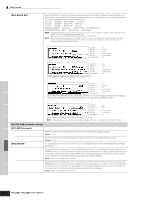
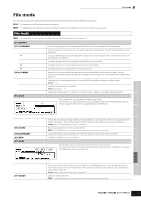
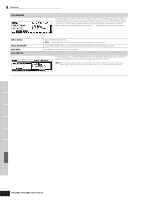
Voice mode Performance mode ■ Supplementary information File ( )/Folder ( ) selection The instructions and illustrations below show you how to select files and folders on the USB storage devices within the File mode. Move the cursor to the desired file or folder by using the [INC/YES] and [DEC/NO] buttons or the data dial. To return to the next highest level, press the [EXIT] button. To call up the contents of a desired folder, highlight the folder and press the [ENTER] button. Move the cursor to the desired file or folder by using the [INC/YES] and [DEC/NO] buttons or the data dial. Playing back the SMF (Standard MIDI file) from the USB storage device In the File mode, you can play back directly the SMF file saved in the USB storage device. This is useful if you are playing a keyboard with the accompaniment of SMF file. 1 Connect the USB storage including the SMF file device to this instrument. 2 Enter the Song mode or Pattern mode, then select the Song or Pattern which has desired the Mixing settings. 3 Press the [FILE] button to enter the File mode. 4 Press the [F3] LOAD button. 5 Move the cursor to the TYPE, then select the Song or Pattern. 6 Select the SMF file. 7 Press the [F6] F (Play) button to play back the SMF file with the Mixing settings of currently selected Song or Pattern. Press the J (Stop) button again to stop the playback. 8 Try playing the keyboard along with the accompaniment of the SMF file. To select the Track for keyboard performance, turn the [TRACK SELECT] button on, then press the any of Number [1] - [16] buttons. Also, you can control the sound of each Part by using the Knobs and Control sliders as the Song mode and Pattern mode. Supplementary infomation Formatting a USB storage device Before you can use a new USB storage device with this synthesizer, you will need to format it. Follow the instructions below. CAUTION If data is already saved on the USB storage device, be careful not to format it. If you format the USB storage device, all the previously recorded data will be deleted. 1 Connect a USB storage device to the USB TO DEVICE connector. If necessary, insert the proper media into the slot of the USB storage device. 2 Press the [FILE] mode to enter the File mode. 3 Press the [F1] CONFIG button, then [SF2] FORMAT button to call up the Format display. 4 Select the slot and partition to be formatted. Specify the slot number at the right top of the display as necessary and select the partition to be formatted at the Type value location in the second line of the display. 5 Set the Volume Label. Move the cursor to the "Volume Label" and input a Volume Label. For instructions on naming, refer to page 38 in the Basic Operation section. 6 Press the [ENTER] button. (The display prompts you for confirmation.) Press the [DEC/NO] button to cancel the Format operation. 7 Press the [INC/YES] button to execute the Format. After formatting has been completed, a "Completed" message appears and operation returns to the original display. CAUTION While formatting is in process, make sure to follow these precautions: • Never remove or eject the media from the device (USB storage). • Never unplug or disconnect any of the devices. • Never turn off the power of the MO or the relevant devices. n By executing the Format operation in the File mode, the USB storage device will be formatted to MS-DOS or Windows format. The formatted USB storage device may not be compatible with other devices such as a Macintosh computer or digital camera. Song mode Pattern mode Reference Mixing Voice mode Utility mode Master mode File mode Owner's Manual 213
-
 1
1 -
2
-
3
-
4
-
5
-
6
-
7
-
8
-
9
-
10
-
11
-
12
-
13
-
14
-
15
-
16
-
17
-
18
-
19
-
20
-
21
-
22
-
23
-
24
-
25
-
26
-
27
-
28
-
29
-
30
-
31
-
32
-
33
-
34
-
35
-
36
-
37
-
38
-
39
-
40
-
41
-
42
-
43
-
44
-
45
-
46
-
47
-
48
-
49
-
50
-
51
-
52
-
53
-
54
-
55
-
56
-
57
-
58
-
59
-
60
-
61
-
62
-
63
-
64
-
65
-
66
-
67
-
68
-
69
-
70
-
71
-
72
-
73
-
74
-
75
-
76
-
77
-
78
-
79
-
80
-
81
-
82
-
83
-
84
-
85
-
86
-
87
-
88
-
89
-
90
-
91
-
92
-
93
-
94
-
95
-
96
-
97
-
98
-
99
-
100
-
101
-
102
-
103
-
104
-
105
-
106
-
107
-
108
-
109
-
110
-
111
-
112
-
113
-
114
-
115
-
116
-
117
-
118
-
119
-
120
-
121
-
122
-
123
-
124
-
125
-
126
-
127
-
128
-
129
-
130
-
131
-
132
-
133
-
134
-
135
-
136
-
137
-
138
-
139
-
140
-
141
-
142
-
143
-
144
-
145
-
146
-
147
-
148
-
149
-
150
-
151
-
152
-
153
-
154
-
155
-
156
-
157
-
158
-
159
-
160
-
161
-
162
-
163
-
164
-
165
-
166
-
167
-
168
-
169
-
170
-
171
-
172
-
173
-
174
-
175
-
176
-
177
-
178
-
179
-
180
-
181
-
182
-
183
-
184
-
185
-
186
-
187
-
188
-
189
-
190
-
191
-
192
-
193
-
194
-
195
-
196
-
197
-
198
-
199
-
200
-
201
-
202
-
203
-
204
-
205
-
206
-
207
-
 208
208 -
 209
209 -
 210
210 -
 211
211 -
 212
212 -
 213
213 -
 214
214 -
 215
215 -
 216
216 -
 217
217 -
 218
218 -
219
-
220
-
221
-
222
-
223
-
224
-
225
-
226
-
227
-
228
-
229
-
230
-
231
-
232
-
233
-
234
-
235
-
236
-
237
-
238
-
239
-
240
 |
 |
