Compaq Armada E700 Compaq Armada E700 Series Reference Guide - Page 122
Solving Drive Problems
 |
View all Compaq Armada E700 manuals
Add to My Manuals
Save this manual to your list of manuals |
Page 122 highlights
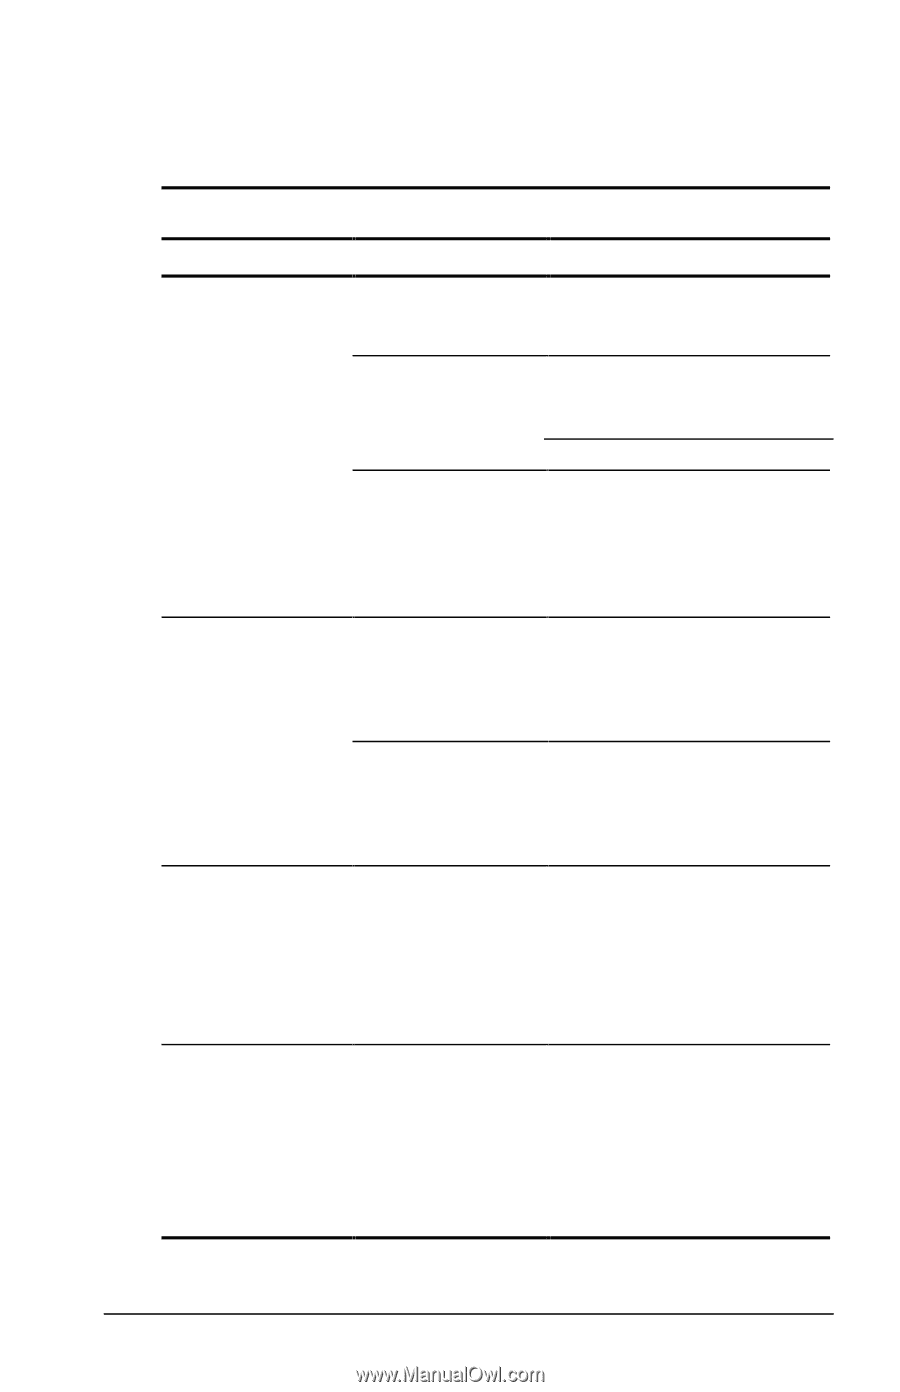
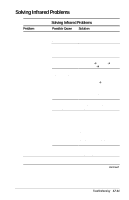
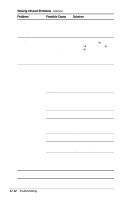
Solving Drive Problems Solving Hard Drive Problems Solving Hard Drive Problems Problem Possible Cause Solution System does not recognize a hard drive. System cannot start up from a hard drive. Hard drive cannot be accessed. DriveLock settings cannot be accessed in Computer Setup. The drive is not seated properly. Remove, then reinsert the drive. The drive is damaged. To verify that the problem is with the drive, try using the hard drive in another bay. Run scandisk on the drive. The drive was inserted while the system was on or in Suspend (Standby) or in Hibernation. Shut down the computer before inserting or removing a hard drive. The drive does not Start up from the hard drive have the necessary supplied with the computer or files to start up and install startup software on the operate the additional drive. computer. The system can access, but not start from, a hard drive in an expansion base. Insert the drive into the computer. DriveLock protection is enabled on the drive. Enter DriveLock User or Master password or remove DriveLock protection from the drive. For instructions, refer to "Using DriveLock" in Chapter 7. The DriveLock settings are accessible only when you enter Computer Setup by turning on (not restarting) the computer. Turn the computer off, then on, then press F10 when the blinking cursor appears upper-right on the screen. Troubleshooting 17-7
-
 1
1 -
2
-
3
-
4
-
5
-
6
-
7
-
8
-
9
-
10
-
11
-
12
-
13
-
14
-
15
-
16
-
17
-
18
-
19
-
20
-
21
-
22
-
23
-
24
-
25
-
26
-
27
-
28
-
29
-
30
-
31
-
32
-
33
-
34
-
35
-
36
-
37
-
38
-
39
-
40
-
41
-
42
-
43
-
44
-
45
-
46
-
47
-
48
-
49
-
50
-
51
-
52
-
53
-
54
-
55
-
56
-
57
-
58
-
59
-
60
-
61
-
62
-
63
-
64
-
65
-
66
-
67
-
68
-
69
-
70
-
71
-
72
-
73
-
74
-
75
-
76
-
77
-
78
-
79
-
80
-
81
-
82
-
83
-
84
-
85
-
86
-
87
-
88
-
89
-
90
-
91
-
92
-
93
-
94
-
95
-
96
-
97
-
98
-
99
-
100
-
101
-
102
-
103
-
104
-
105
-
106
-
107
-
108
-
109
-
110
-
111
-
112
-
113
-
114
-
115
-
116
-
 117
117 -
 118
118 -
 119
119 -
 120
120 -
 121
121 -
 122
122 -
 123
123 -
 124
124 -
 125
125 -
 126
126 -
 127
127 -
128
-
129
-
130
-
131
-
132
-
133
-
134
-
135
-
136
-
137
-
138
-
139
-
140
-
141
-
142
-
143
-
144
-
145
-
146
-
147
-
148
-
149
-
150
-
151
-
152
-
153
-
154
-
155
-
156
-
157
-
158
-
159
-
160
-
161
-
162
-
163
-
164
-
165
-
166
-
167
-
168
-
169
-
170
-
171
-
172
-
173
-
174
-
175
 |
 |