HP 1200 HP LaserJet 1200 Series - User Guide - Page 84
Starting a scan
 |
UPC - 637836445790
View all HP 1200 manuals
Add to My Manuals
Save this manual to your list of manuals |
Page 84 highlights
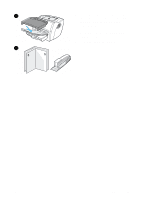
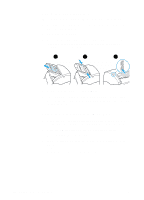
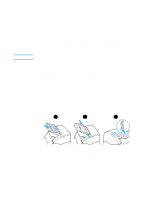
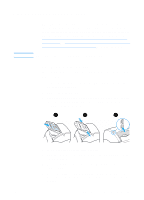
Starting a scan Note You can start the scanning process from the HP LaserJet Director. The HP LaserJet Director is not supported for Microsoft Windows 95. If you are using Windows 95, see Acquiring an image. Windows 1 Place the item into the copier/scanner media input tray. 2 Press the Scan button on the copier/scanner, or open the HP LaserJet Director by clicking the HP LaserJet Director icon located on the taskbar and clicking Scan. 3 Select a scan destination. 4 Choose to scan in color by selecting the Scan in color check box. The product automatically scans in black and white if you do not select this check box. 5 Select whether you want to scan all pages at once or scan page-by-page. If you choose to scan all pages at once, click Scan. The edits are saved and the rest of the pages are scanned automatically. The entire document is sent to the destination. If you send a scanned document to a file, a printer, or an e-mail application, a secondary dialog box appears and prompts you for additional information. -OrIf you choose to scan page-by-page, see Working with scanned items. Mac OS 1 Place the item into the copier/scanner media input tray. 2 Press the Scan button on the copier/scanner, or double-click the alias for the HP LaserJet Director that appears on the desktop and clicking Scan on the HP LaserJet Director. The HP LaserJet Scan Control Viewer dialog box appears. 3 Select a scan destination. 4 To select the color scanning option, click Scan in color. (The product automatically scans the selection in black and white if this option is not selected.) 82 Chapter 6 Scanning tasks EN
-
 1
1 -
2
-
3
-
4
-
5
-
6
-
7
-
8
-
9
-
10
-
11
-
12
-
13
-
14
-
15
-
16
-
17
-
18
-
19
-
20
-
21
-
22
-
23
-
24
-
25
-
26
-
27
-
28
-
29
-
30
-
31
-
32
-
33
-
34
-
35
-
36
-
37
-
38
-
39
-
40
-
41
-
42
-
43
-
44
-
45
-
46
-
47
-
48
-
49
-
50
-
51
-
52
-
53
-
54
-
55
-
56
-
57
-
58
-
59
-
60
-
61
-
62
-
63
-
64
-
65
-
66
-
67
-
68
-
69
-
70
-
71
-
72
-
73
-
74
-
75
-
76
-
77
-
78
-
 79
79 -
 80
80 -
 81
81 -
 82
82 -
 83
83 -
 84
84 -
 85
85 -
 86
86 -
 87
87 -
 88
88 -
 89
89 -
90
-
91
-
92
-
93
-
94
-
95
-
96
-
97
-
98
-
99
-
100
-
101
-
102
-
103
-
104
-
105
-
106
-
107
-
108
-
109
-
110
-
111
-
112
-
113
-
114
-
115
-
116
-
117
-
118
-
119
-
120
-
121
-
122
-
123
-
124
-
125
-
126
-
127
-
128
-
129
-
130
-
131
-
132
-
133
-
134
-
135
-
136
-
137
-
138
-
139
-
140
-
141
-
142
-
143
-
144
-
145
-
146
-
147
-
148
-
149
-
150
-
151
-
152
-
153
-
154
-
155
-
156
-
157
-
158
-
159
-
160
-
161
-
162
-
163
-
164
-
165
-
166
-
167
-
168
-
169
-
170
-
171
-
172
-
173
-
174
-
175
-
176
-
177
-
178
-
179
-
180
-
181
-
182
-
183
-
184
-
185
-
186
-
187
-
188
-
189
-
190
-
191
-
192
-
193
-
194
-
195
-
196
-
197
-
198
-
199
-
200
-
201
-
202
-
203
-
204
-
205
-
206
-
207
-
208
-
209
-
210
-
211
-
212
-
213
-
214
-
215
-
216
-
217
-
218
-
219
-
220
-
221
-
222
-
223
-
224
-
225
-
226
-
227
-
228
-
229
-
230
-
231
-
232
-
233
-
234
-
235
-
236
-
237
-
238
-
239
-
240
-
241
-
242
-
243
-
244
-
245
-
246
-
247
-
248
-
249
-
250
-
251
-
252
-
253
-
254
-
255
-
256
-
257
-
258
-
259
-
260
-
261
-
262
-
263
-
264
-
265
-
266
-
267
-
268
-
269
-
270
-
271
-
272
-
273
-
274
-
275
-
276
-
277
-
278
 |
 |