HP StorageWorks MSA 2/8 HP StorageWorks Fabric OS Procedures V3.1.x/4.1.x User - Page 14
Connecting and Configuring the Switch, Physically Connecting to the Switch, Power on the Switch - san switch manuals
 |
View all HP StorageWorks MSA 2/8 manuals
Add to My Manuals
Save this manual to your list of manuals |
Page 14 highlights
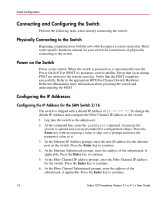
Initial Configuration Connecting and Configuring the Switch Perform the following tasks when initially connecting the switch: Physically Connecting to the Switch Beginning communication with the new switch requires a serial connection. Refer to the specific hardware manual for your switch for instructions on physically connecting to the switch. Power on the Switch Power on the switch. When the switch is powered on, it automatically runs the Power On Self Test (POST) to guarantee switch stability. Errors that occur during POST are written to the system error log. Verify that the POST completes successfully. Refer to the appropriate HP Fibre Channel Switch Hardware Reference Manualsfor more information about powering the switch and understanding the POST. Configuring the IP Addresses Configuring the IP Address for the SAN Switch 2/16 The switch is shipped with a default IP address of 10.77.77.77. To change the default IP Address and configure the Fibre Channel IP address of the switch: 1. Log into the switch as the admin user. 2. At the command line, enter the ipaddrset command. An interactive session is opened and you are prompted for configuration values. Press the Enter key without entering a value to skip over a prompt and leave the parameter value as is. 3. At the Ethernet IP Address prompt, enter the new IP address for the ethernet port on the switch. Press the Enter key to continue. 4. At the Ethernet Subnetmask prompt, enter the address of the subnetmask, if applicable. Press the Enter key to continue. 5. At the Fibre Channel IP address prompt, enter the Fibre Channel IP address for the switch. Press the Enter key to continue. 6. At the Fibre Channel Subnetmask prompt, enter the address of the subnetmask, if applicable. Press the Enter key to continue. 14 Fabric OS Procedures Version 3.1.x/4.1.x User Guide
-
 1
1 -
2
-
3
-
4
-
5
-
6
-
7
-
8
-
 9
9 -
 10
10 -
 11
11 -
 12
12 -
 13
13 -
 14
14 -
 15
15 -
 16
16 -
 17
17 -
 18
18 -
 19
19 -
20
-
21
-
22
-
23
-
24
-
25
-
26
-
27
-
28
-
29
-
30
-
31
-
32
-
33
-
34
-
35
-
36
-
37
-
38
-
39
-
40
-
41
-
42
-
43
-
44
-
45
-
46
-
47
-
48
-
49
-
50
-
51
-
52
-
53
-
54
-
55
-
56
-
57
-
58
-
59
-
60
-
61
-
62
-
63
-
64
-
65
-
66
-
67
-
68
-
69
-
70
-
71
-
72
-
73
-
74
-
75
-
76
-
77
-
78
-
79
-
80
-
81
-
82
-
83
-
84
-
85
-
86
-
87
-
88
-
89
-
90
-
91
-
92
-
93
-
94
-
95
-
96
-
97
-
98
-
99
-
100
-
101
-
102
-
103
-
104
-
105
-
106
-
107
-
108
-
109
-
110
-
111
-
112
-
113
-
114
-
115
-
116
-
117
-
118
-
119
-
120
-
121
-
122
-
123
-
124
-
125
-
126
-
127
-
128
-
129
-
130
-
131
-
132
-
133
-
134
-
135
-
136
-
137
-
138
-
139
-
140
-
141
-
142
-
143
-
144
-
145
-
146
-
147
-
148
-
149
-
150
-
151
-
152
-
153
-
154
-
155
-
156
-
157
-
158
-
159
-
160
-
161
-
162
-
163
-
164
-
165
-
166
-
167
-
168
-
169
-
170
-
171
-
172
-
173
-
174
-
175
-
176
-
177
-
178
-
179
-
180
-
181
-
182
-
183
-
184
-
185
-
186
-
187
-
188
-
189
-
190
-
191
-
192
-
193
-
194
-
195
-
196
-
197
-
198
-
199
-
200
-
201
-
202
-
203
-
204
-
205
-
206
-
207
-
208
-
209
-
210
-
211
-
212
-
213
-
214
-
215
-
216
-
217
-
218
-
219
-
220
-
221
-
222
-
223
-
224
-
225
-
226
-
227
-
228
-
229
-
230
-
231
-
232
-
233
-
234
-
235
-
236
-
237
-
238
-
239
-
240
-
241
-
242
-
243
-
244
-
245
-
246
-
247
-
248
-
249
-
250
-
251
-
252
-
253
-
254
-
255
-
256
-
257
-
258
-
259
-
260
-
261
-
262
-
263
-
264
-
265
-
266
-
267
-
268
-
269
-
270
 |
 |
