LG LS670 Owner's Manual - Page 72
Synchronizing Your Corporate Account, Corporate email account. See Corporate Email
 |
View all LG LS670 manuals
Add to My Manuals
Save this manual to your list of manuals |
Page 72 highlights
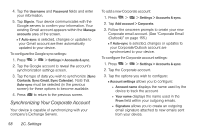
4. Tap the Username and Password fields and enter your information. 5. Tap Sign in. Your device communicates with the Google servers to confirm your information. Your existing Gmail account appears within the Manage accounts area of the screen. Ⅲ If Auto-sync is selected, changes or updates to your Gmail account are then automatically updated to your device. To configure the Google sync settings: 1. Press > > Settings > Accounts & sync. 2. Tap the Google account to reveal the account's synchronization settings screen. 3. Tap the type of data you wish to synchronize (Sync Contacts, Sync Gmail, Sync Calendar). Note that Auto-sync must be selected (in the previous screen) for these options to become available. 4. Press to return to the previous screen. Synchronizing Your Corporate Account Your device is capable of synchronizing with your company's Exchange Servers. To add a new Corporate account: 1. Press > > Settings > Accounts & sync. 2. Tap Add account > Corporate. 3. Follow the onscreen prompts to create your new Corporate email account. (See "Corporate Email (Outlook)" on page 155.) Ⅲ If Auto-sync is selected, changes or updates to your Corporate/Outlook account are synchronized to your device. To configure the Corporate account settings: 1. Press > > Settings > Accounts & sync. 2. Tap the Corporate account. 3. Tap the options you wish to configure: Ⅲ Account settings allows you to configure: ● Account name displays the name used by the device to track the account. ● Your name displays the name used in the From field within your outgoing emails. ● Signature allows you to create an outgoing email signature attached to new emails sent from your device. 58 2C. Settings
-
 1
1 -
2
-
3
-
4
-
5
-
6
-
7
-
8
-
9
-
10
-
11
-
12
-
13
-
14
-
15
-
16
-
17
-
18
-
19
-
20
-
21
-
22
-
23
-
24
-
25
-
26
-
27
-
28
-
29
-
30
-
31
-
32
-
33
-
34
-
35
-
36
-
37
-
38
-
39
-
40
-
41
-
42
-
43
-
44
-
45
-
46
-
47
-
48
-
49
-
50
-
51
-
52
-
53
-
54
-
55
-
56
-
57
-
58
-
59
-
60
-
61
-
62
-
63
-
64
-
65
-
66
-
 67
67 -
 68
68 -
 69
69 -
 70
70 -
 71
71 -
 72
72 -
 73
73 -
 74
74 -
 75
75 -
 76
76 -
 77
77 -
78
-
79
-
80
-
81
-
82
-
83
-
84
-
85
-
86
-
87
-
88
-
89
-
90
-
91
-
92
-
93
-
94
-
95
-
96
-
97
-
98
-
99
-
100
-
101
-
102
-
103
-
104
-
105
-
106
-
107
-
108
-
109
-
110
-
111
-
112
-
113
-
114
-
115
-
116
-
117
-
118
-
119
-
120
-
121
-
122
-
123
-
124
-
125
-
126
-
127
-
128
-
129
-
130
-
131
-
132
-
133
-
134
-
135
-
136
-
137
-
138
-
139
-
140
-
141
-
142
-
143
-
144
-
145
-
146
-
147
-
148
-
149
-
150
-
151
-
152
-
153
-
154
-
155
-
156
-
157
-
158
-
159
-
160
-
161
-
162
-
163
-
164
-
165
-
166
-
167
-
168
-
169
-
170
-
171
-
172
-
173
-
174
-
175
-
176
-
177
-
178
-
179
-
180
-
181
-
182
-
183
-
184
-
185
-
186
-
187
-
188
-
189
-
190
-
191
-
192
-
193
-
194
-
195
-
196
-
197
-
198
-
199
-
200
-
201
-
202
-
203
-
204
-
205
-
206
-
207
-
208
-
209
-
210
-
211
-
212
-
213
 |
 |