Lexmark X925 Lexmark Document Distributor - Page 116
Creating forms printers, E-Forms, Forms Printers, Notes, Email, Print, Action Settings
 |
View all Lexmark X925 manuals
Add to My Manuals
Save this manual to your list of manuals |
Page 116 highlights
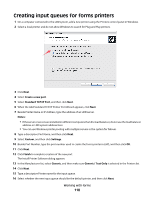
Creating forms printers A forms printer is a virtual printer in the LDD system to which print queues on other computers can send data files for forms merge. The forms printer can print, e-mail, or save the results, or run a script using the input data. 1 If necessary, install e-forms virtual printer licenses on the LDD system as shown in "Adding an MFP, e-forms virtual printer, or software client license to an existing server" on page 63. 2 Click the E-Forms tab. 3 Select Forms Printers from the list. 4 Click Add. 5 Type the Port number to be used by print queues that connect to the forms printer. Notes: • Each forms printer in the system must have a unique port number, and you must use a port number that is not used by any other network traffic. For a list of ports used by LDD, see "Ports used by the LDD system" on page 20, and for a list of commonly used ports, see the Internet Assigned Numbers Authority (IANA) list of port numbers at http://www.iana.org/assignments/port-numbers. Do not use well-known ports (port numbers 0-1023), and make sure that other applications that are using the network are not using the selected port number. • Communication using the selected port number must be allowed on the network. 6 Type a description of the forms printer, and then click Next. 7 Configure an action to perform when a user submits a job: Notes: • If you do not want to perform an action, select None beside Action. • Actions can also be included in forms merge scripts. If an action is both selected in LMC and specified by a script, it is executed twice. For information about actions included in a forms merge script, contact the person who developed the solution that includes the script. a Select an Action to perform: • Email-Sends an e-mail message with the output attached • File-Saves the output to a file • Print-Prints the output to a physical printer b Click Action Settings. c Configure the action settings. If you selected: • Email: 1 Enter the addresses, subject, and message text for the e-mail message. 2 Click OK. Note: To use the Email action, the Email service must be correctly configured on the Services tab. • File: 1 Type the File Path and Name to use for each saved file. 2 To add a timestamp to the file name of each saved file, select Append Time Stamp. 3 If Append Time Stamp is not selected, you must select Overwrite to overwrite the existing file each time. If neither option is selected, only the first output file will be saved. Working with forms 116
-
 1
1 -
2
-
3
-
4
-
5
-
6
-
7
-
8
-
9
-
10
-
11
-
12
-
13
-
14
-
15
-
16
-
17
-
18
-
19
-
20
-
21
-
22
-
23
-
24
-
25
-
26
-
27
-
28
-
29
-
30
-
31
-
32
-
33
-
34
-
35
-
36
-
37
-
38
-
39
-
40
-
41
-
42
-
43
-
44
-
45
-
46
-
47
-
48
-
49
-
50
-
51
-
52
-
53
-
54
-
55
-
56
-
57
-
58
-
59
-
60
-
61
-
62
-
63
-
64
-
65
-
66
-
67
-
68
-
69
-
70
-
71
-
72
-
73
-
74
-
75
-
76
-
77
-
78
-
79
-
80
-
81
-
82
-
83
-
84
-
85
-
86
-
87
-
88
-
89
-
90
-
91
-
92
-
93
-
94
-
95
-
96
-
97
-
98
-
99
-
100
-
101
-
102
-
103
-
104
-
105
-
106
-
107
-
108
-
109
-
110
-
 111
111 -
 112
112 -
 113
113 -
 114
114 -
 115
115 -
 116
116 -
 117
117 -
 118
118 -
 119
119 -
 120
120 -
 121
121 -
122
-
123
-
124
-
125
-
126
-
127
-
128
-
129
-
130
-
131
-
132
-
133
-
134
-
135
-
136
-
137
-
138
-
139
-
140
-
141
 |
 |
