Samsung SPH-M920 User Manual (user Manual) (ver.f6) (English) - Page 182
Adding Additional Internet Email Accounts, Configuring Email Settings
 |
View all Samsung SPH-M920 manuals
Add to My Manuals
Save this manual to your list of manuals |
Page 182 highlights
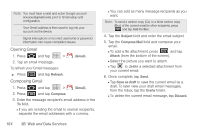
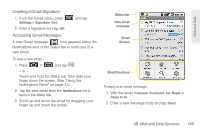
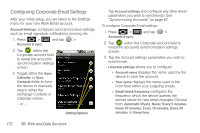
9. Once complete, tap Send. Ⅲ Tap > Save as draft to save the current email as a draft. To later view your draft email messages, from the Inbox, tap the Drafts folder. Ⅲ To delete the current email message, tap Discard. Adding Additional Internet Email Accounts 1. Press and tap > . 2. Press account. and tap Accounts > > Add 3. Follow the onscreen prompts to add additional Internet-based email accounts such as Yahoo!, Gmail, AOL, or other POP or IMAP accounts. Configuring Email Settings 1. Press and tap > . 2. Tap the email account from the Accounts area of the Email screen. 3. Tap Inbox to open the contents of your inbox. 4. Press and tap Account settings. (See "Synchronizing Your Corporate Account" on page 68.) 5. This menu provides both field information and settings: Ⅲ General settings allows you to configure: ● Account name displays the name used by the device to track the account. ● Your name displays the name used in the From field within your outgoing emails. ● Email check frequency configures the frequency which the device queries the remote server for new email changes. ● Default account assigns this account as the default used when sending out new emails. Ⅲ Notification settings allows you to configure: ● Email notifications enables the device to display a status bar icon when new emails have been received. ● Select ringtone assigns an audible ringtone when a new or upcoming event is pending. ● Vibrate assigns a vibration when a new or upcoming event is pending. 168 3B. Web and Data Services
-
 1
1 -
2
-
3
-
4
-
5
-
6
-
7
-
8
-
9
-
10
-
11
-
12
-
13
-
14
-
15
-
16
-
17
-
18
-
19
-
20
-
21
-
22
-
23
-
24
-
25
-
26
-
27
-
28
-
29
-
30
-
31
-
32
-
33
-
34
-
35
-
36
-
37
-
38
-
39
-
40
-
41
-
42
-
43
-
44
-
45
-
46
-
47
-
48
-
49
-
50
-
51
-
52
-
53
-
54
-
55
-
56
-
57
-
58
-
59
-
60
-
61
-
62
-
63
-
64
-
65
-
66
-
67
-
68
-
69
-
70
-
71
-
72
-
73
-
74
-
75
-
76
-
77
-
78
-
79
-
80
-
81
-
82
-
83
-
84
-
85
-
86
-
87
-
88
-
89
-
90
-
91
-
92
-
93
-
94
-
95
-
96
-
97
-
98
-
99
-
100
-
101
-
102
-
103
-
104
-
105
-
106
-
107
-
108
-
109
-
110
-
111
-
112
-
113
-
114
-
115
-
116
-
117
-
118
-
119
-
120
-
121
-
122
-
123
-
124
-
125
-
126
-
127
-
128
-
129
-
130
-
131
-
132
-
133
-
134
-
135
-
136
-
137
-
138
-
139
-
140
-
141
-
142
-
143
-
144
-
145
-
146
-
147
-
148
-
149
-
150
-
151
-
152
-
153
-
154
-
155
-
156
-
157
-
158
-
159
-
160
-
161
-
162
-
163
-
164
-
165
-
166
-
167
-
168
-
169
-
170
-
171
-
172
-
173
-
174
-
175
-
176
-
 177
177 -
 178
178 -
 179
179 -
 180
180 -
 181
181 -
 182
182 -
 183
183 -
 184
184 -
 185
185 -
 186
186 -
 187
187 -
188
-
189
-
190
-
191
-
192
-
193
-
194
-
195
-
196
-
197
-
198
-
199
-
200
-
201
-
202
-
203
-
204
-
205
-
206
-
207
-
208
-
209
-
210
-
211
-
212
-
213
-
214
-
215
-
216
-
217
-
218
-
219
-
220
-
221
-
222
-
223
-
224
-
225
-
226
-
227
-
228
-
229
-
230
-
231
-
232
-
233
-
234
-
235
-
236
-
237
-
238
 |
 |