Samsung SPH-M920 User Manual (user Manual) (ver.f6) (English) - Page 202
Registering TeleNav GPS Navigator, Unblocking Unknown Installations
 |
View all Samsung SPH-M920 manuals
Add to My Manuals
Save this manual to your list of manuals |
Page 202 highlights
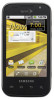
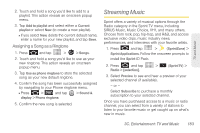
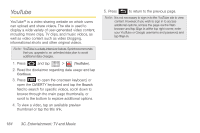
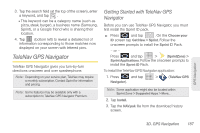
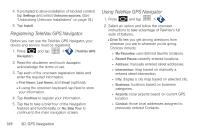
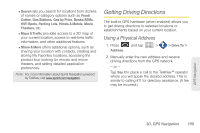
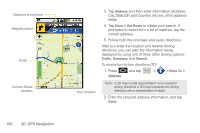
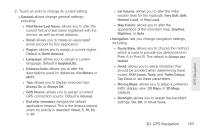
4. If prompted to allow installation of blocked content, tap Settings and select Unknown sources. (See "Unblocking Unknown Installations" on page 74.) 5. Tap Install. Registering TeleNav GPS Navigator Before you can use the TeleNav GPS Navigator, your device and service must be registered. 1. Press and tap Navigator). > (TeleNav GPS 2. Read the disclaimer and touch Accept to acknowledge the terms of use. 3. Tap each of the onscreen registration fields and enter the required information. Ⅲ First Name, Last Name, and Email (optional). Ⅲ If using the onscreen keyboard, tap Next to store your information. 4. Tap Continue to register your information. 5. Tap Yes to take a brief tour of the Navigation features and functionality, or No, Skip Tour to continue to the main navigation screen. Using TeleNav GPS Navigator 1. Press and tap > . 2. Select an option and follow the onscreen instructions to take advantage of TeleNav's full suite of features. Ⅲ Drive To lets you get driving directions from wherever you are to wherever you're going. Choices include: ● My Favorites: user-defined favorite locations. ● Recent Places: recently entered locations. ● Address: manually entered street addresses. ● Intersection: map based on manually a entered street intersection. ● City: display a city map based on selected city. ● Business: locations based on business categories. ● Airports: local airports based on current GPS location. ● Contact: those local addresses assigned to previously entered Contacts. 188 3D. GPS Navigation
-
 1
1 -
2
-
3
-
4
-
5
-
6
-
7
-
8
-
9
-
10
-
11
-
12
-
13
-
14
-
15
-
16
-
17
-
18
-
19
-
20
-
21
-
22
-
23
-
24
-
25
-
26
-
27
-
28
-
29
-
30
-
31
-
32
-
33
-
34
-
35
-
36
-
37
-
38
-
39
-
40
-
41
-
42
-
43
-
44
-
45
-
46
-
47
-
48
-
49
-
50
-
51
-
52
-
53
-
54
-
55
-
56
-
57
-
58
-
59
-
60
-
61
-
62
-
63
-
64
-
65
-
66
-
67
-
68
-
69
-
70
-
71
-
72
-
73
-
74
-
75
-
76
-
77
-
78
-
79
-
80
-
81
-
82
-
83
-
84
-
85
-
86
-
87
-
88
-
89
-
90
-
91
-
92
-
93
-
94
-
95
-
96
-
97
-
98
-
99
-
100
-
101
-
102
-
103
-
104
-
105
-
106
-
107
-
108
-
109
-
110
-
111
-
112
-
113
-
114
-
115
-
116
-
117
-
118
-
119
-
120
-
121
-
122
-
123
-
124
-
125
-
126
-
127
-
128
-
129
-
130
-
131
-
132
-
133
-
134
-
135
-
136
-
137
-
138
-
139
-
140
-
141
-
142
-
143
-
144
-
145
-
146
-
147
-
148
-
149
-
150
-
151
-
152
-
153
-
154
-
155
-
156
-
157
-
158
-
159
-
160
-
161
-
162
-
163
-
164
-
165
-
166
-
167
-
168
-
169
-
170
-
171
-
172
-
173
-
174
-
175
-
176
-
177
-
178
-
179
-
180
-
181
-
182
-
183
-
184
-
185
-
186
-
187
-
188
-
189
-
190
-
191
-
192
-
193
-
194
-
195
-
196
-
 197
197 -
 198
198 -
 199
199 -
 200
200 -
 201
201 -
 202
202 -
 203
203 -
 204
204 -
 205
205 -
 206
206 -
 207
207 -
208
-
209
-
210
-
211
-
212
-
213
-
214
-
215
-
216
-
217
-
218
-
219
-
220
-
221
-
222
-
223
-
224
-
225
-
226
-
227
-
228
-
229
-
230
-
231
-
232
-
233
-
234
-
235
-
236
-
237
-
238
 |
 |