Asus SCSI 320-0 Global Array Manager Transition Tool - Page 102
Installing an LSI Logic SNMP Agent, SNMP Installation Prerequisites
 |
View all Asus SCSI 320-0 manuals
Add to My Manuals
Save this manual to your list of manuals |
Page 102 highlights
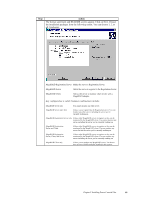
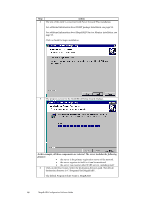
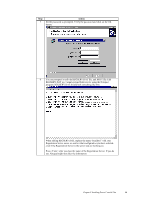
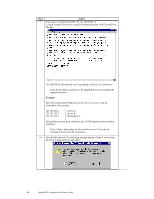
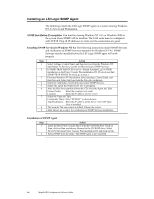
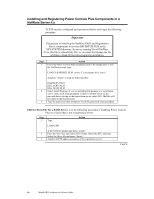
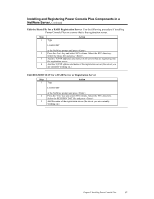
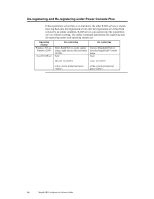
Installing an LSI Logic SNMP Agent The following installs the LSI Logic SNMP agent on a system running Windows NT 4.x Server and Workstation. SNMP Installation Prerequisites You must be running Windows NT v4.x or Windows 2000 in the system where SNMP will be installed. The LAN cards must be configured with TCP/IP. Ping all IP addresses to make sure the connections are good. Installing SNMP Services in Windows NT 4.x The following instructions install SNMP Services and verification of SNMP Services operation for Windows NT 4.x. SNMP Services must be installed before the LSI Logic SNMP agent will work properly. Step Action 1 Select Settings, Control Panel, and then Services from the Windows NT Start button. In Services, use the scrollbar to locate SNMP Services. 2 If SNMP TRAP SERVICES is set to -Started Automatic, go to SNMP installation on the Power Console Plus installation CD. If you do not find SNMP TRAP SERVICES listed, go to step 3. 3 From the Windows NT Start button, Select Settings, Control Panel, and then Network. Select Services from the Network workgroup. 4 Select the Add button. Scroll down and select SNMP Services. 5 Select OK. Insert the Windows NT CD as prompted. 6 After the files have transferred from the CD, select the Agent tab. Edit: Contact Name: Enter the computer user name Location: Enter the IP address of your server 7 Select the Traps tab. Edit: Community Name: Enter "PUBLIC" or desired name. Trap Destination: Enter the IP address of the Server where HP Open View is installed. 8 The Security Tab can remain at default. Reboot the system. 9 After reboot, go to step 1 for verification of SNMP Services installation. Installation of SNMP Agent Step Action 1 Insert the first Power Console Plus CD in the CD-ROM drive. Click on Start, click on Run, and choose Browse for the CD-ROM drive. Select SETUP.EXE from Power Console Plus installation CD and click on OK. 2 Select SNMP from the menu. The SNMP agent is now installed. 94 MegaRAID Configuration Software Guide
-
 1
1 -
2
-
3
-
4
-
5
-
6
-
7
-
8
-
9
-
10
-
11
-
12
-
13
-
14
-
15
-
16
-
17
-
18
-
19
-
20
-
21
-
22
-
23
-
24
-
25
-
26
-
27
-
28
-
29
-
30
-
31
-
32
-
33
-
34
-
35
-
36
-
37
-
38
-
39
-
40
-
41
-
42
-
43
-
44
-
45
-
46
-
47
-
48
-
49
-
50
-
51
-
52
-
53
-
54
-
55
-
56
-
57
-
58
-
59
-
60
-
61
-
62
-
63
-
64
-
65
-
66
-
67
-
68
-
69
-
70
-
71
-
72
-
73
-
74
-
75
-
76
-
77
-
78
-
79
-
80
-
81
-
82
-
83
-
84
-
85
-
86
-
87
-
88
-
89
-
90
-
91
-
92
-
93
-
94
-
95
-
96
-
 97
97 -
 98
98 -
 99
99 -
 100
100 -
 101
101 -
 102
102 -
 103
103 -
 104
104 -
 105
105 -
 106
106 -
 107
107 -
108
-
109
-
110
-
111
-
112
-
113
-
114
-
115
-
116
-
117
-
118
-
119
-
120
-
121
-
122
-
123
-
124
-
125
-
126
-
127
-
128
-
129
-
130
-
131
-
132
-
133
-
134
-
135
-
136
-
137
-
138
-
139
-
140
-
141
-
142
-
143
-
144
-
145
-
146
-
147
-
148
-
149
-
150
-
151
-
152
-
153
-
154
 |
 |