Asus SCSI 320-0 Global Array Manager Transition Tool - Page 135
Custom Configuration Defining Logical Drives, Action, Spanning, Undoing an Array
 |
View all Asus SCSI 320-0 manuals
Add to My Manuals
Save this manual to your list of manuals |
Page 135 highlights
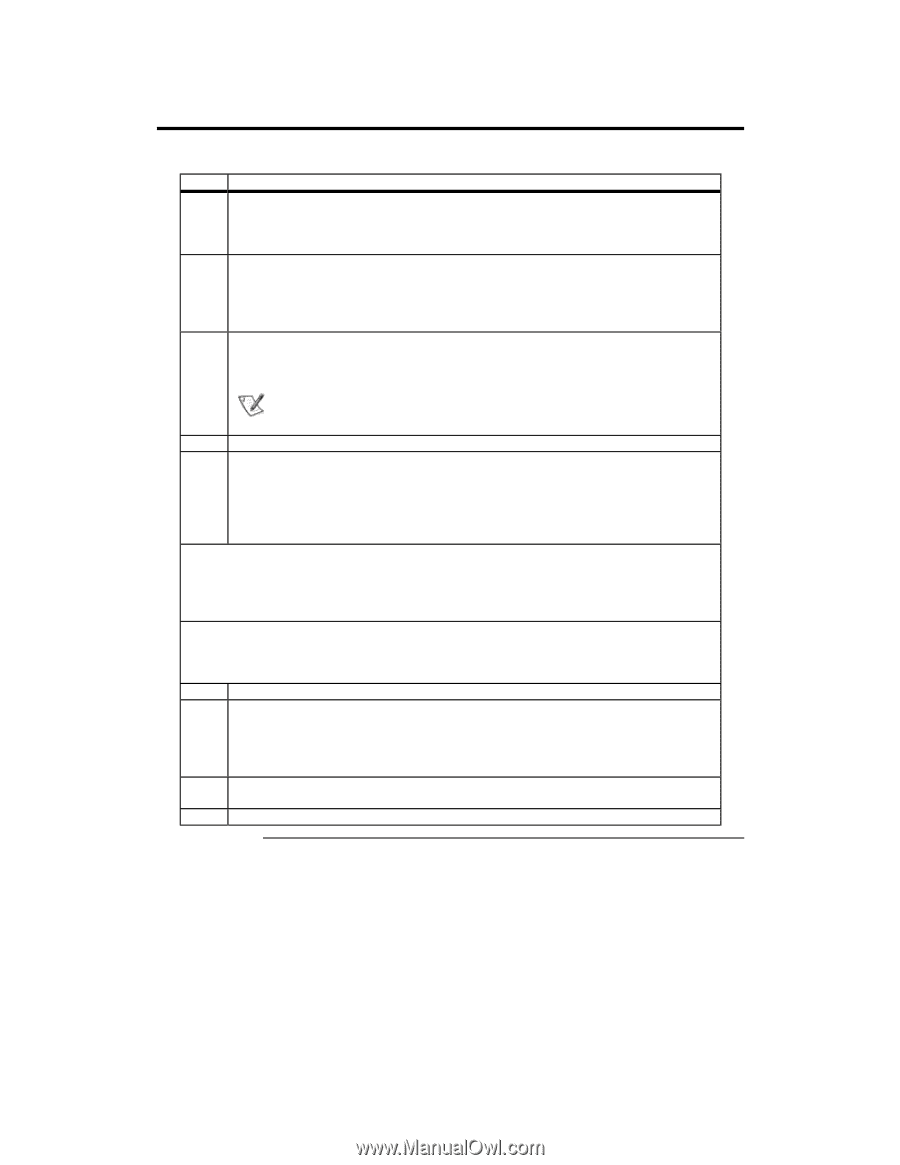
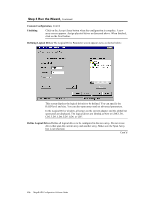
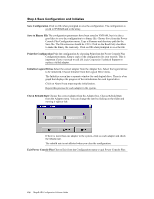
Step 3 Run the Wizard, Continued Custom Configuration Defining Logical Drives, Cont'd Step Action 1 Specify the RAID level by clicking on the RAID Level dropdown menu on the Logical Drive Parameter screen and selecting a RAID level. The Wizard will not let you configure an invalid RAID level. See the MegaRAID hardware guide for your board for information about the requirements for each RAID level. 2 Set the size either by accepting the default or by clicking in the Size box and typing a smaller size. If you specify a smaller size, there will be room in the array for additional logical drives. Creating multiple logical drives in the same array disables FlexRAID, so you cannot change RAID levels or add capacity. Do not mix redundant and nonredundant logical drives in the same array. 3 Click on the Advanced button to set the stripe size, read policy, write policy, virtual sizing, and cache policy. Click on the respective dropdown menus to display the choices for each parameter. When finished, click on the OK button. Note: If you use Power Console Plus to configure an array on a NetWare server, you cannot use Writeback as the write policy. 4 Click on Accept when the logical drive parameters are set. 5 The next logical drive appears. If space is still available in the current array, the new logical drive will appear in the array. Define any additional logical drives in the current array that will not be spanned. The Wizard will continue to create logical drives for the same array until there is no more space available in the array or until there are 40 logical drives in the array (if you have a controller that supports 40 logical drives: Enterprise 1600, Elite 1600, or Express 500.) Continue to define logical drives as described above. Spanning Click on the Span Arrays box to create a logical drive that spans across all defined arrays depending on the firmware's span depth. An array that encompasses both spanned arrays (labeled something like A1-1) appears in the Logical Devices window. The capacity in the Size box increases to reflect the spanned arrays. Undoing an Array When you are running the Configuration Wizard, you can always remove the last logical drive that was created by clicking on the Undo button. You cannot undo an array after you have finished running the Configuration Wizard. 6 When all logical drives are defined for the selected adapter, click on Next. 7 The Preview Configuration screen appears. All arrays, logical drives, and hot spares are shown for the current adapter in the Logical Devices window. All physical drives with their SCSI ID, Ready, or Spare status are shown in the Physical Devices window. Click on Finish to accept the configuration as displayed. Click on Back to return to the Logical Drive Definition screen to redefine logical drive parameters. 8 After you click on Finish, a dialog box prompts you to initialize. This option is recommended. 9 Add newly configured logical drives to the NT Disk Administrator. Chapter 7 Configuring Arrays and Logical Drives 127
-
 1
1 -
2
-
3
-
4
-
5
-
6
-
7
-
8
-
9
-
10
-
11
-
12
-
13
-
14
-
15
-
16
-
17
-
18
-
19
-
20
-
21
-
22
-
23
-
24
-
25
-
26
-
27
-
28
-
29
-
30
-
31
-
32
-
33
-
34
-
35
-
36
-
37
-
38
-
39
-
40
-
41
-
42
-
43
-
44
-
45
-
46
-
47
-
48
-
49
-
50
-
51
-
52
-
53
-
54
-
55
-
56
-
57
-
58
-
59
-
60
-
61
-
62
-
63
-
64
-
65
-
66
-
67
-
68
-
69
-
70
-
71
-
72
-
73
-
74
-
75
-
76
-
77
-
78
-
79
-
80
-
81
-
82
-
83
-
84
-
85
-
86
-
87
-
88
-
89
-
90
-
91
-
92
-
93
-
94
-
95
-
96
-
97
-
98
-
99
-
100
-
101
-
102
-
103
-
104
-
105
-
106
-
107
-
108
-
109
-
110
-
111
-
112
-
113
-
114
-
115
-
116
-
117
-
118
-
119
-
120
-
121
-
122
-
123
-
124
-
125
-
126
-
127
-
128
-
129
-
 130
130 -
 131
131 -
 132
132 -
 133
133 -
 134
134 -
 135
135 -
 136
136 -
 137
137 -
 138
138 -
 139
139 -
 140
140 -
141
-
142
-
143
-
144
-
145
-
146
-
147
-
148
-
149
-
150
-
151
-
152
-
153
-
154
 |
 |