Asus SCSI 320-0 Global Array Manager Transition Tool - Page 68
Logical Drive, Options, Description
 |
View all Asus SCSI 320-0 manuals
Add to My Manuals
Save this manual to your list of manuals |
Page 68 highlights
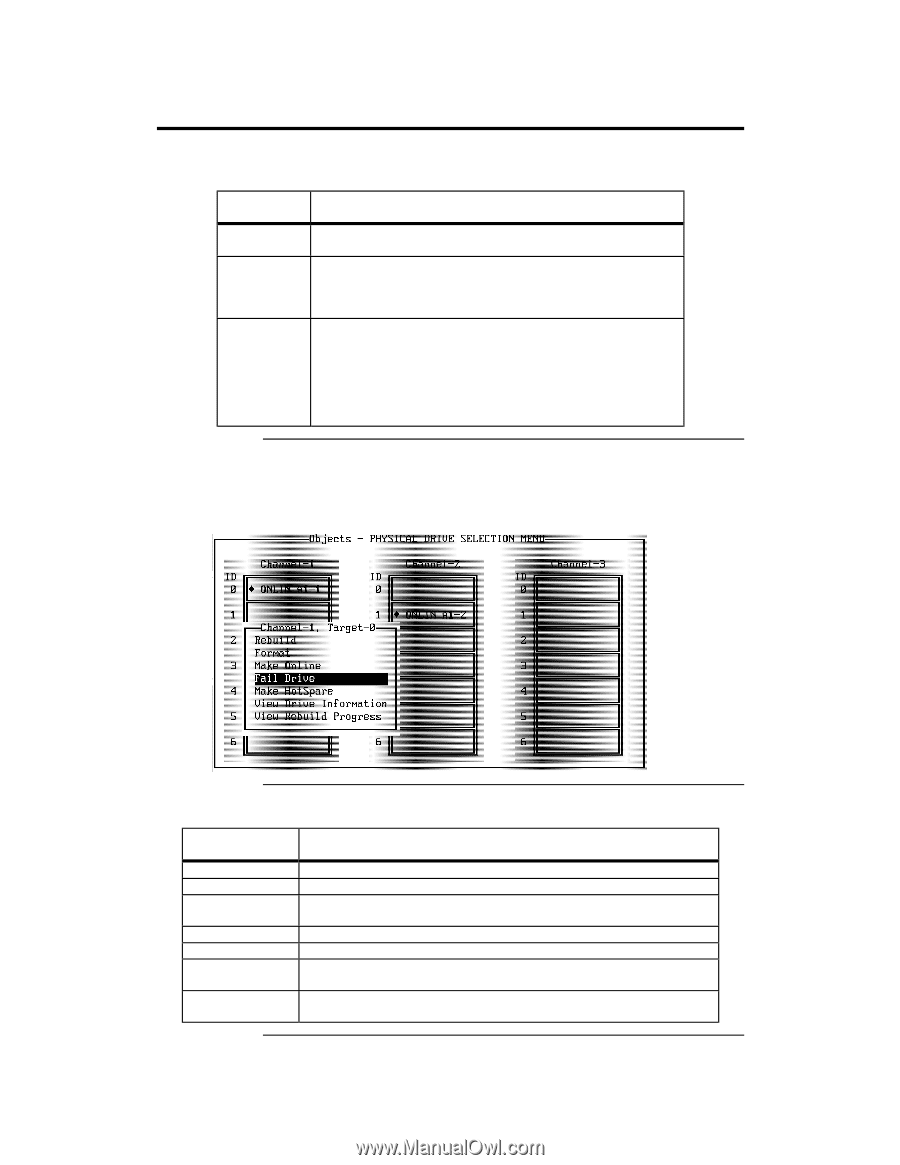
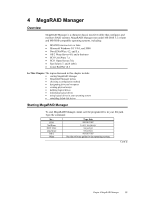
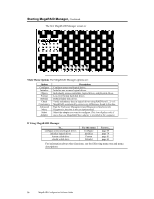
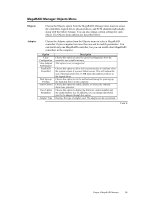
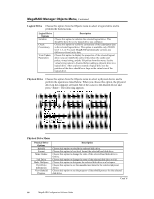
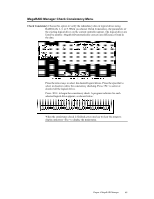
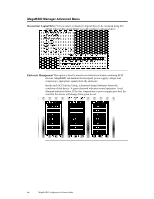
MegaRAID Manager Objects Menu, Continued Logical Drive Choose this option from the Objects menu to select a logical drive and to perform the listed actions. Logical Drive Options Initialize Check Consistency View/Update Parameters Description Choose this option to initialize the selected logical drive. This should be done for every logical drive you configure. Choose this option to verify the correctness of the redundancy data in the selected logical drive. This option is available only if RAID level 1, 3, or 5 is used. MegaRAID automatically corrects any differences found in the data. Choose this option to display the properties of the selected logical drive; you can modify the cache write policy, the cache read policy, virtual sizing, and the I/O policy from this menu. Set the virtual sizing option to Enabled before adding a physical drive to a logical drive. After you have created a logical drive set, the partition of the drive should be as large as the virtual size of the logical drive. Physical Drive Choose this option from the Objects menu to select a physical device and to perform the operations listed below. When you choose this option, the physical drives in the computer are listed. Move the cursor to the desired device and press . The following appears: Physical Drive Menu Physical Drive Options Rebuild Format Make Online Fail Drive Make HotSpare View Drive Information View Rebuild Progress Description Choose this option to rebuild the selected disk drive. Choose this option to low-level format the selected hard disk drive. Choose this option to change the state of the selected hard disk drive to Online. Choose this option to change the state of the selected disk drive to Fail. Choose this option to designate the selected disk drive as a hot spare. Choose this option to see the manufacturer data for the selected physical device. Choose this option to see the progress of the rebuild process for the selected disk drive. Cont'd 60 MegaRAID Configuration Software Guide
-
 1
1 -
2
-
3
-
4
-
5
-
6
-
7
-
8
-
9
-
10
-
11
-
12
-
13
-
14
-
15
-
16
-
17
-
18
-
19
-
20
-
21
-
22
-
23
-
24
-
25
-
26
-
27
-
28
-
29
-
30
-
31
-
32
-
33
-
34
-
35
-
36
-
37
-
38
-
39
-
40
-
41
-
42
-
43
-
44
-
45
-
46
-
47
-
48
-
49
-
50
-
51
-
52
-
53
-
54
-
55
-
56
-
57
-
58
-
59
-
60
-
61
-
62
-
 63
63 -
 64
64 -
 65
65 -
 66
66 -
 67
67 -
 68
68 -
 69
69 -
 70
70 -
 71
71 -
 72
72 -
 73
73 -
74
-
75
-
76
-
77
-
78
-
79
-
80
-
81
-
82
-
83
-
84
-
85
-
86
-
87
-
88
-
89
-
90
-
91
-
92
-
93
-
94
-
95
-
96
-
97
-
98
-
99
-
100
-
101
-
102
-
103
-
104
-
105
-
106
-
107
-
108
-
109
-
110
-
111
-
112
-
113
-
114
-
115
-
116
-
117
-
118
-
119
-
120
-
121
-
122
-
123
-
124
-
125
-
126
-
127
-
128
-
129
-
130
-
131
-
132
-
133
-
134
-
135
-
136
-
137
-
138
-
139
-
140
-
141
-
142
-
143
-
144
-
145
-
146
-
147
-
148
-
149
-
150
-
151
-
152
-
153
-
154
 |
 |